This comprehensive guide will walk you through the process of listing your Shopify products on the Shein marketplace using the Base platform. We’ll cover every step from creating a Base account to managing your live Shein offers.
Create a Base Account
If you don’t already have one, you’ll need to sign up for a Base account. This will be your central hub for managing your product listings across different platforms.
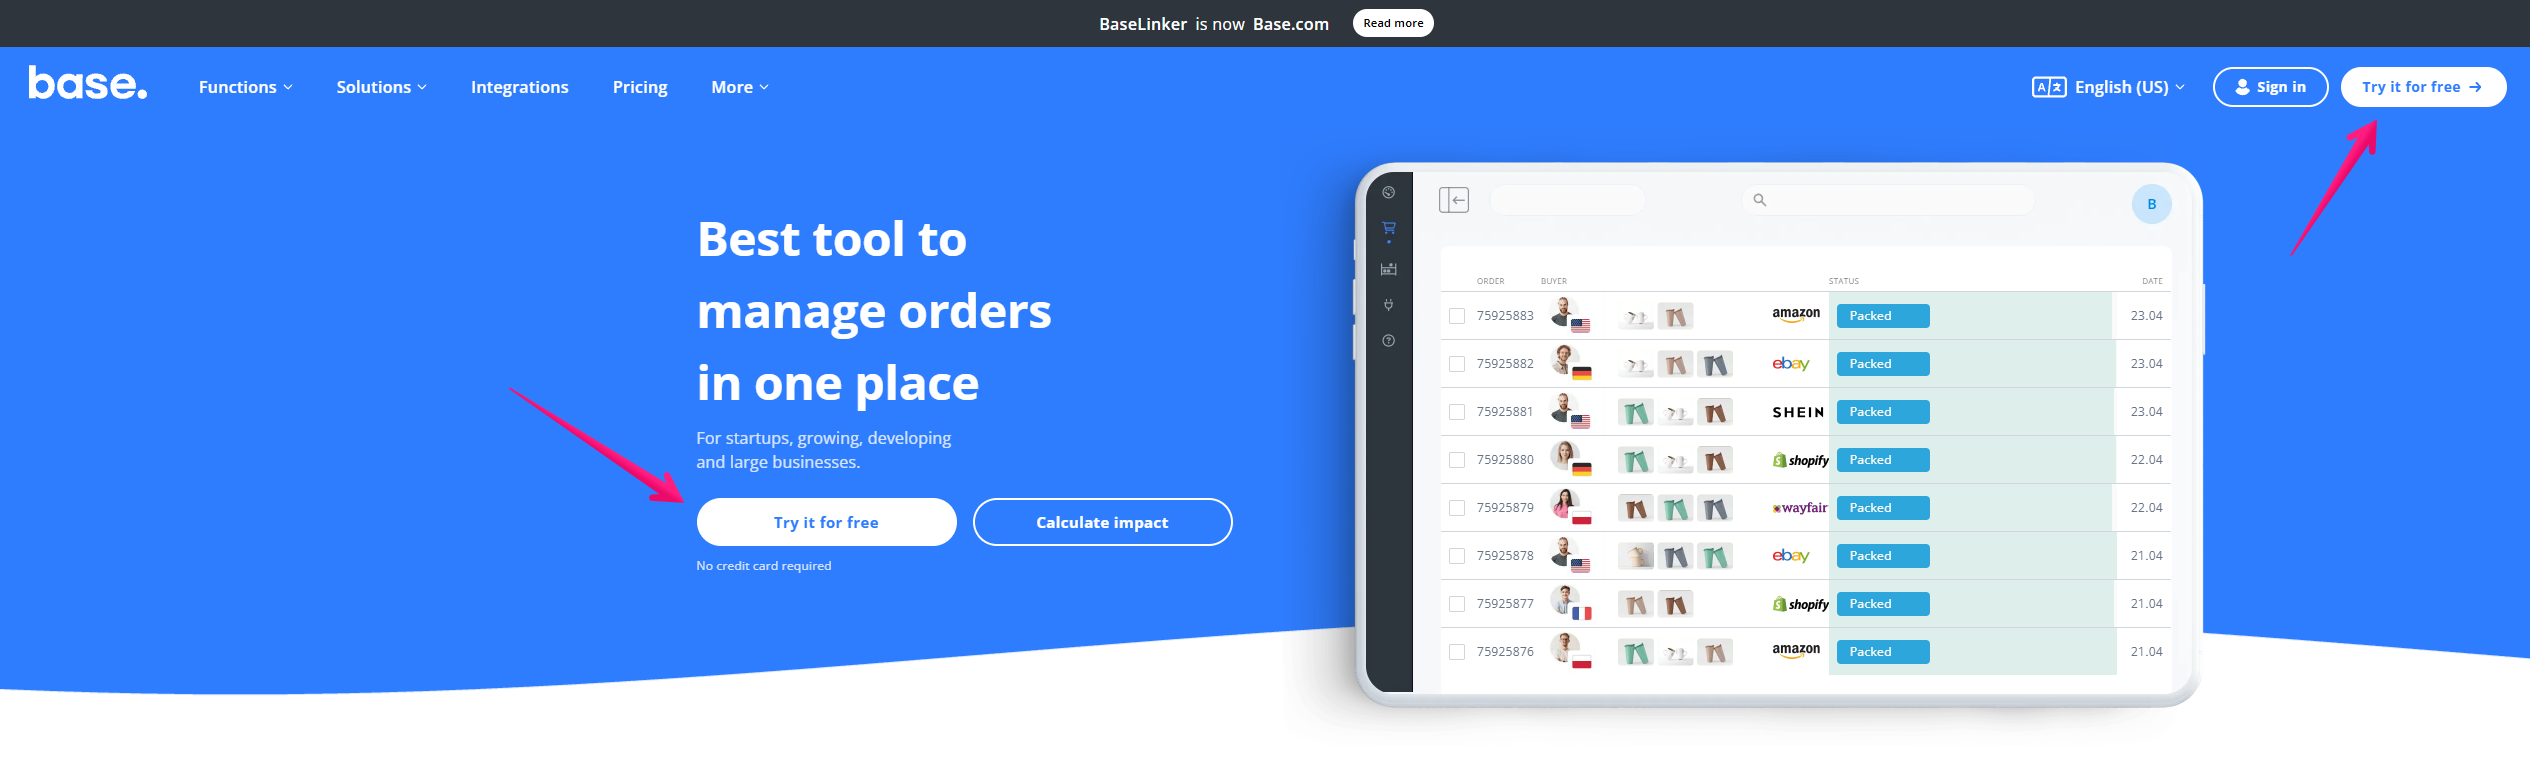
- Navigate to https://base.com/en-US/home/ and click “try it for free”
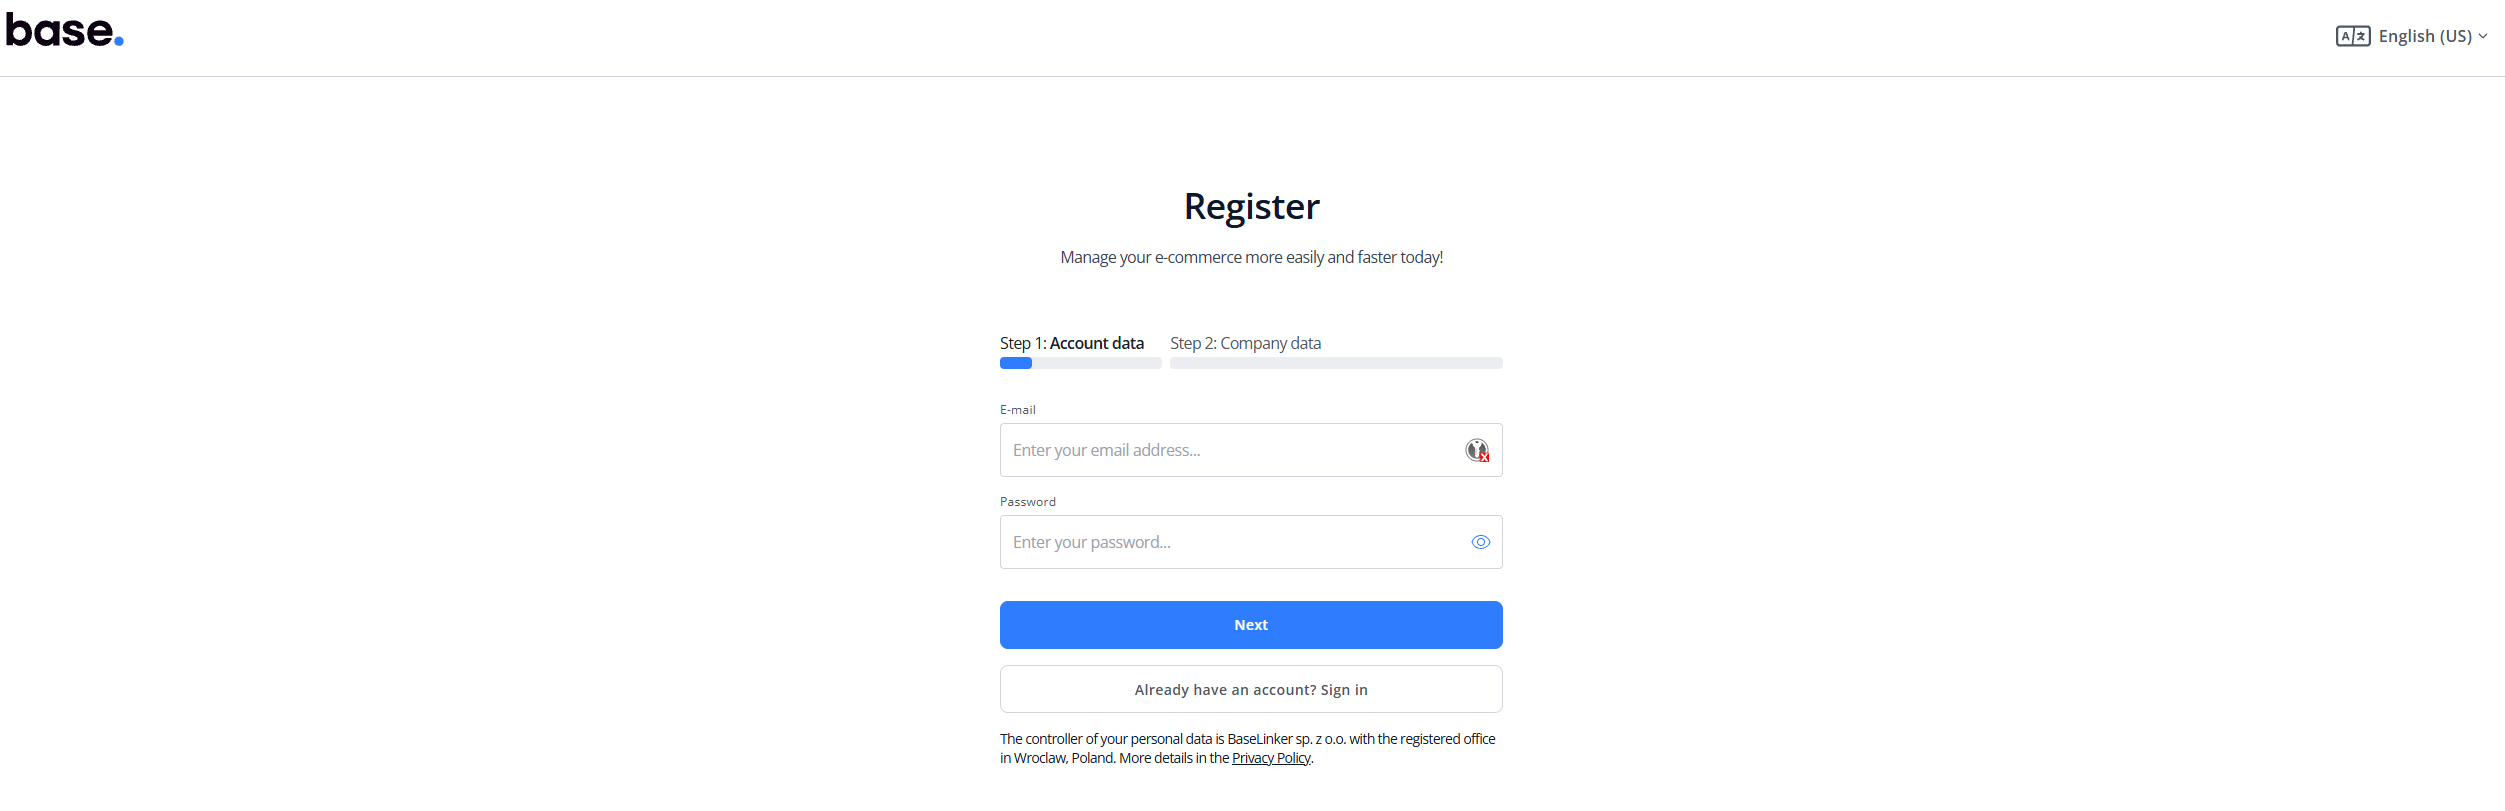
- Fill out the form to create your trial Base account.
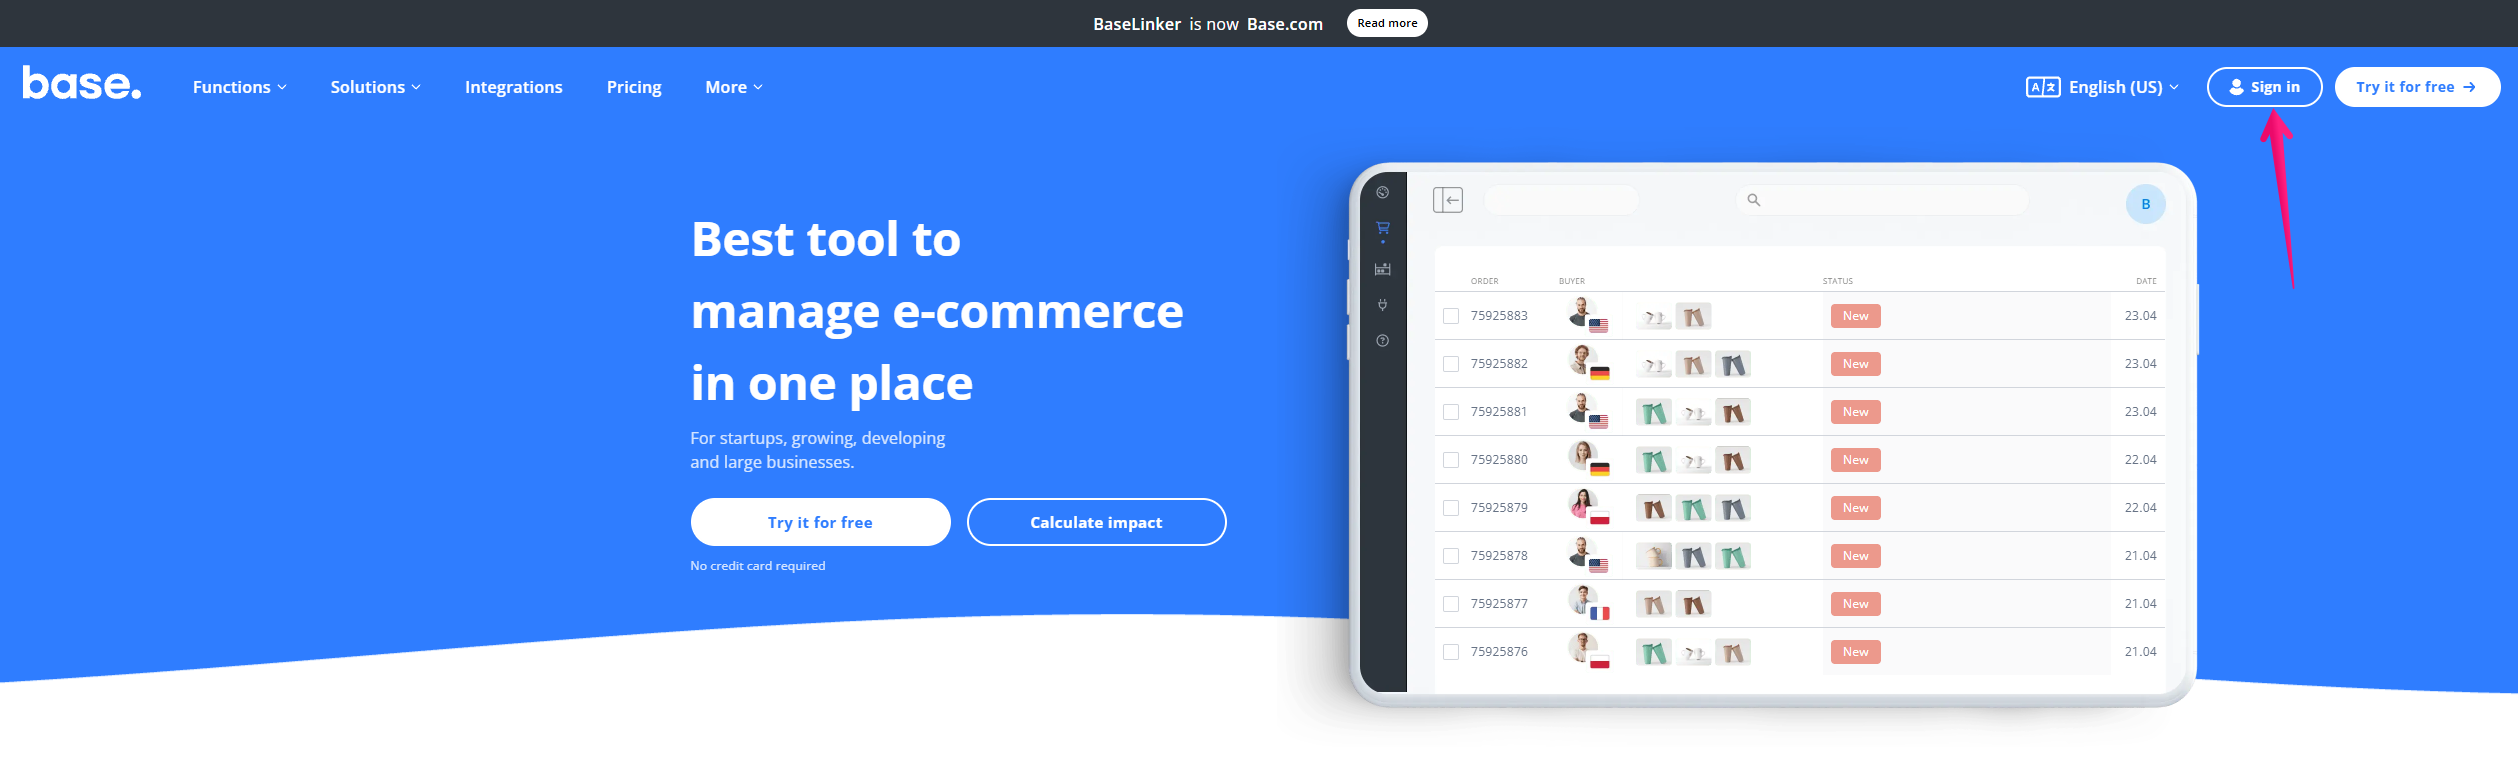
- If you already have a Base account then click “Sign in“.
- Fill out you login credentials and click “Sign In“.

Add Shopify Integration to Base
We will be adding Shopify integration to Base. This will allow Base to manage their Shopify store directly from Base including product listings, inventory and order data. Additionally, the integration will streamline order fulfillment and synchronization of data between the two platforms.
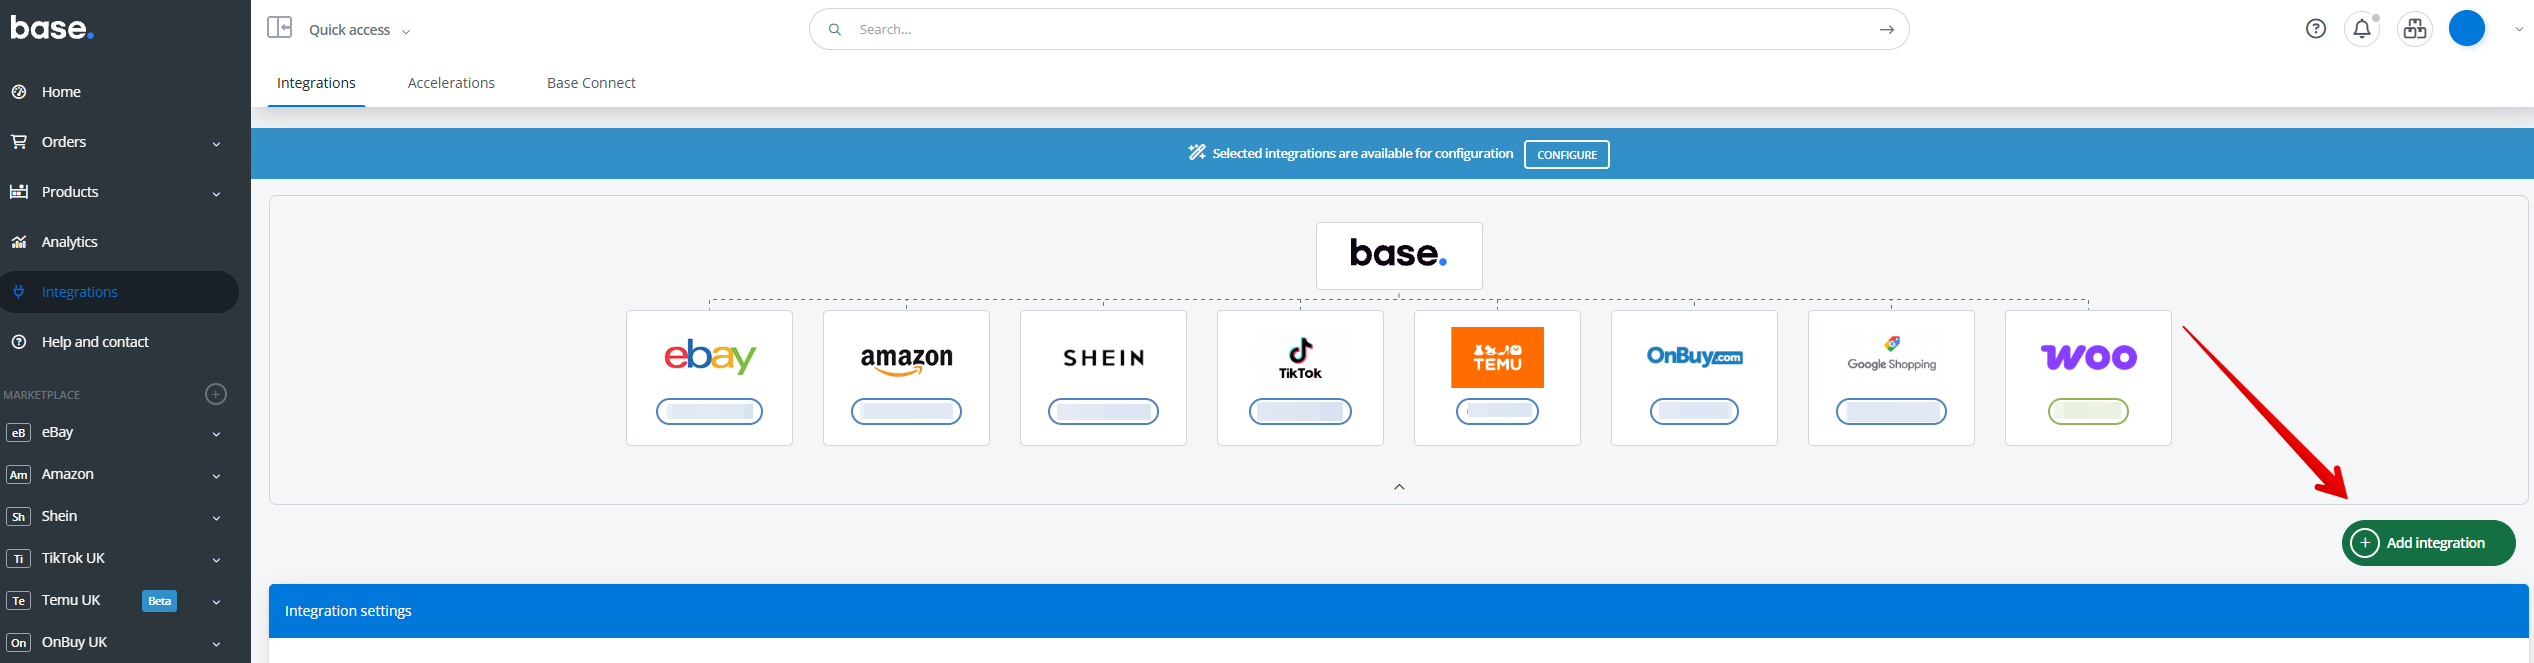
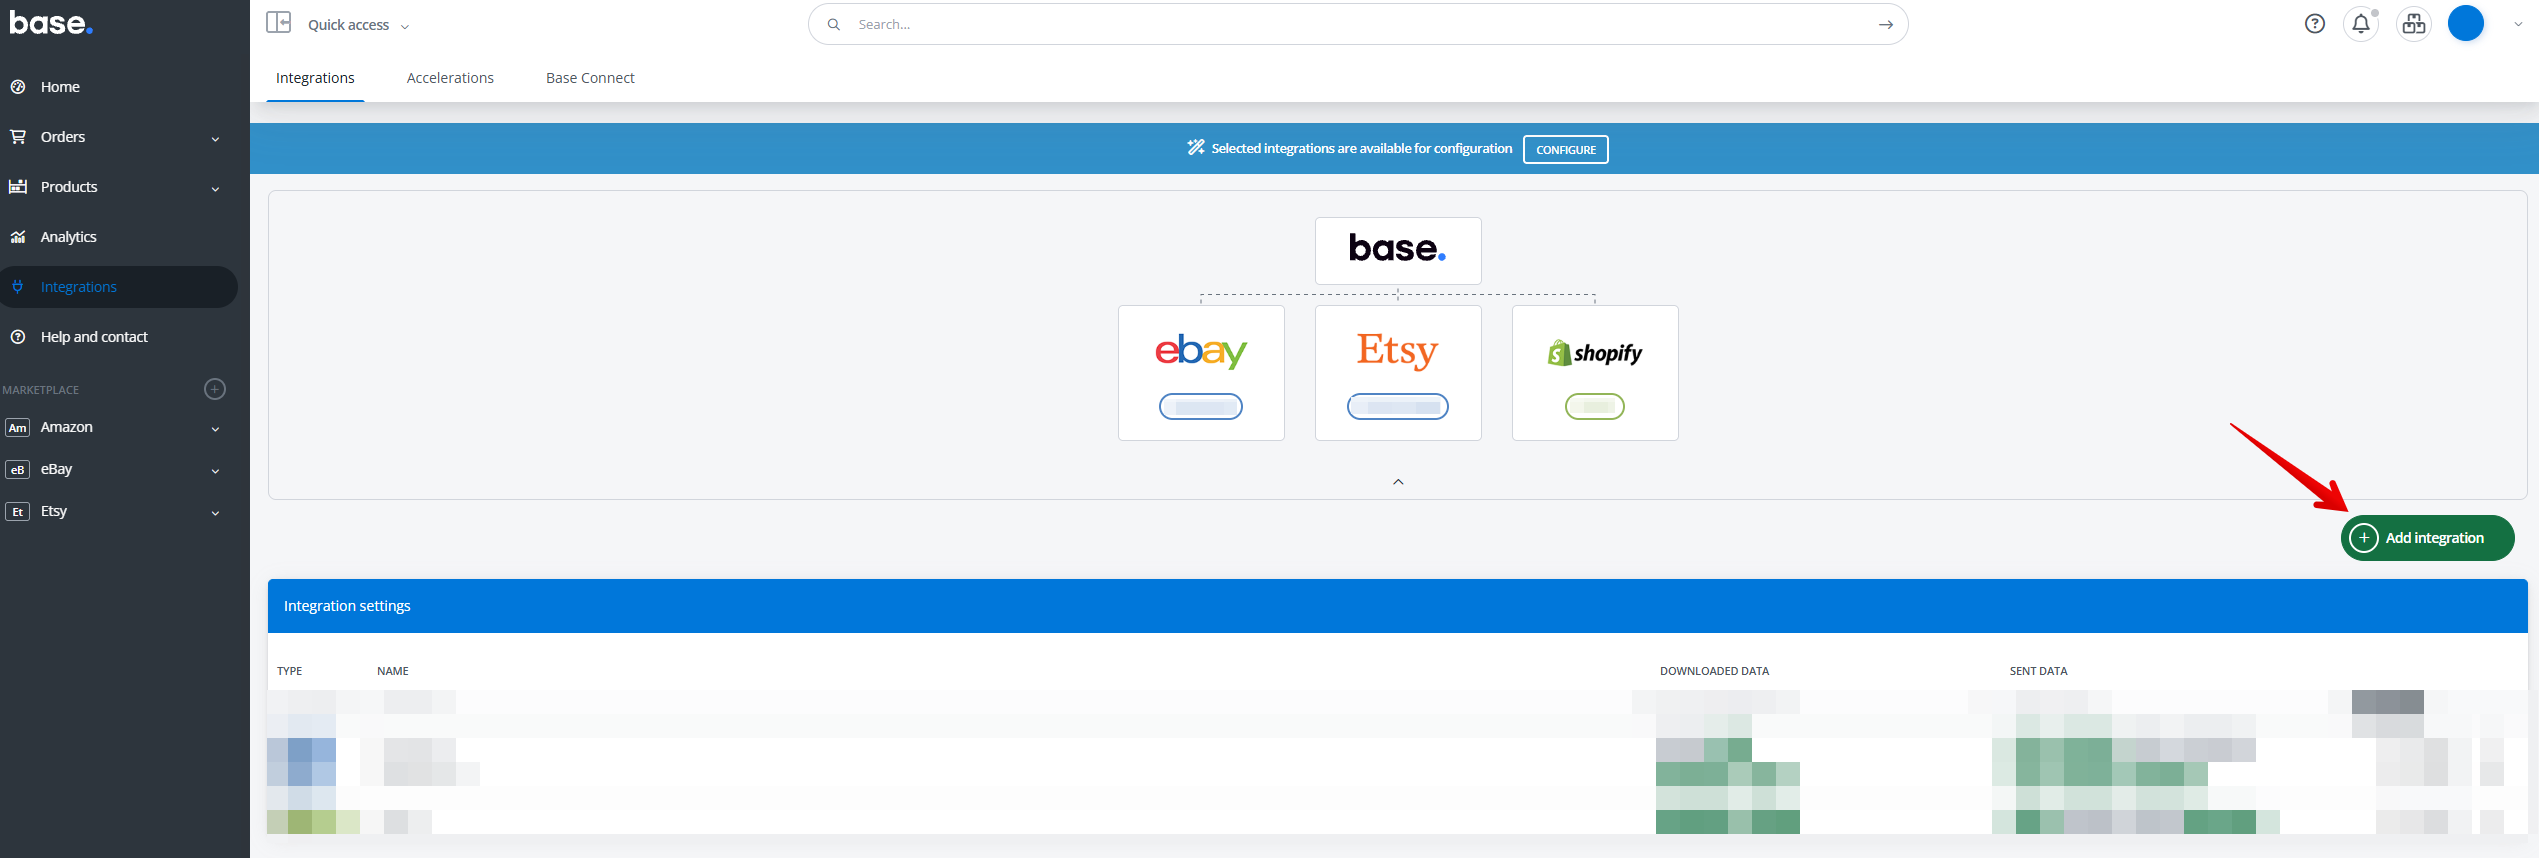
- Click “Integrations”

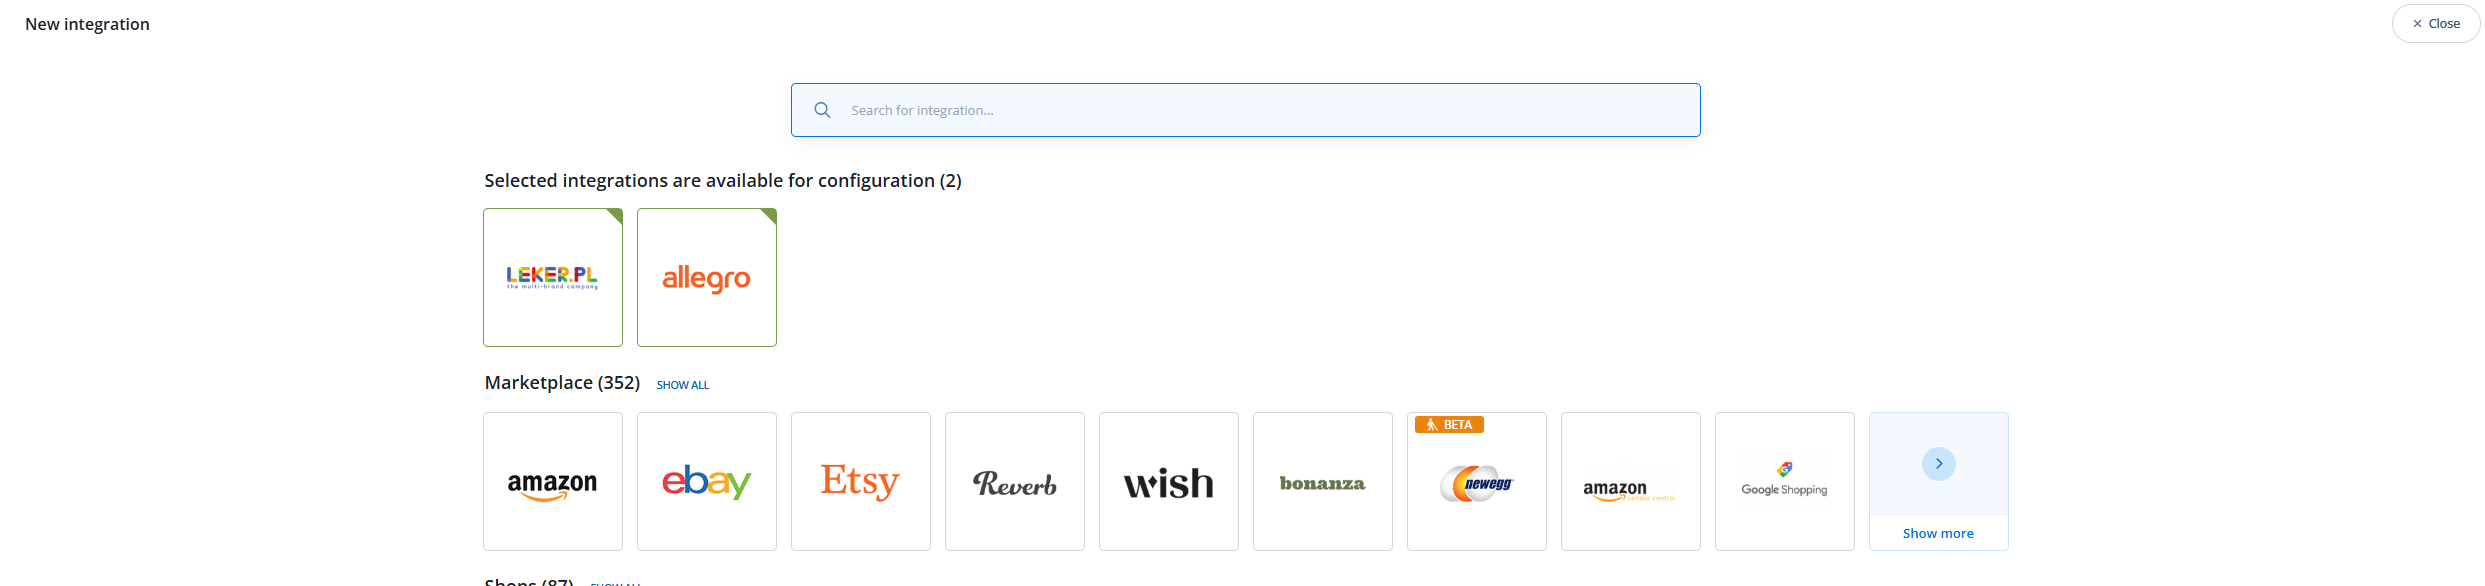
- Click “Add integration“.
- Type in “Shopify” in the search bar and click on the Shopify icon under “Shops”.

- You can leave the fields blank for now as we will need to set up a custom app in Shopify to get the API keys and access tokens. Click on “Save” and move onto the next step.

Create and Configure App in Shopify
This guide provides a step-by-step process for creating and configuring an app in Shopify to connect to your Base account. The purpose of the app is to establish a connection between Shopify and Base, enabling data synchronization between the two platforms.
- Log into your store’s Shopify Admin panel.
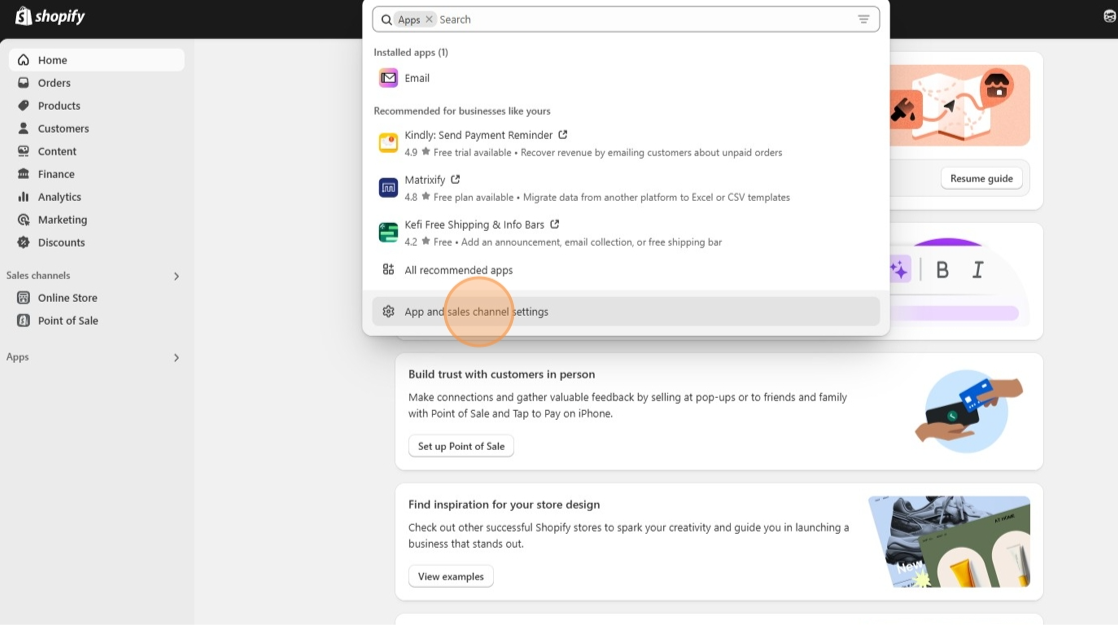
- In the search bar at the top of the screen, click on the grey bubble titled “Apps” and then click on “App and sales channel settings” at the bottom.
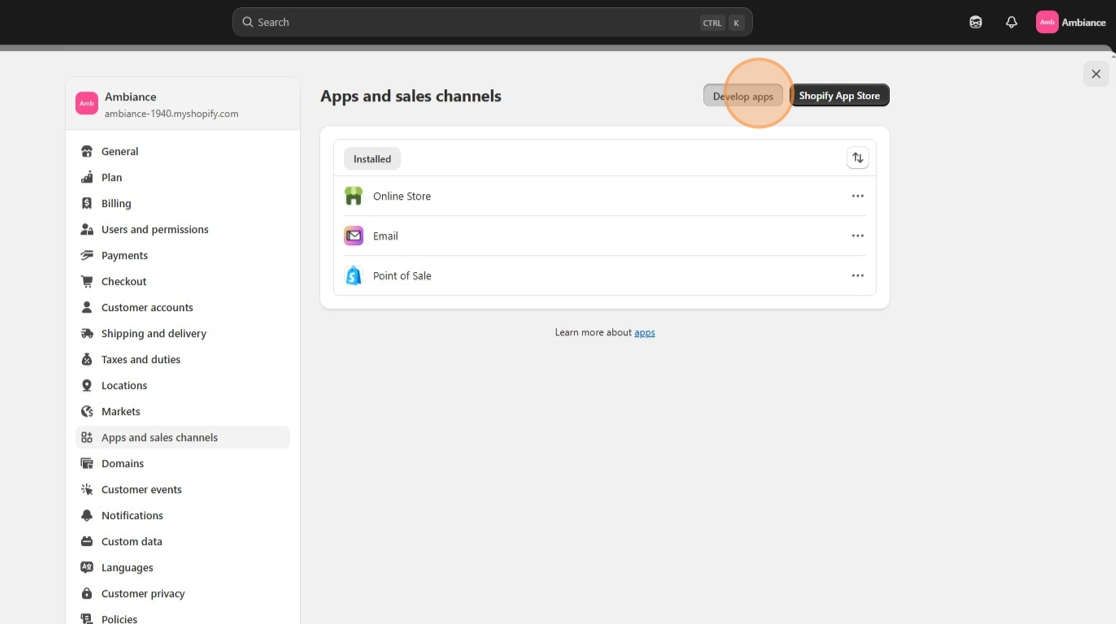
- Click “Develop apps”
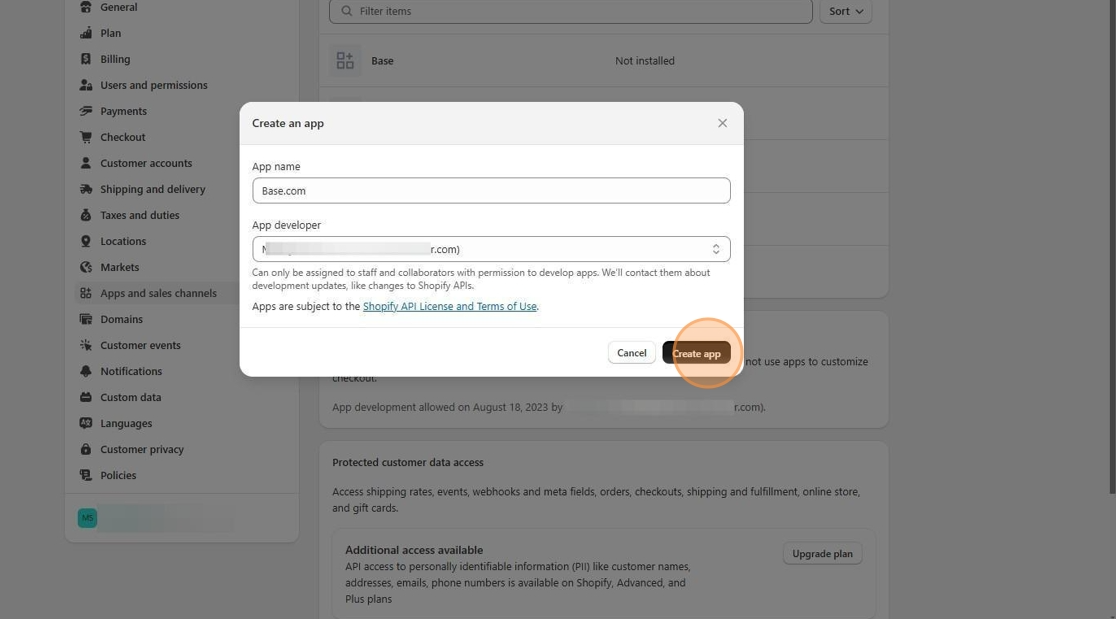
- Click “Create an app“
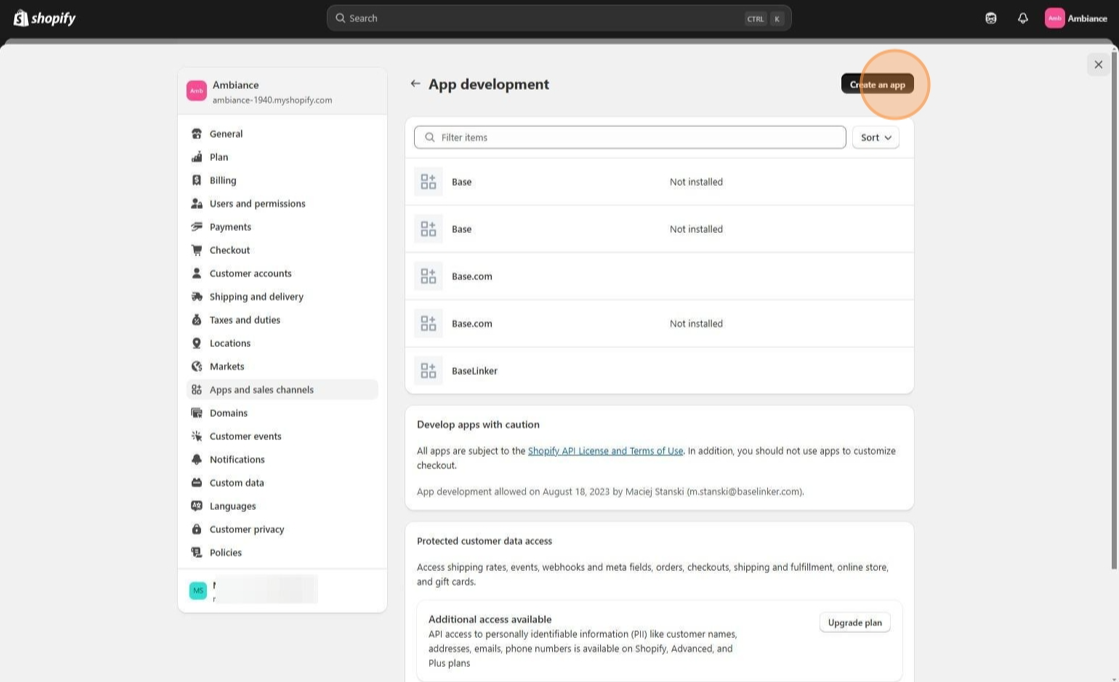
- For app name, call it “Base.com” and click “Create app“.
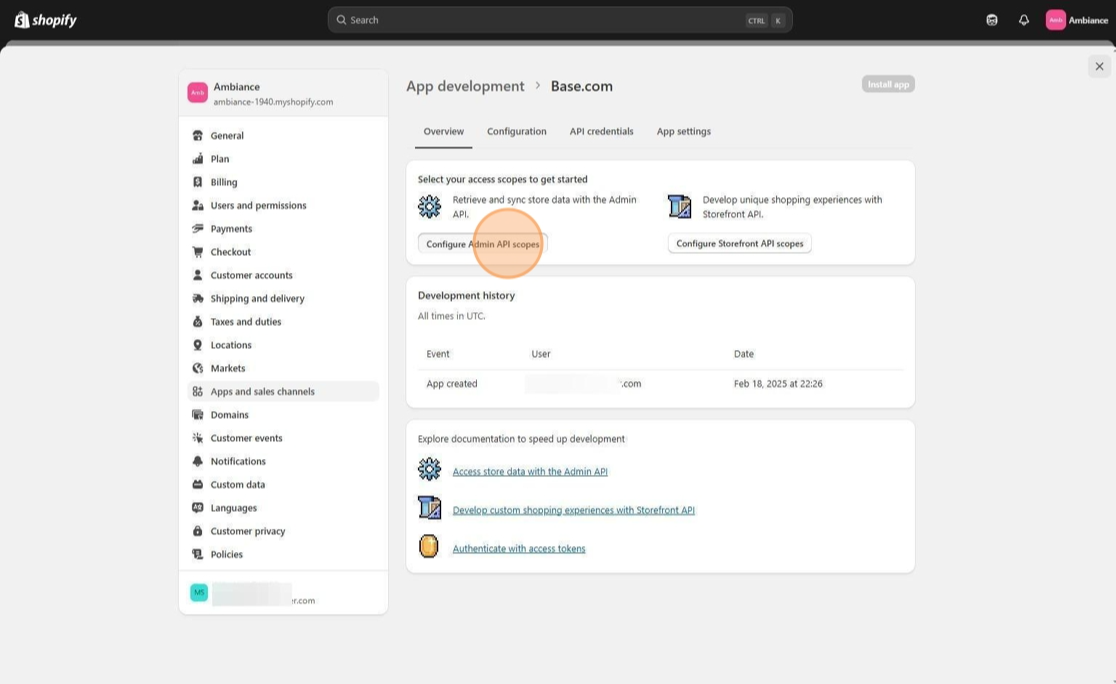
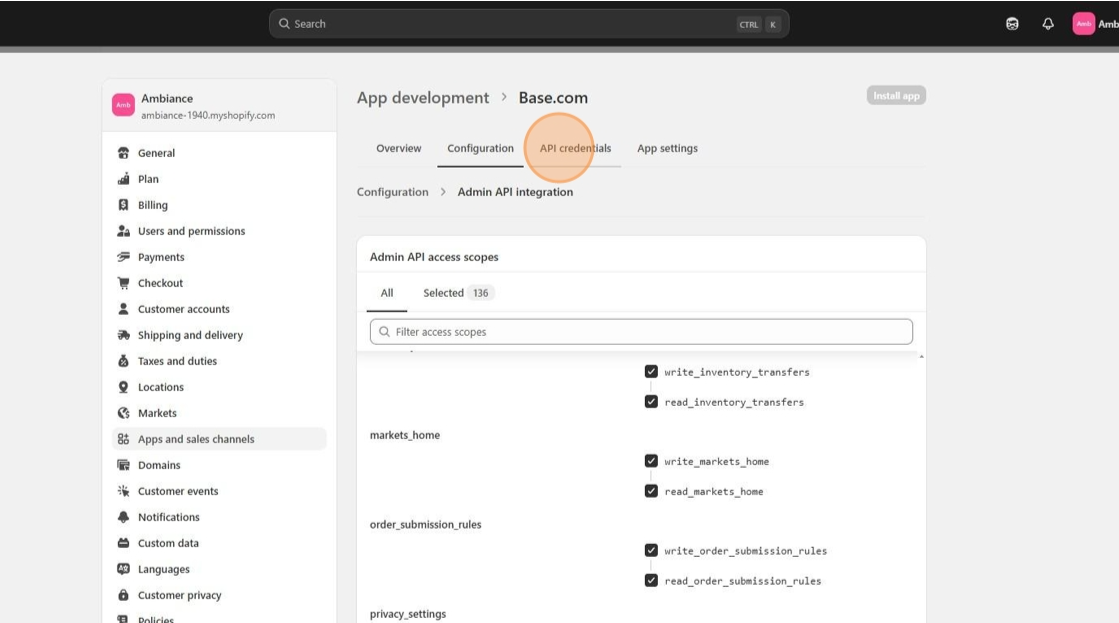
- Click “Configure Admin API scopes“
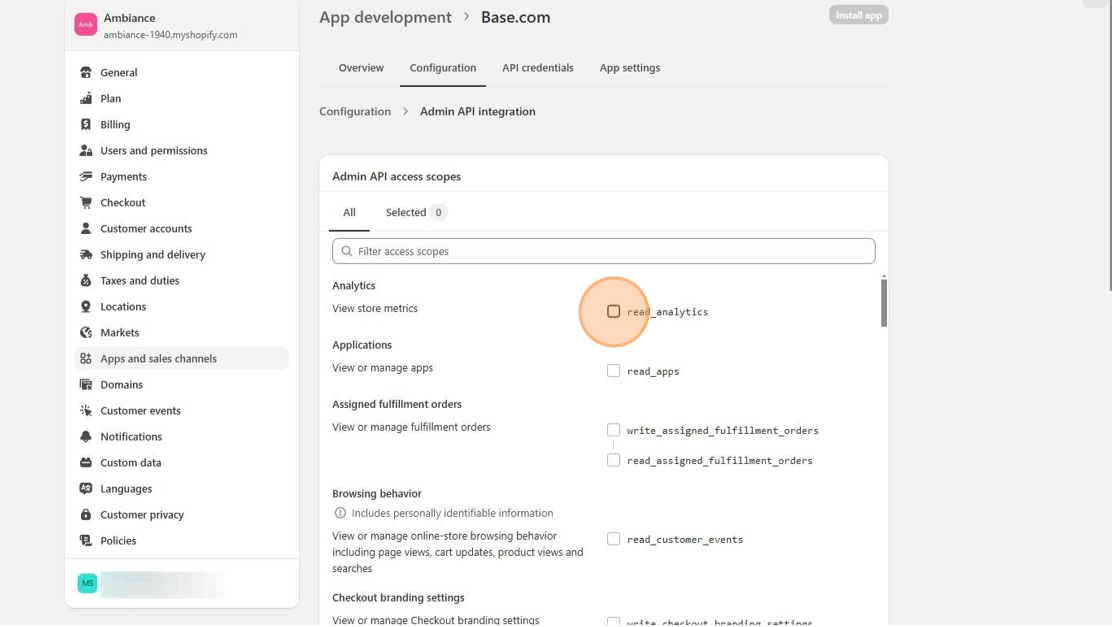
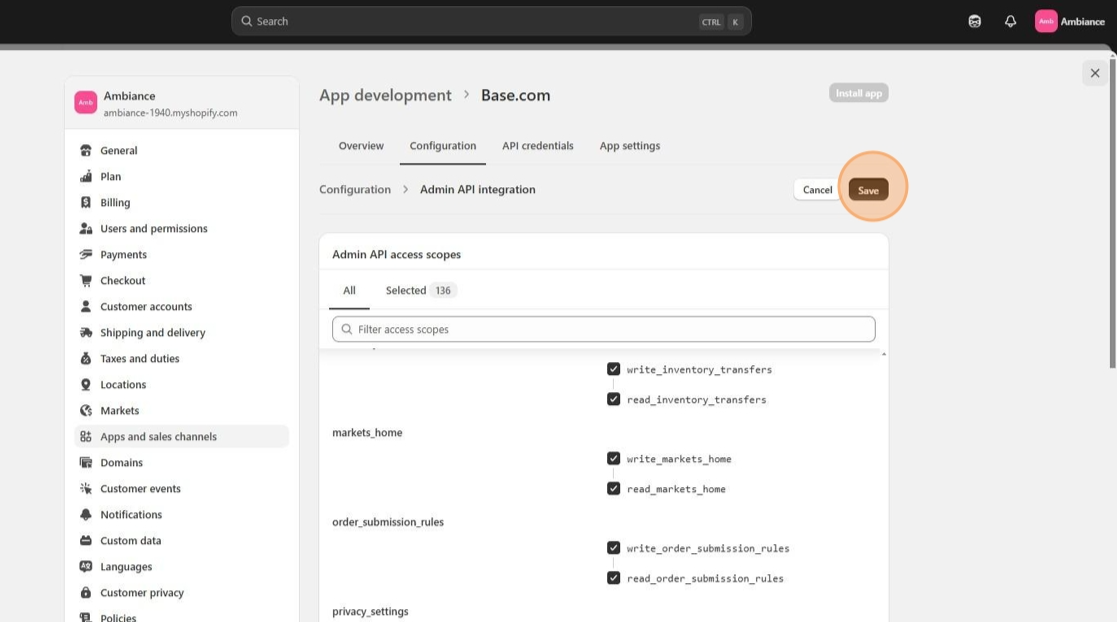
- You will need to give the app full permissions by check marking all the boxes on this page.
- Click “Save“
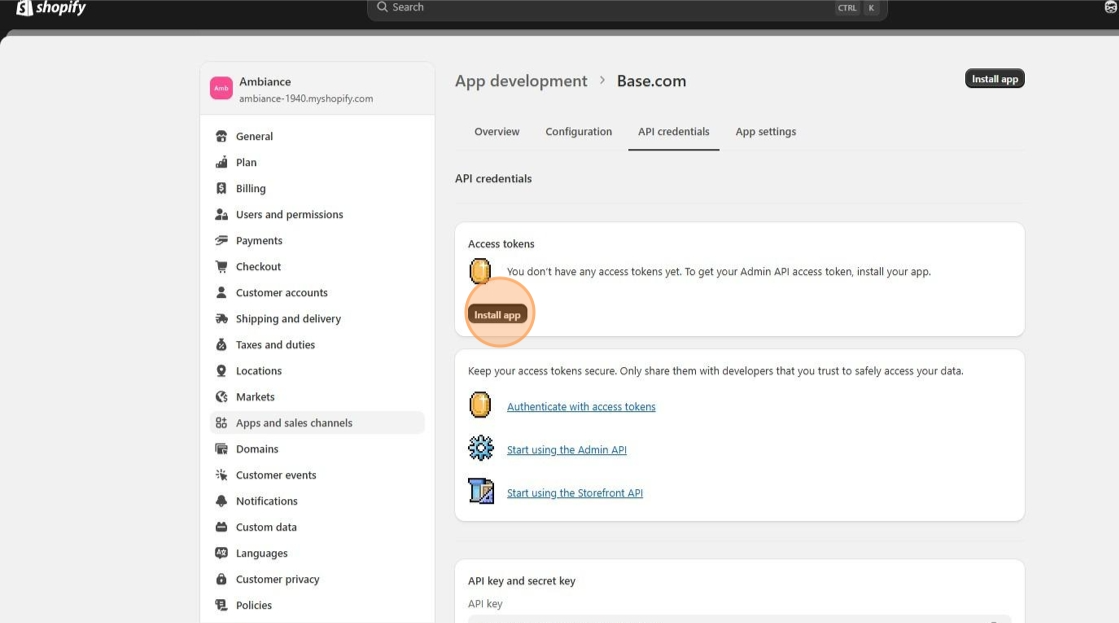
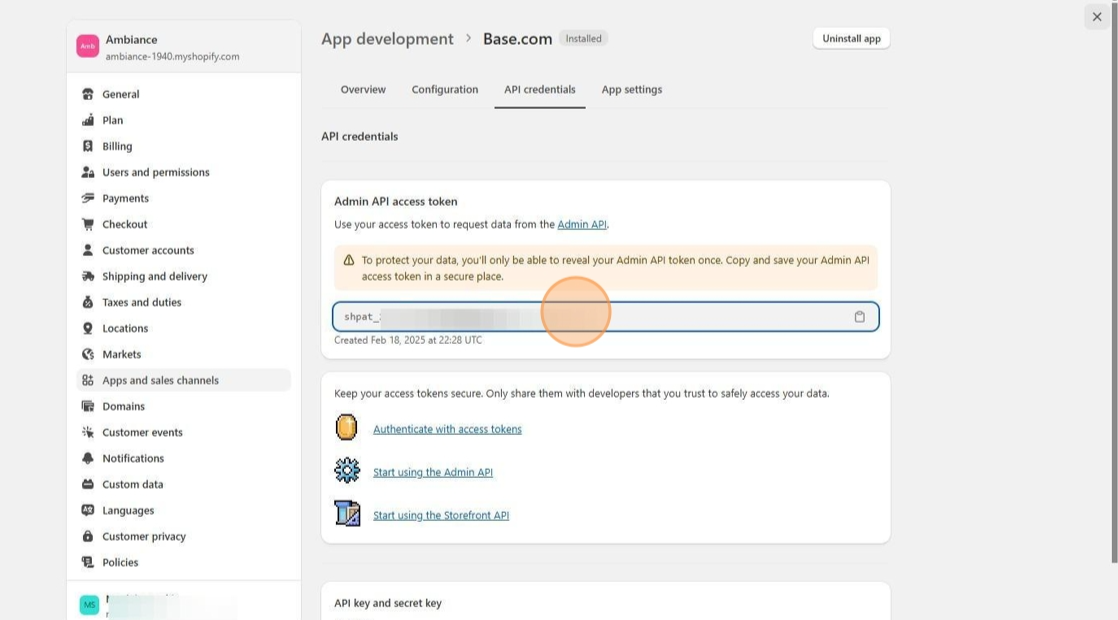
- Click “API credentials“
- Click “Install app“
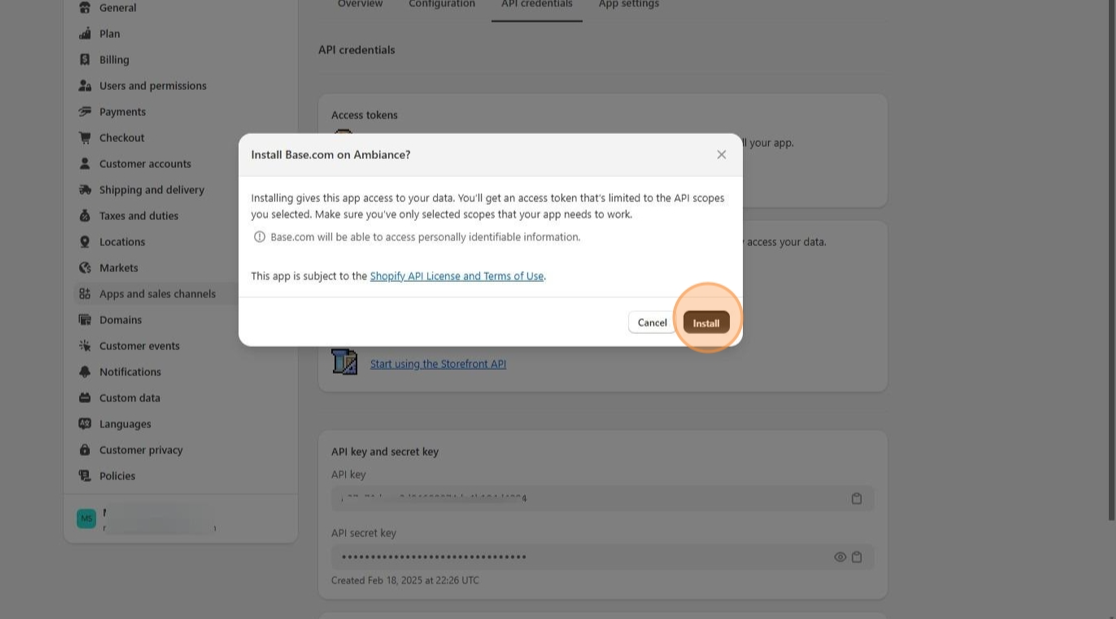
- Click “Install“
- Click “Reveal token once“.You can only see the Admin API access token once so if you fail to copy the first time then you will have to create another custom app to get a new token.
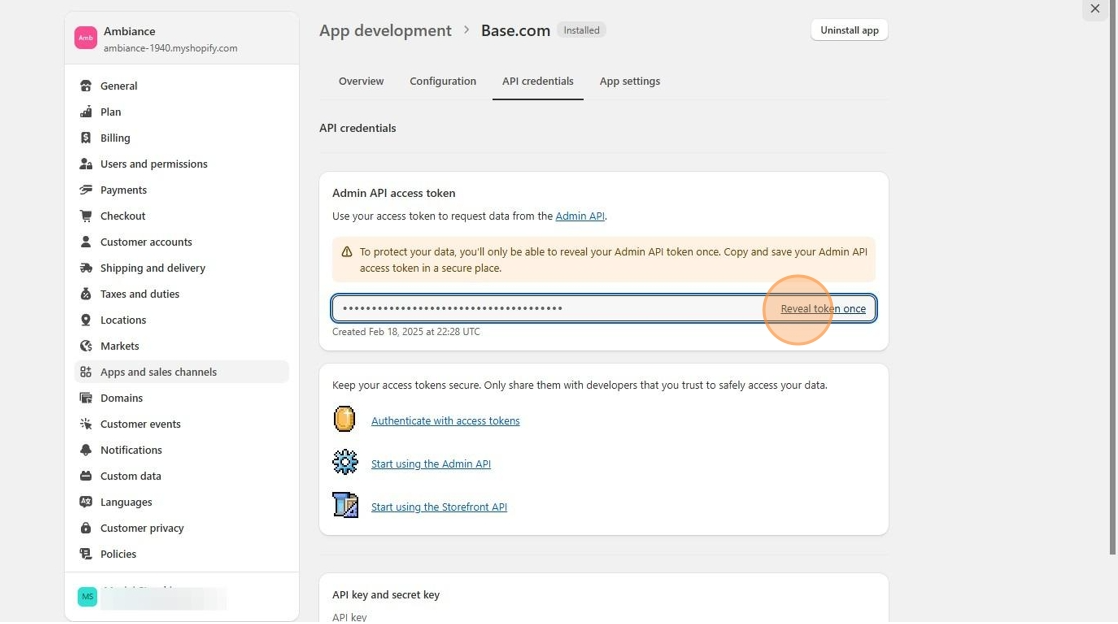
- Double-click the “Admin API access token text field” field and copy the token.
- Switch or open a new tab to Base and navigate to the Shopify integration.
- In the settings, paste the copied access token in the “Admin API access token“.
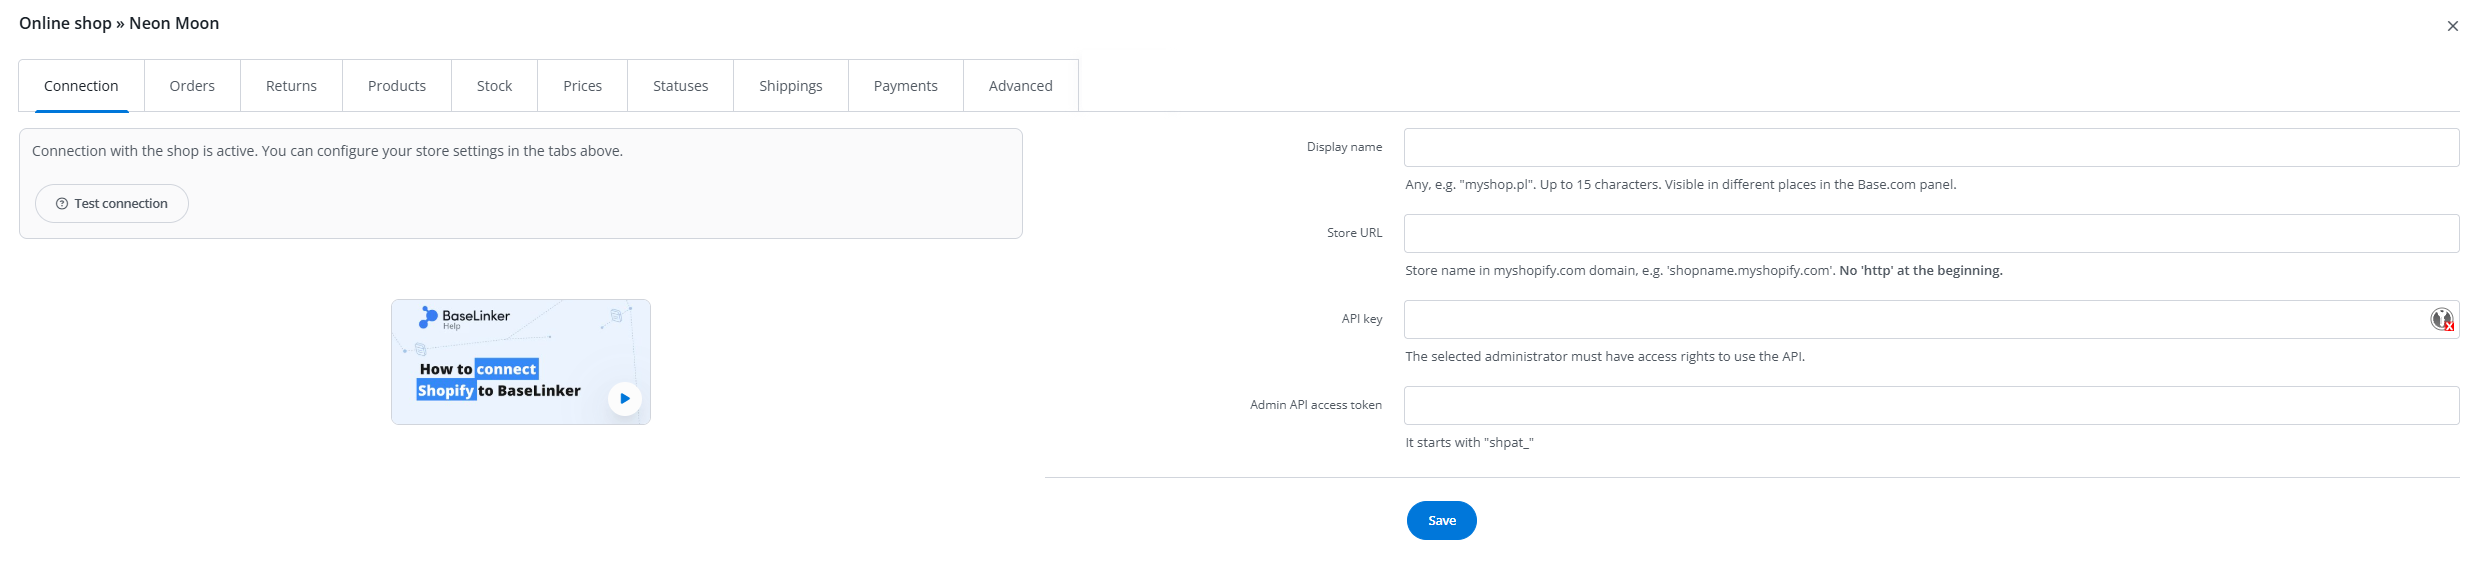
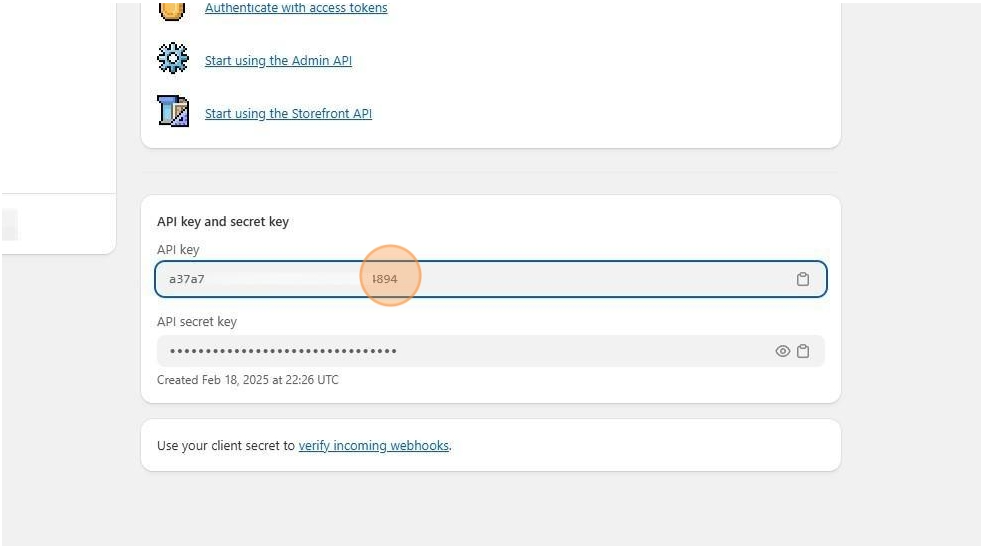
- Switch back the Shopify Admin tab.
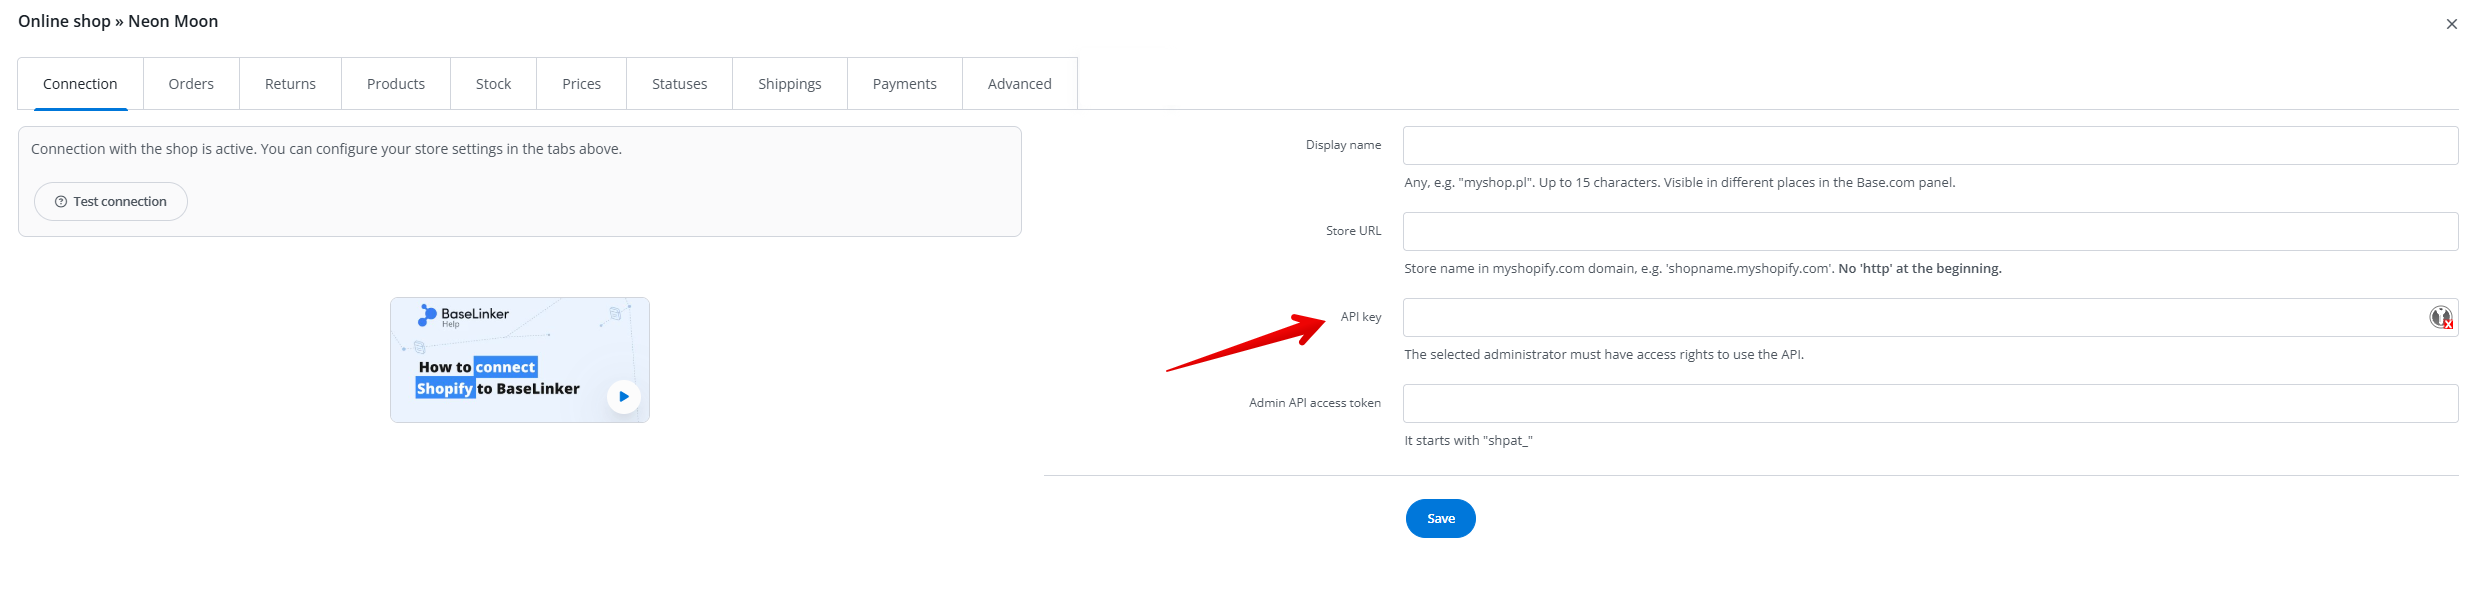
- Double-click the “API key” field and copy the key.
- Switch back to the Base tab/window.
- Paste the copied key to the “API key” field.
- Click “Save”
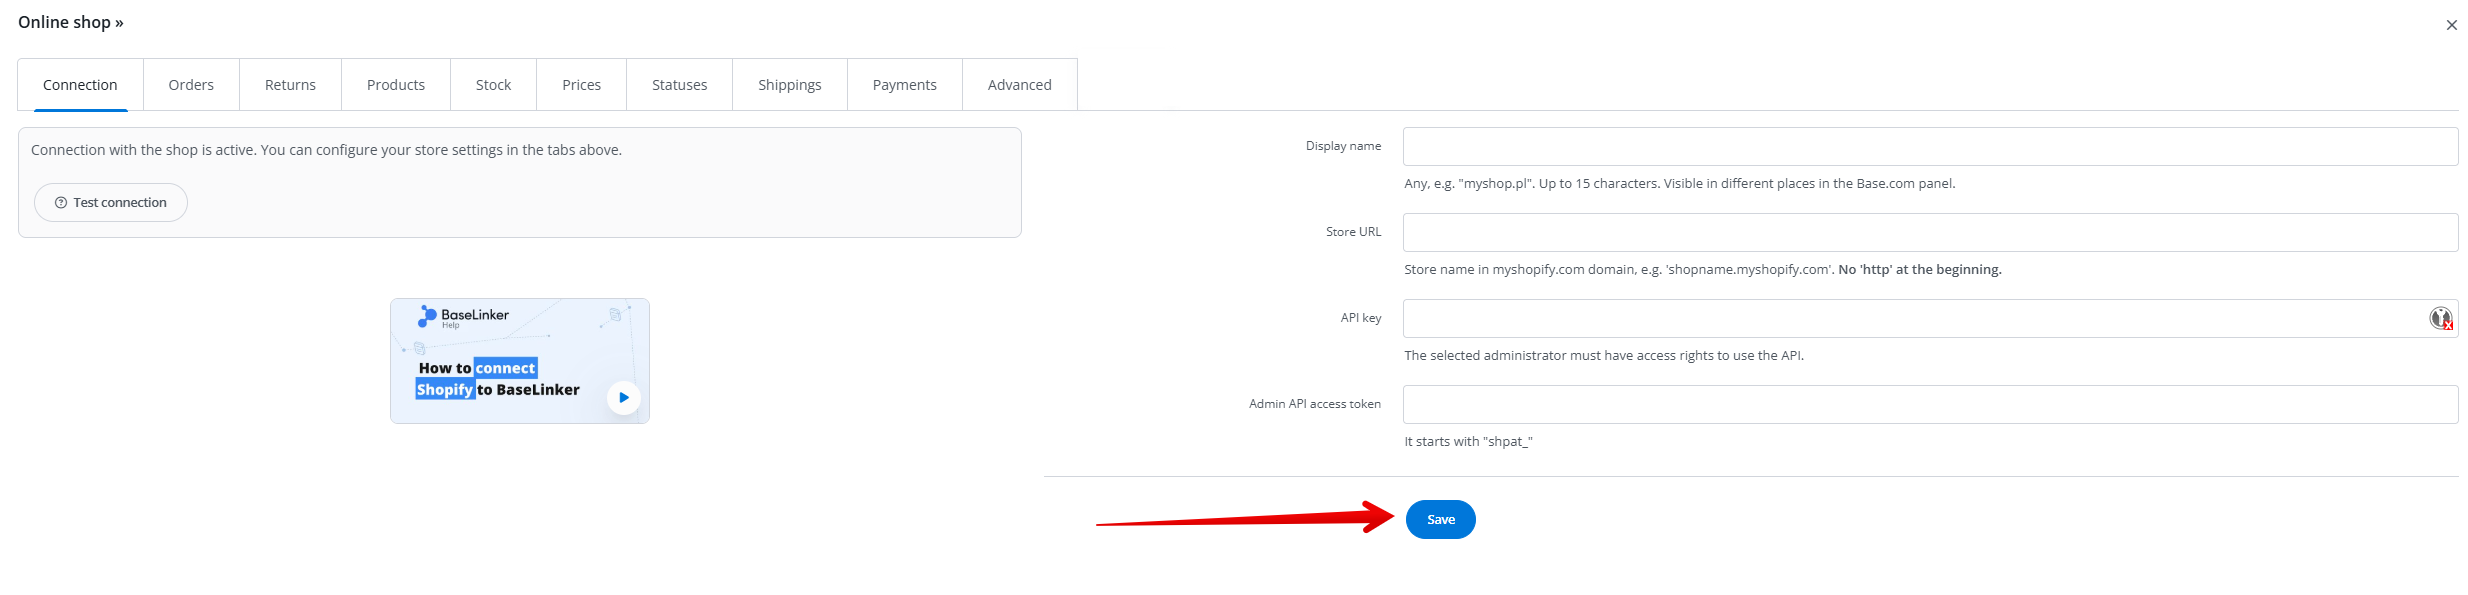
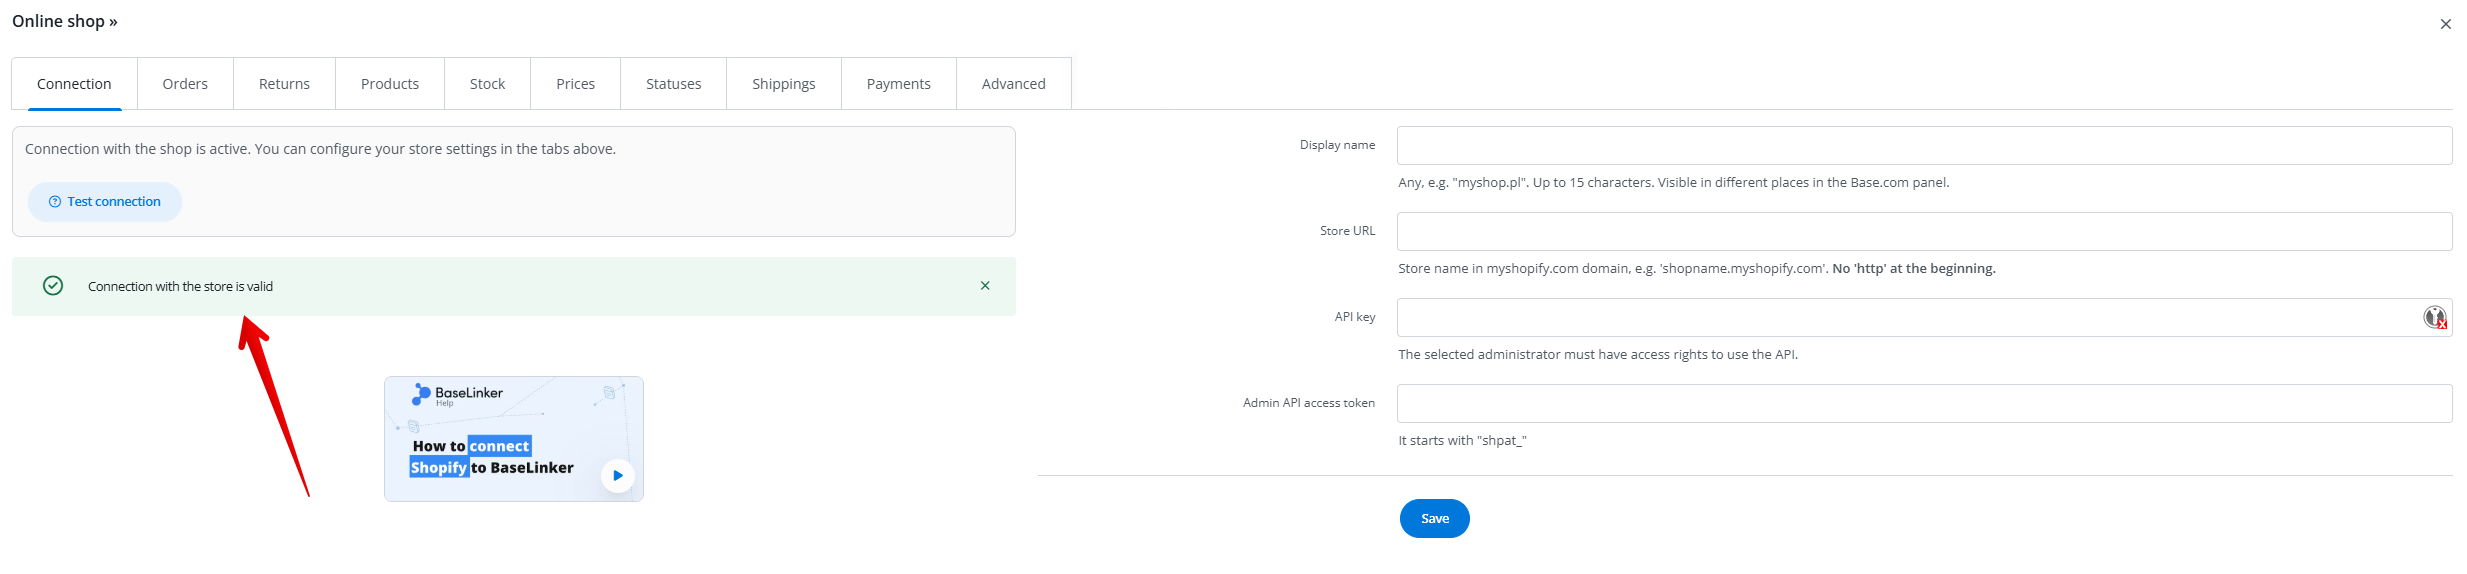
- Click “Test connection“. You should see a successful connection message.
Import Products from Shopify Into Base.com
This guide shows how to import products from the Shopify store after adding Shopify integration. This process is performed after you have successfully integrated your Shopify store with Base. By following these instructions, you can efficiently transfer your product data, including details like product names, descriptions, images, prices, and inventory levels, from Shopify to Base.
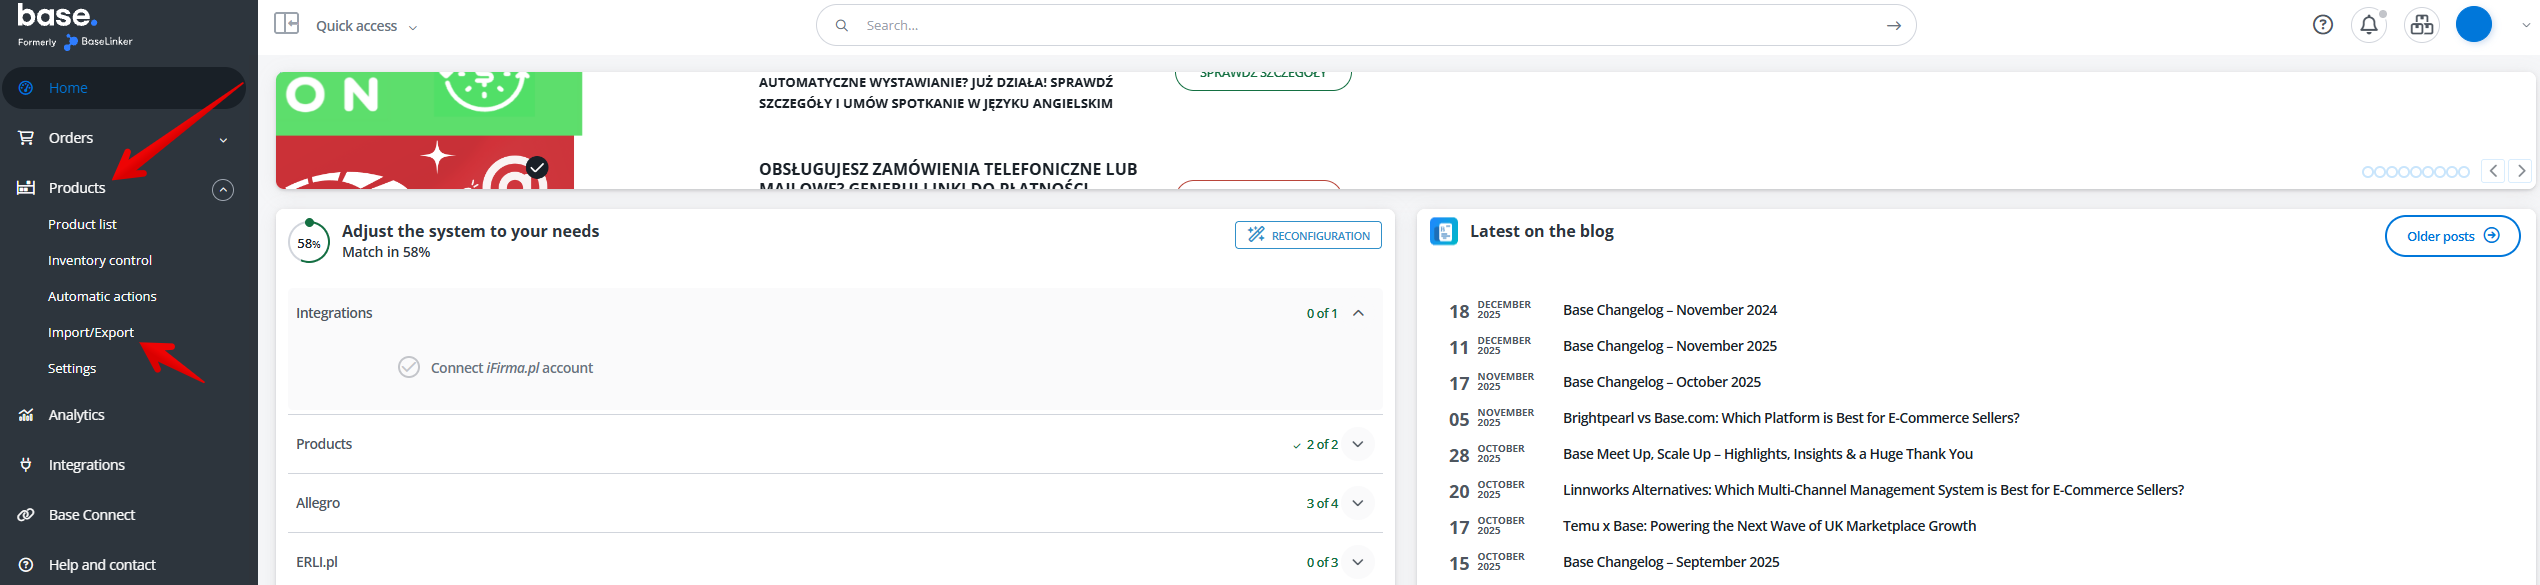
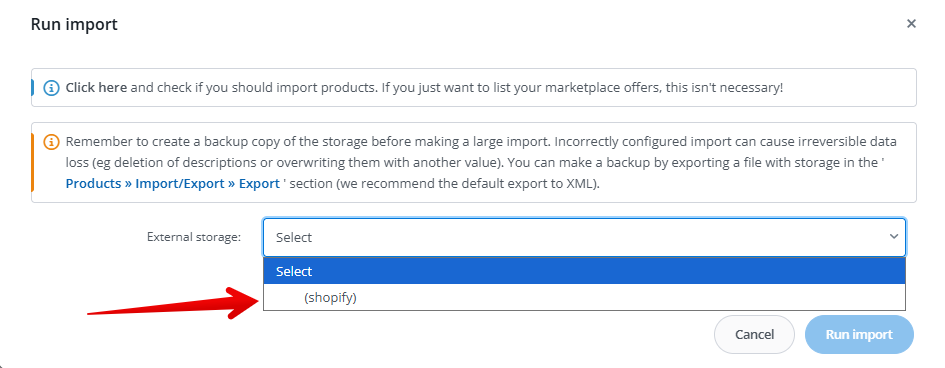
- Click “Products” and then “Import/export”
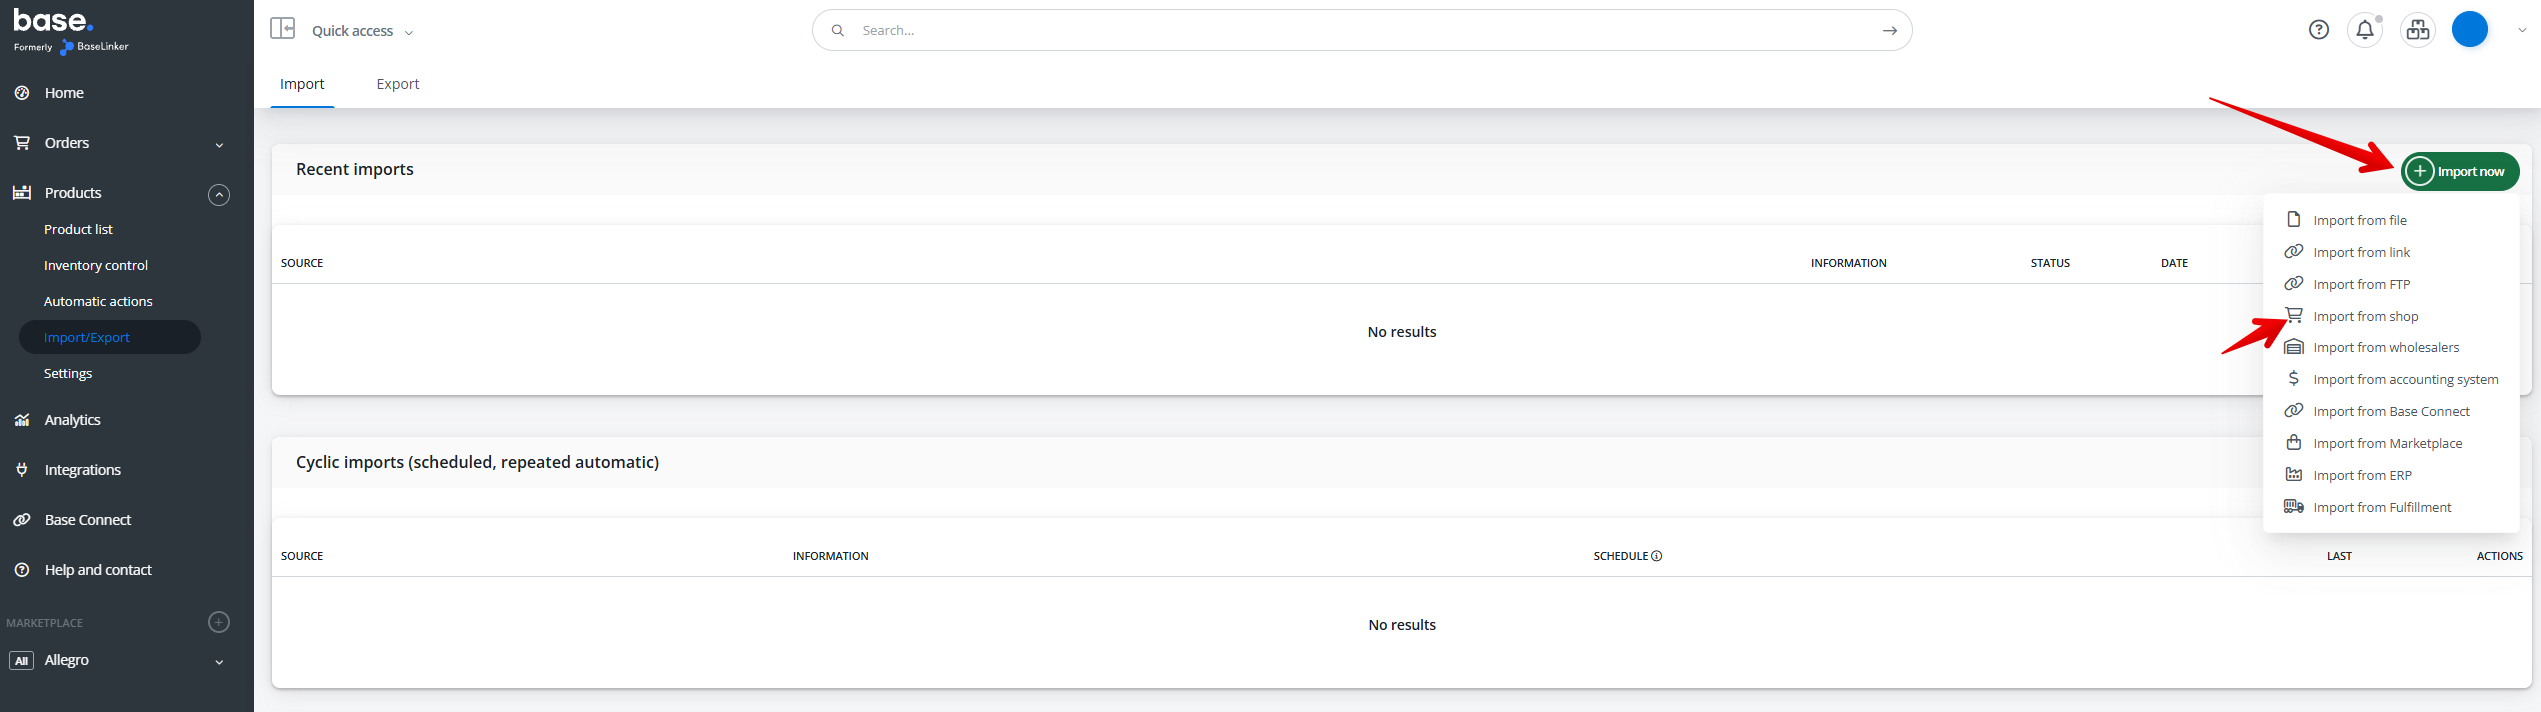
- Click “Import now” and choose option “import from the shop”
- Select the name of the Shopify store option.
- Select the “Download new products and update existing ones” option. Adjust all settings of the import.
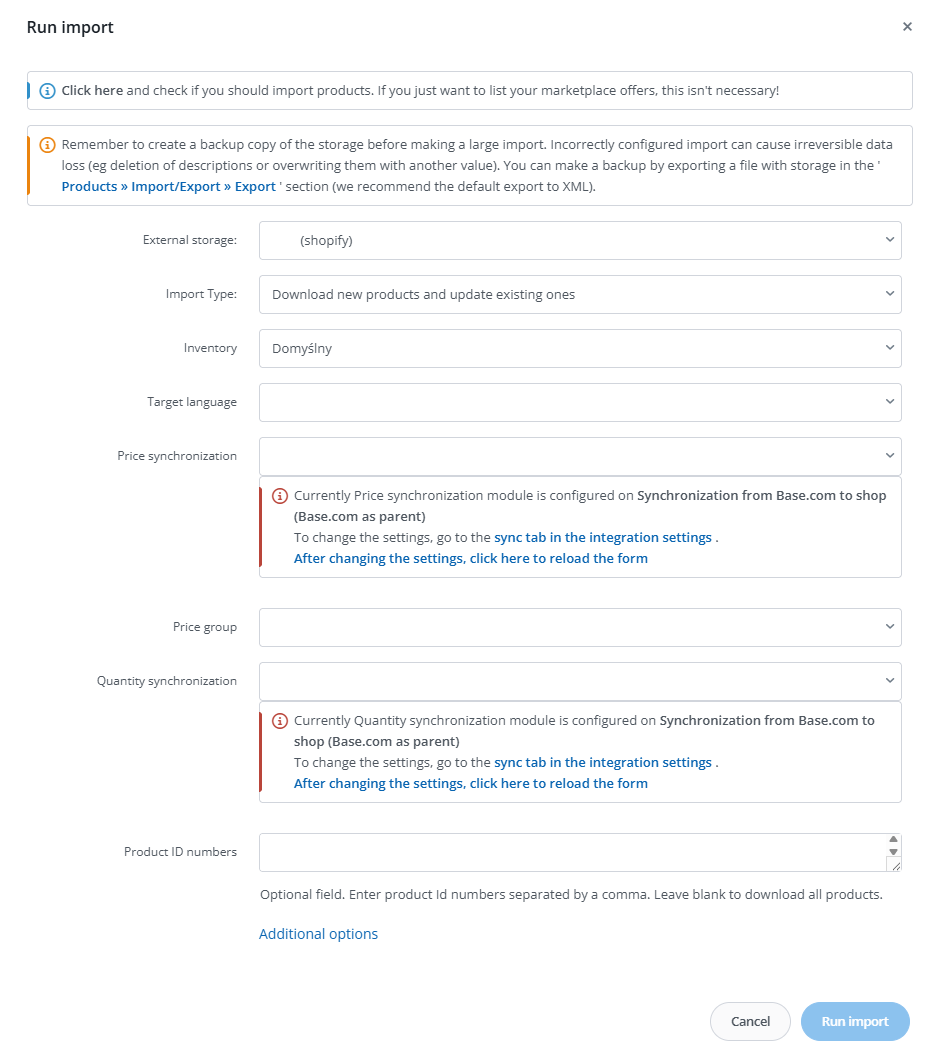
- After that click “Run import”
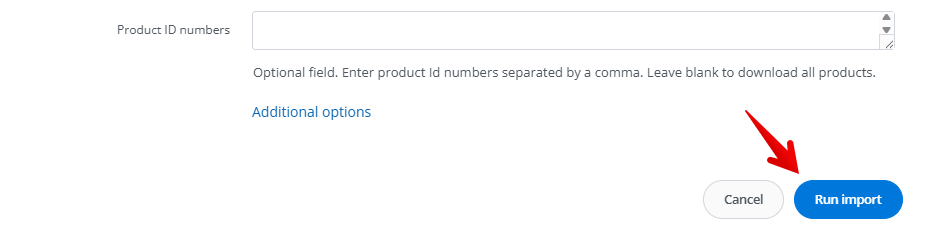
- Let the import run to 100%.
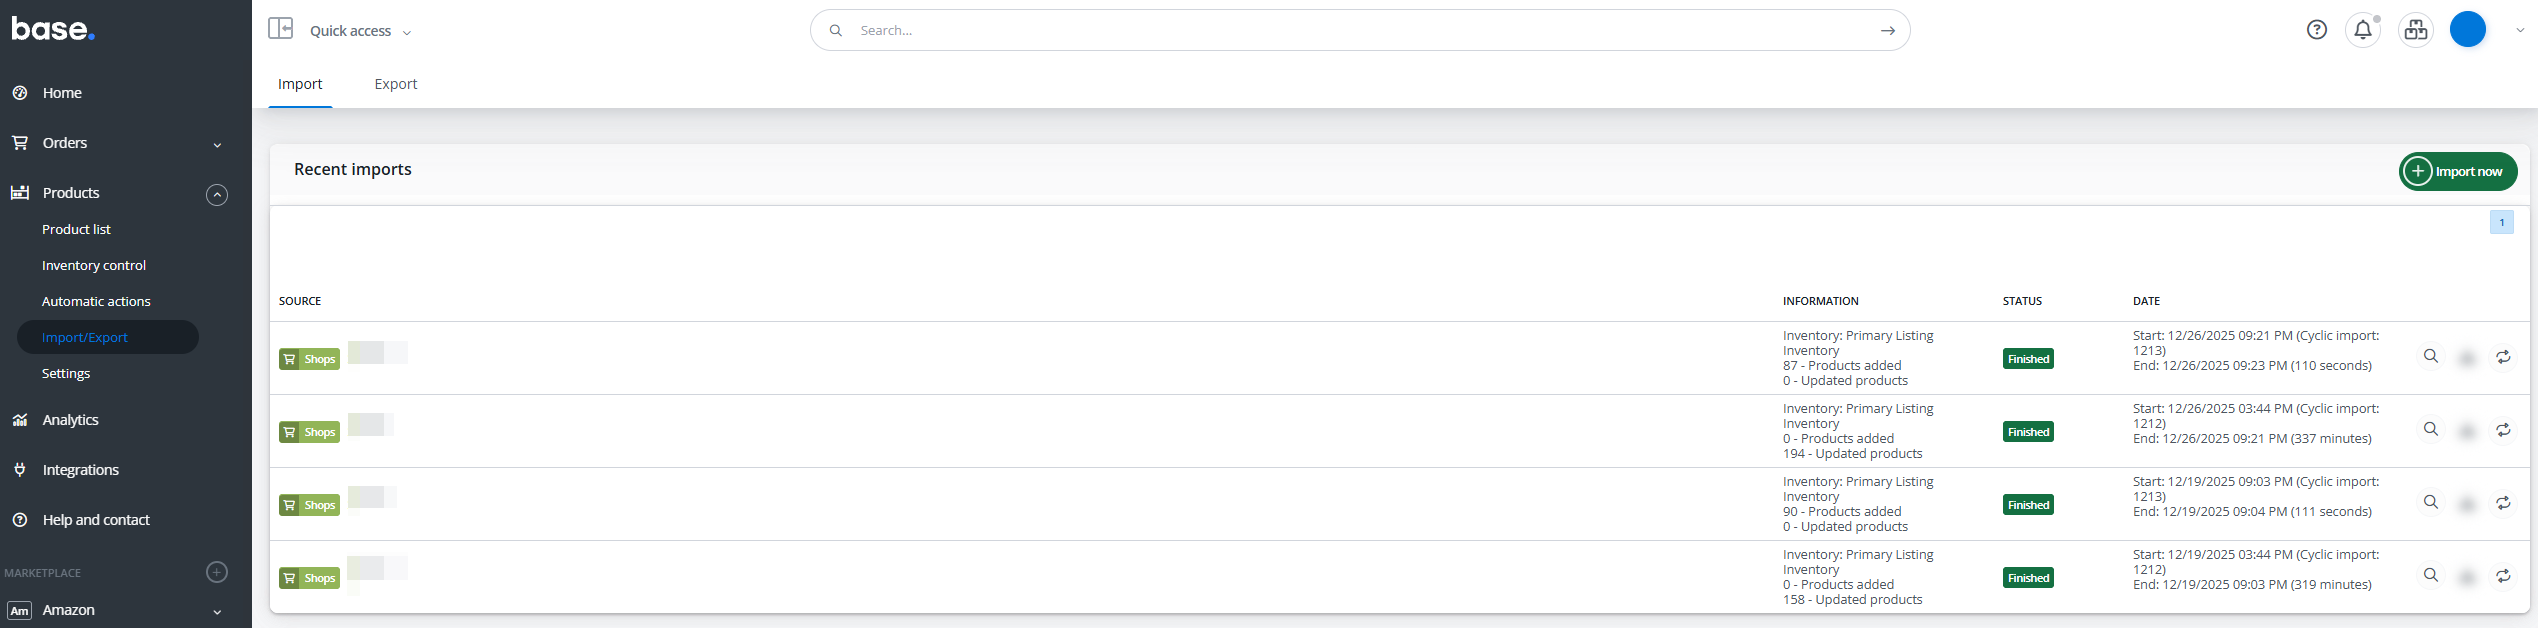
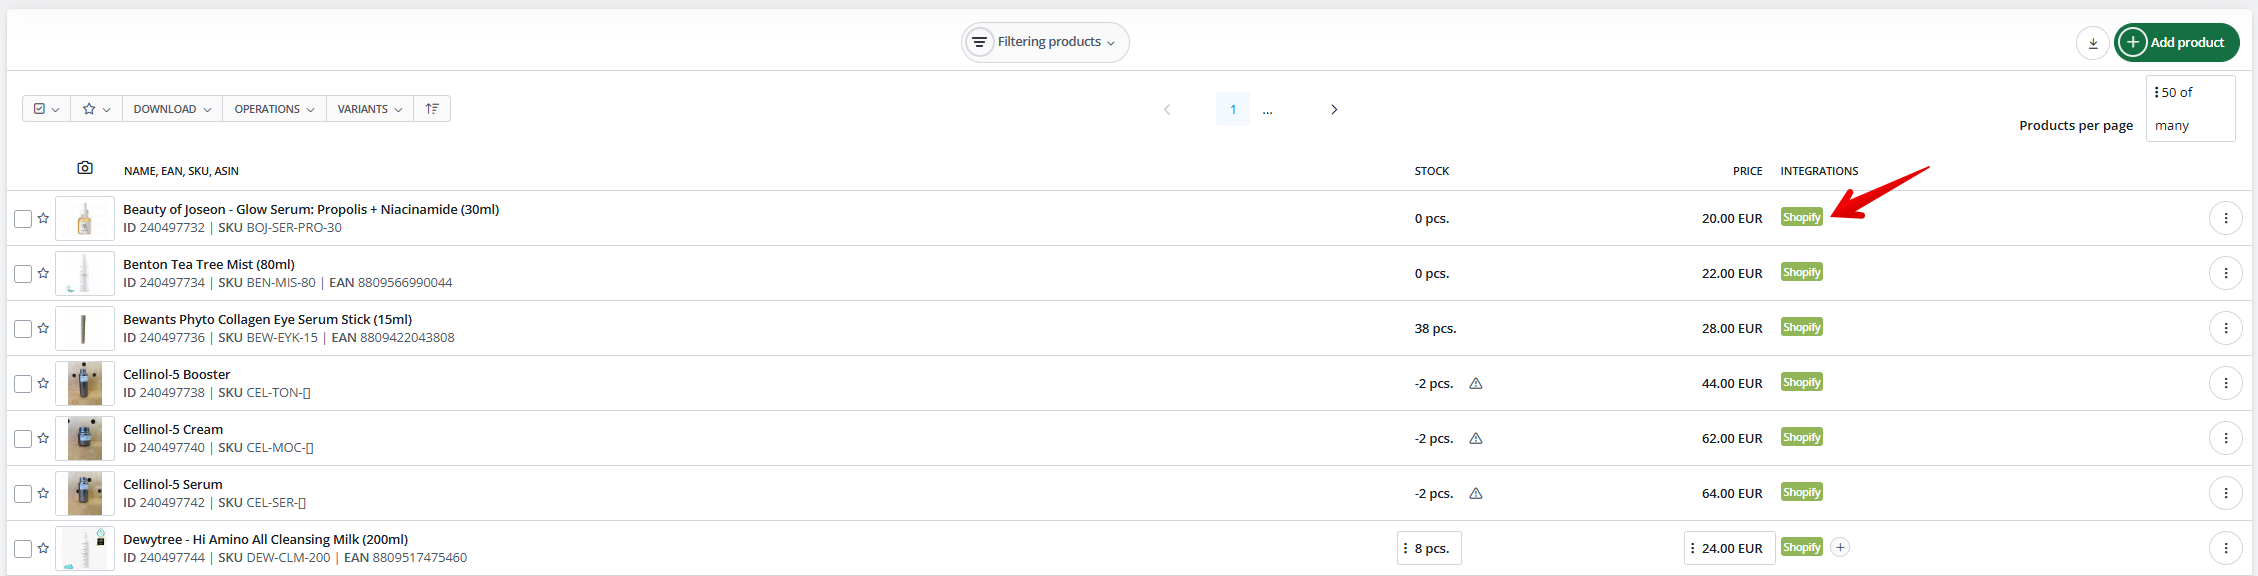
- Products that were imported from Shopify will have a green tag next to them in the Integration column.
Adding Shein Integration.
This guide provides a straightforward, step-by-step process for integrating Shein with Base.
- Click on “Integrations”

- Click “Add integration“.
- Click the “Search for integration…” field.
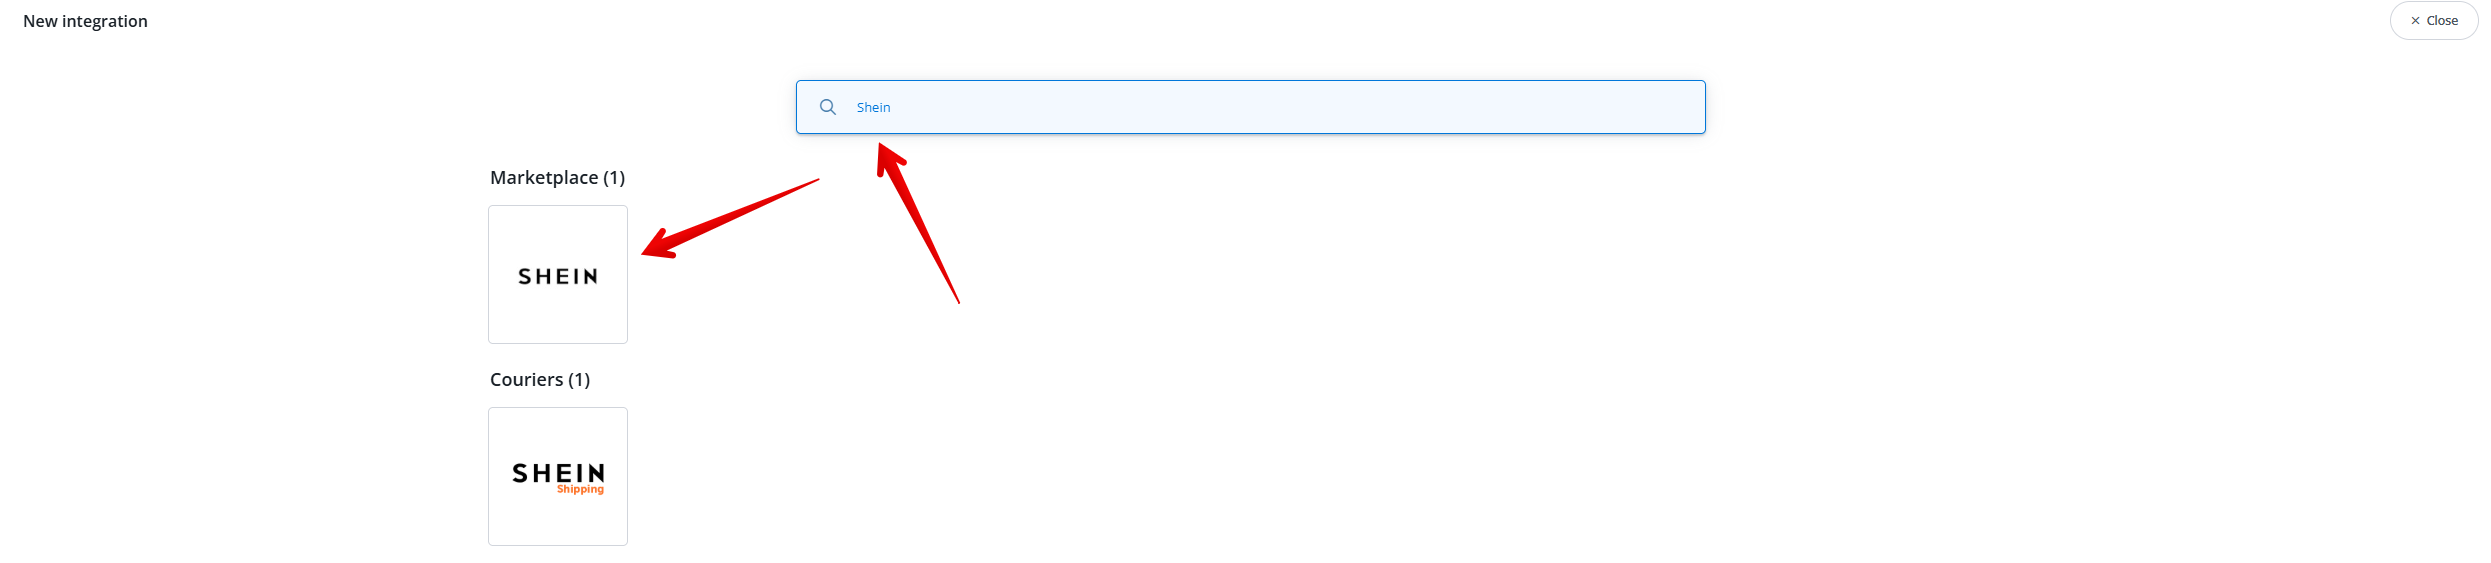
- Type “Shein” in the search bar and click on the Shein icon under marketplace.
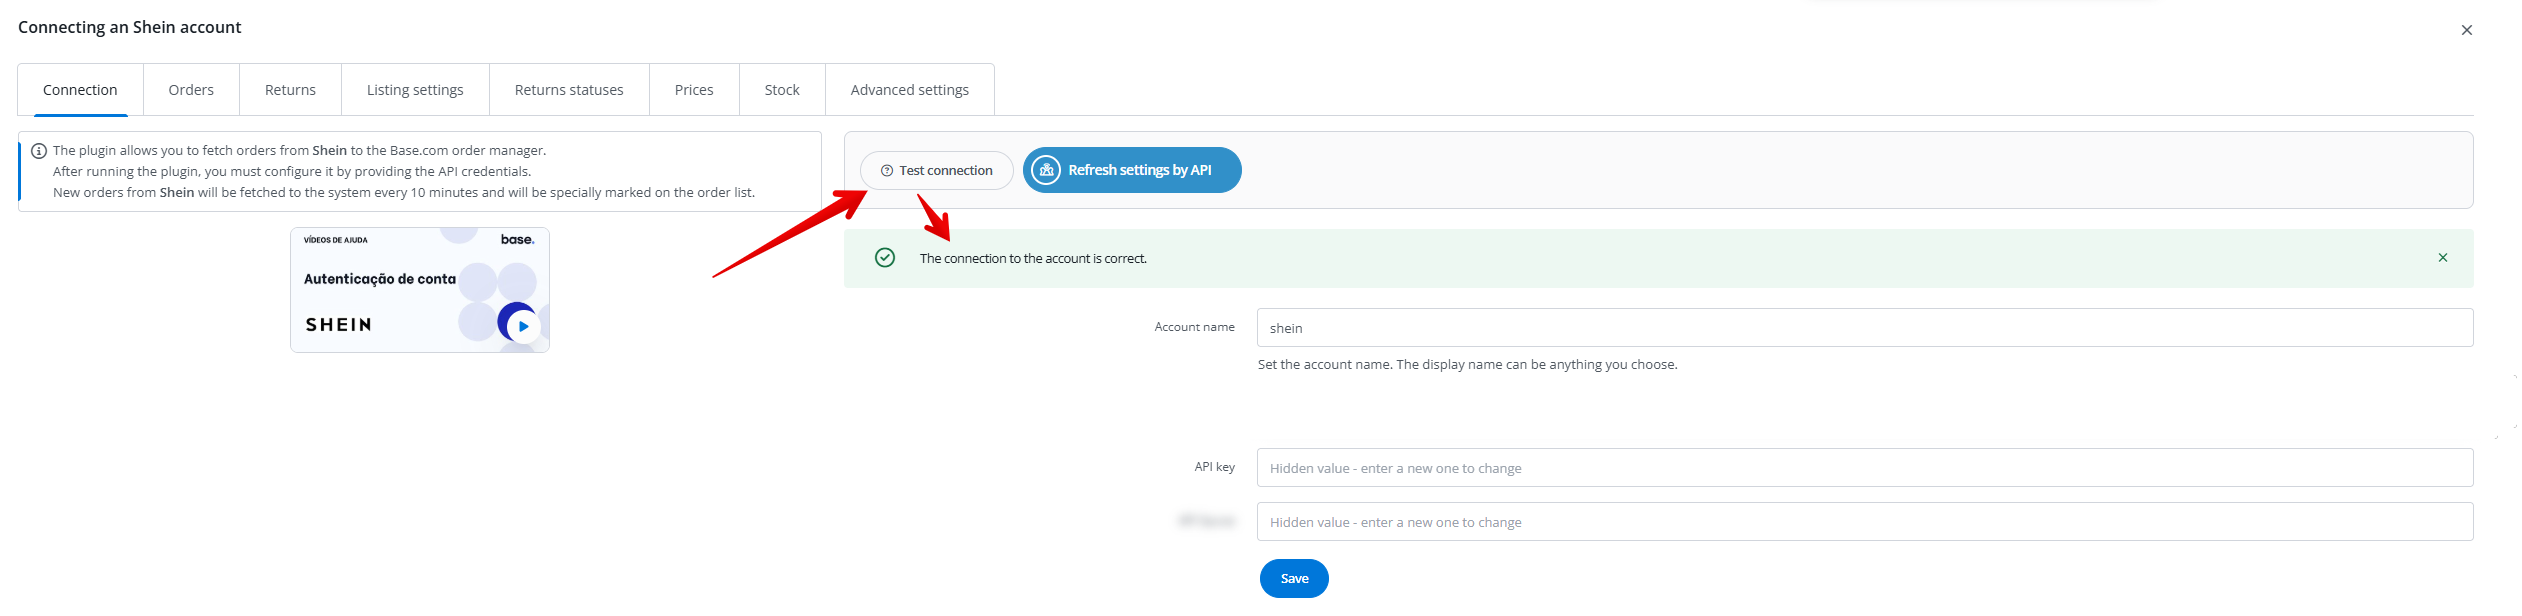
- Fill out account name, API key and API Secret. Click on “Save” afterwards.

- Click “Test connection“. You should see a prompt showing that the connection was successful.
Importing existing Shein offers into Base.
This guide offers a process for importing existing Shein offers into your listing management system. If you have no existing offers, then you can skip this step.
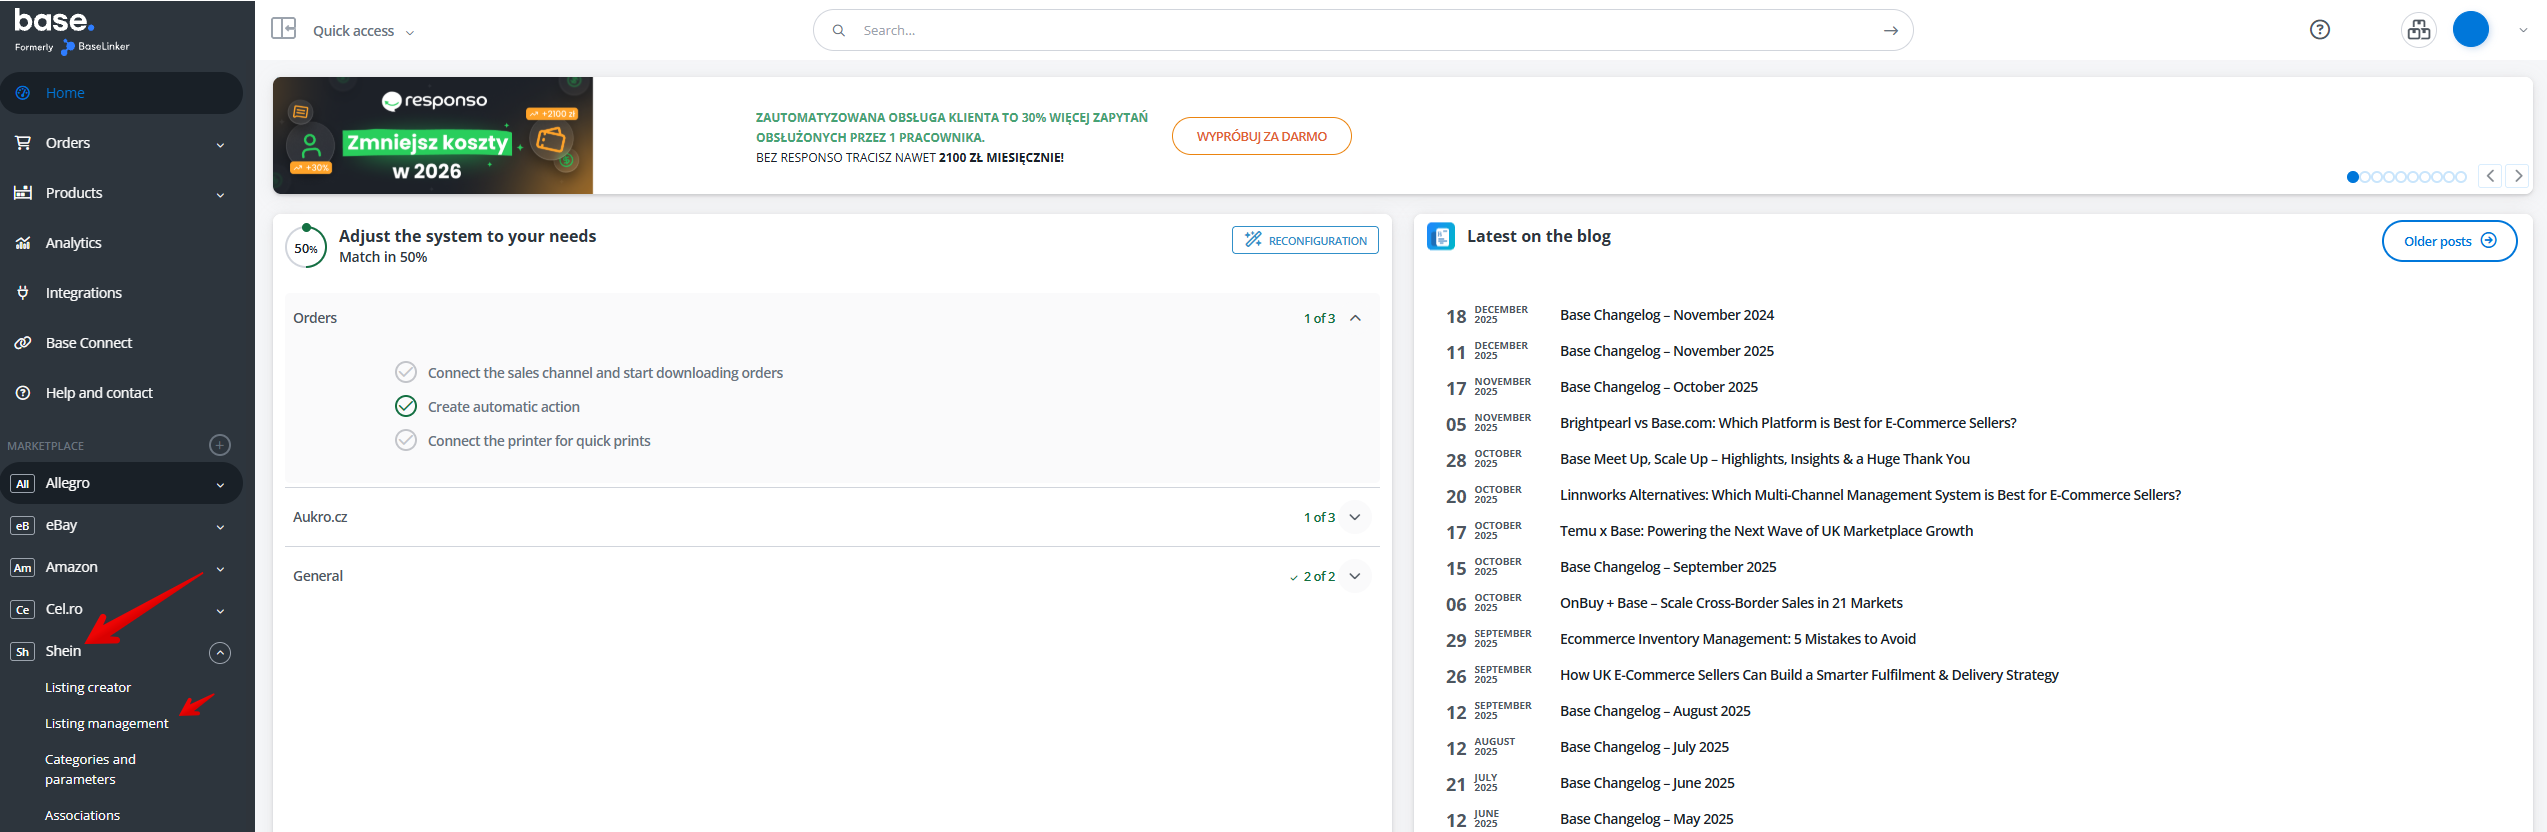
- Click on “Shein” under Marketplace and then “listing management”
- Click “Import offers”

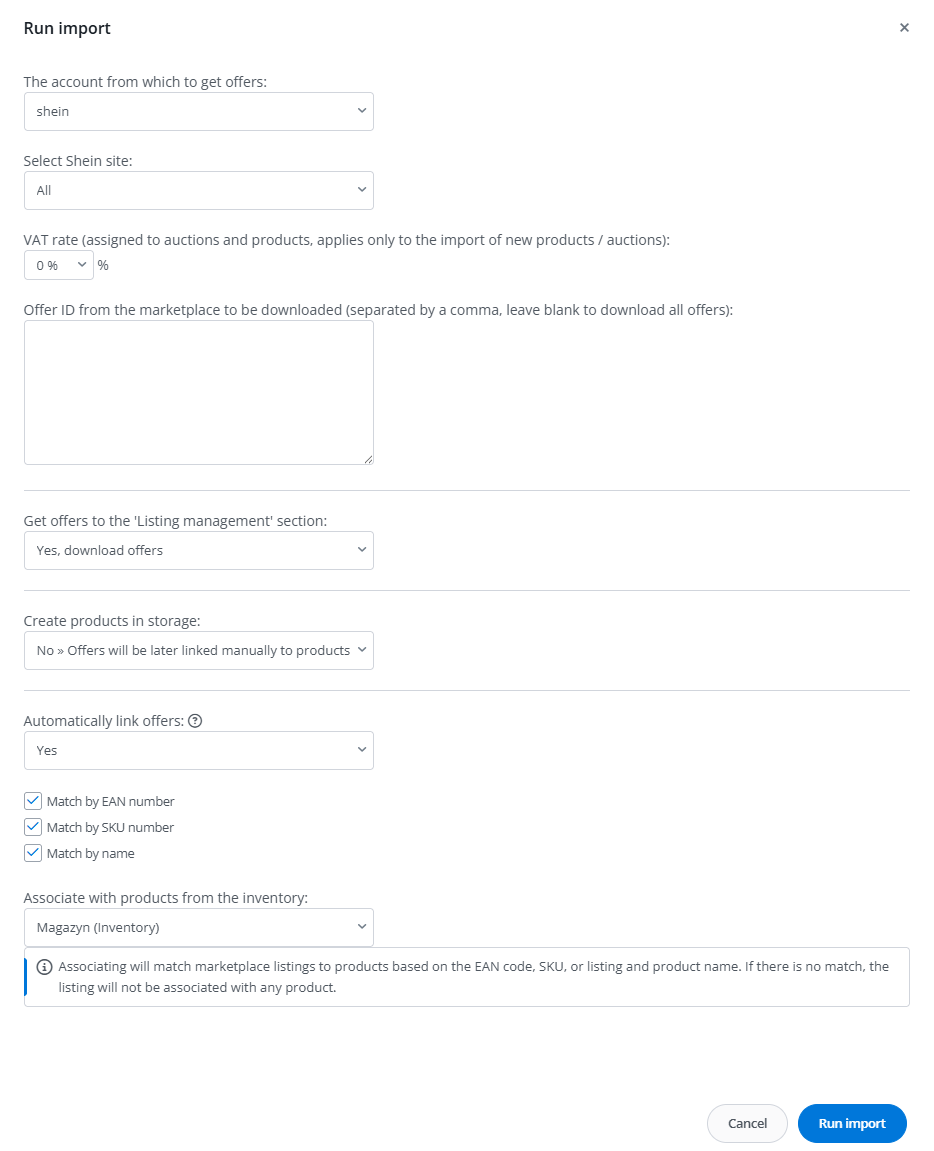
- Click “Import now”

- Select your Shein account and match the rest of the fields to the image. After that click “Run import”
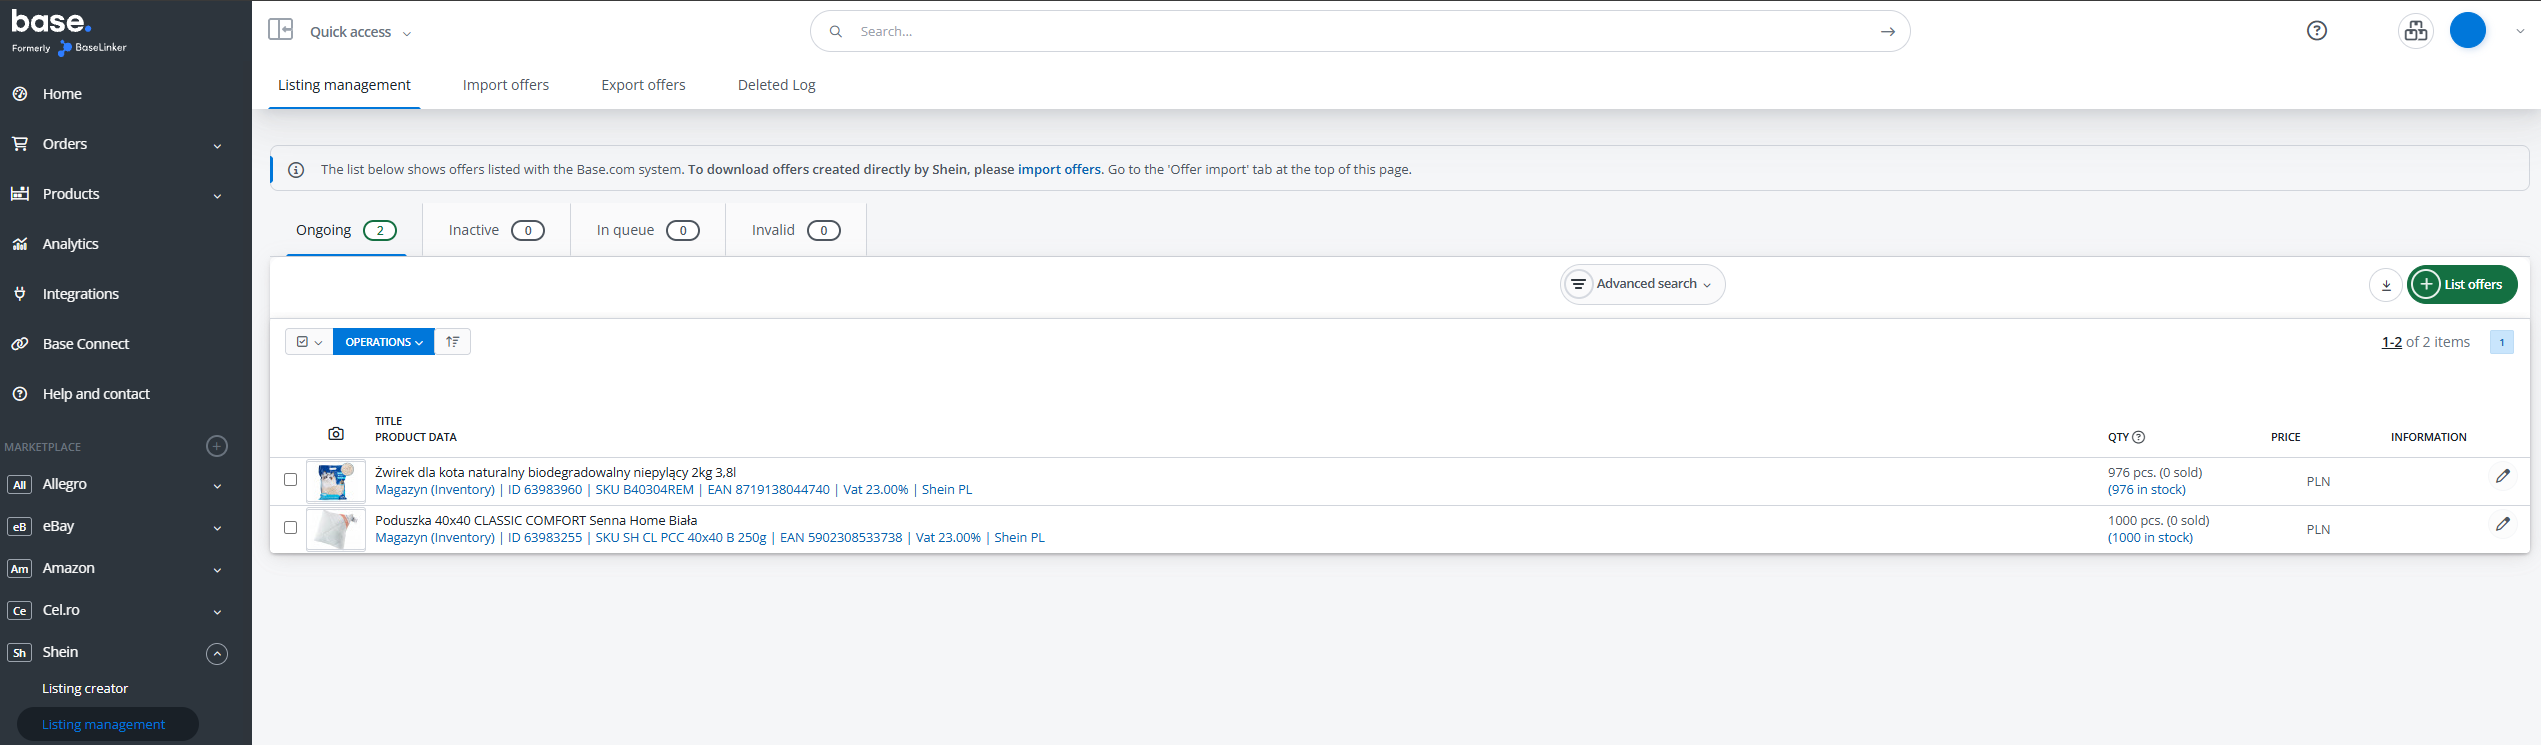
- Once the import is complete, click the “Listing management” tab. All existing offers on Shein will be listed here.
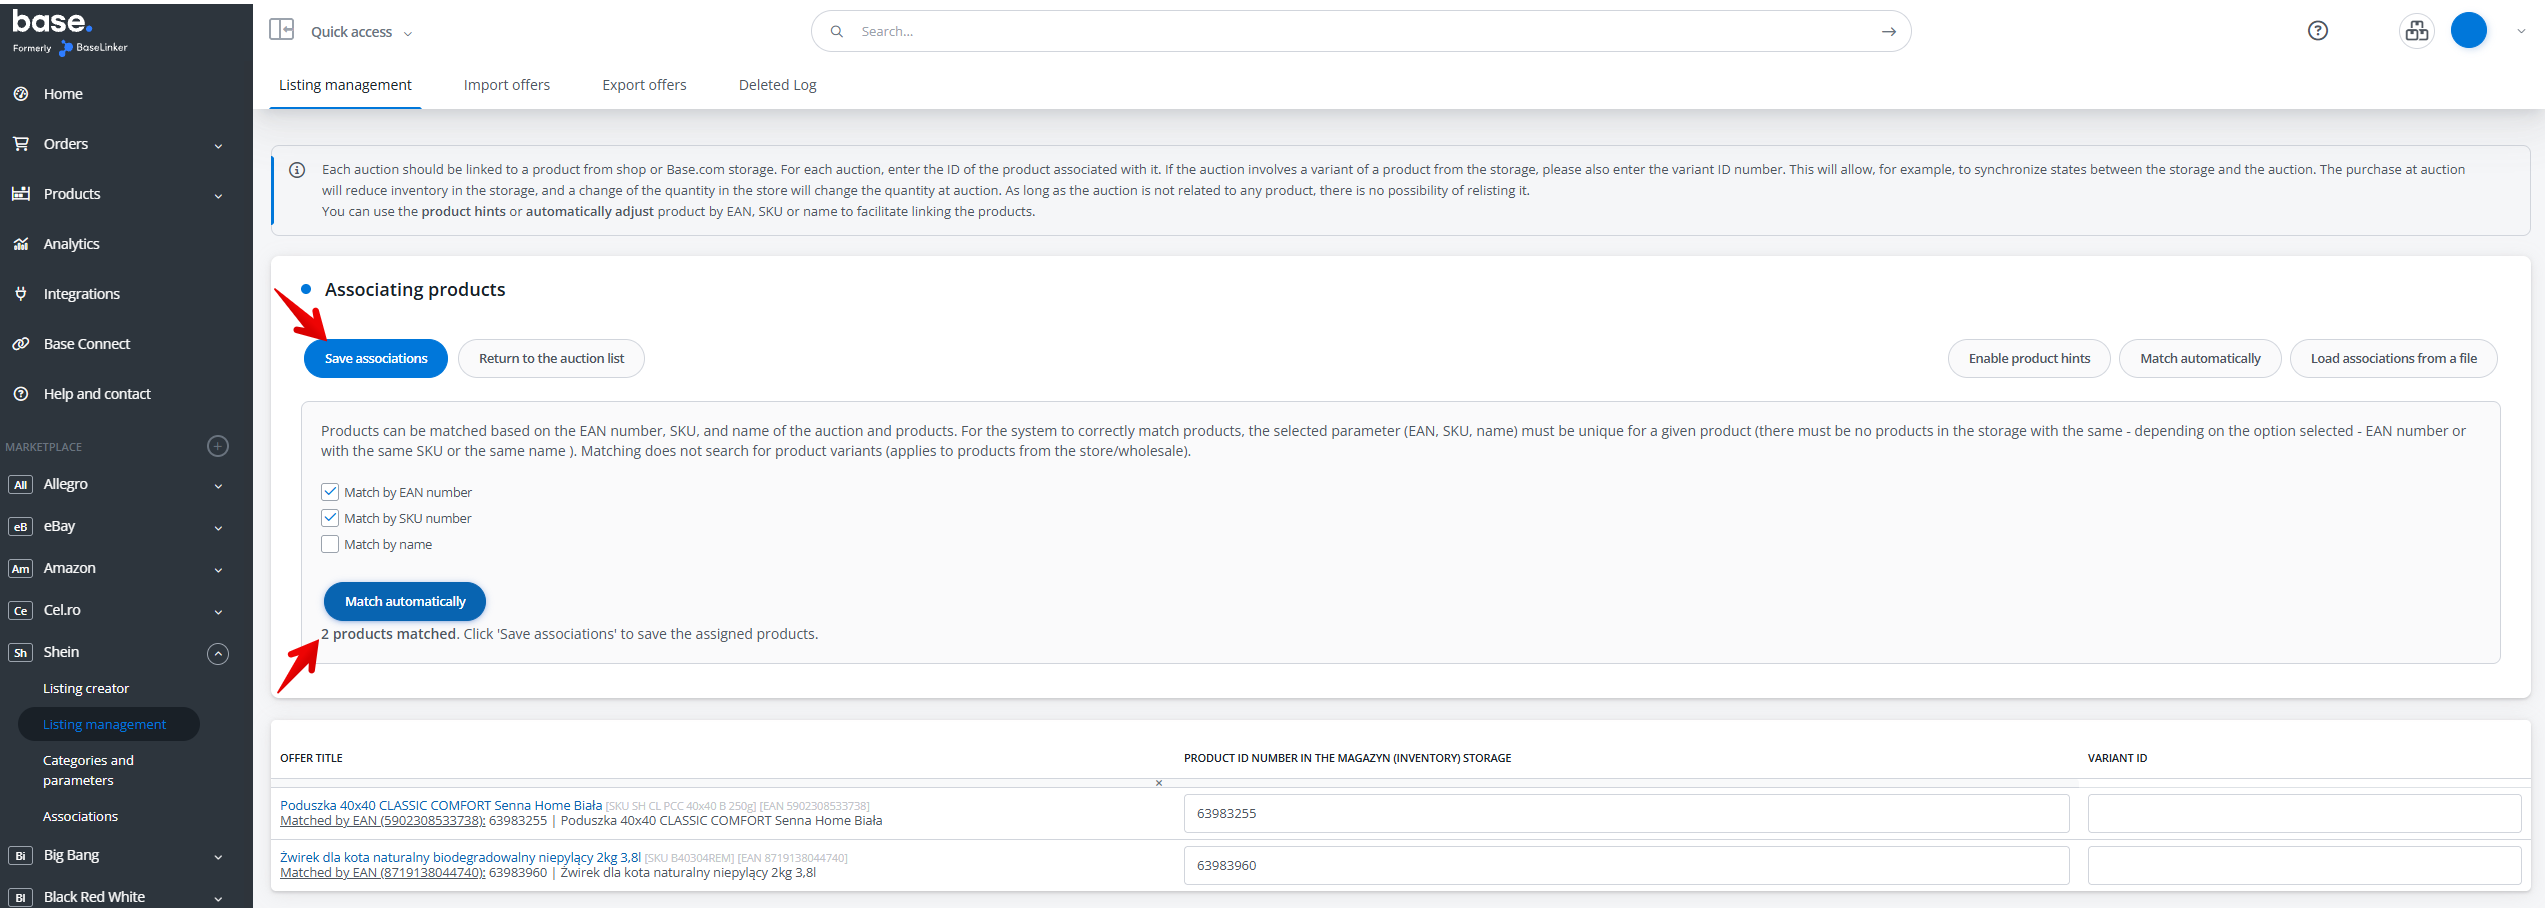
Linking Shein ongoing offers with product from inventory
This guide offers a step-by-step approach to effectively link Shein’s ongoing offers with product inventory. If you do not currently have any existing offers on Shein, then you can skip this chapter.
- Click “Listing management” under the Shein Marketplace. Then “select all” ongoing offers
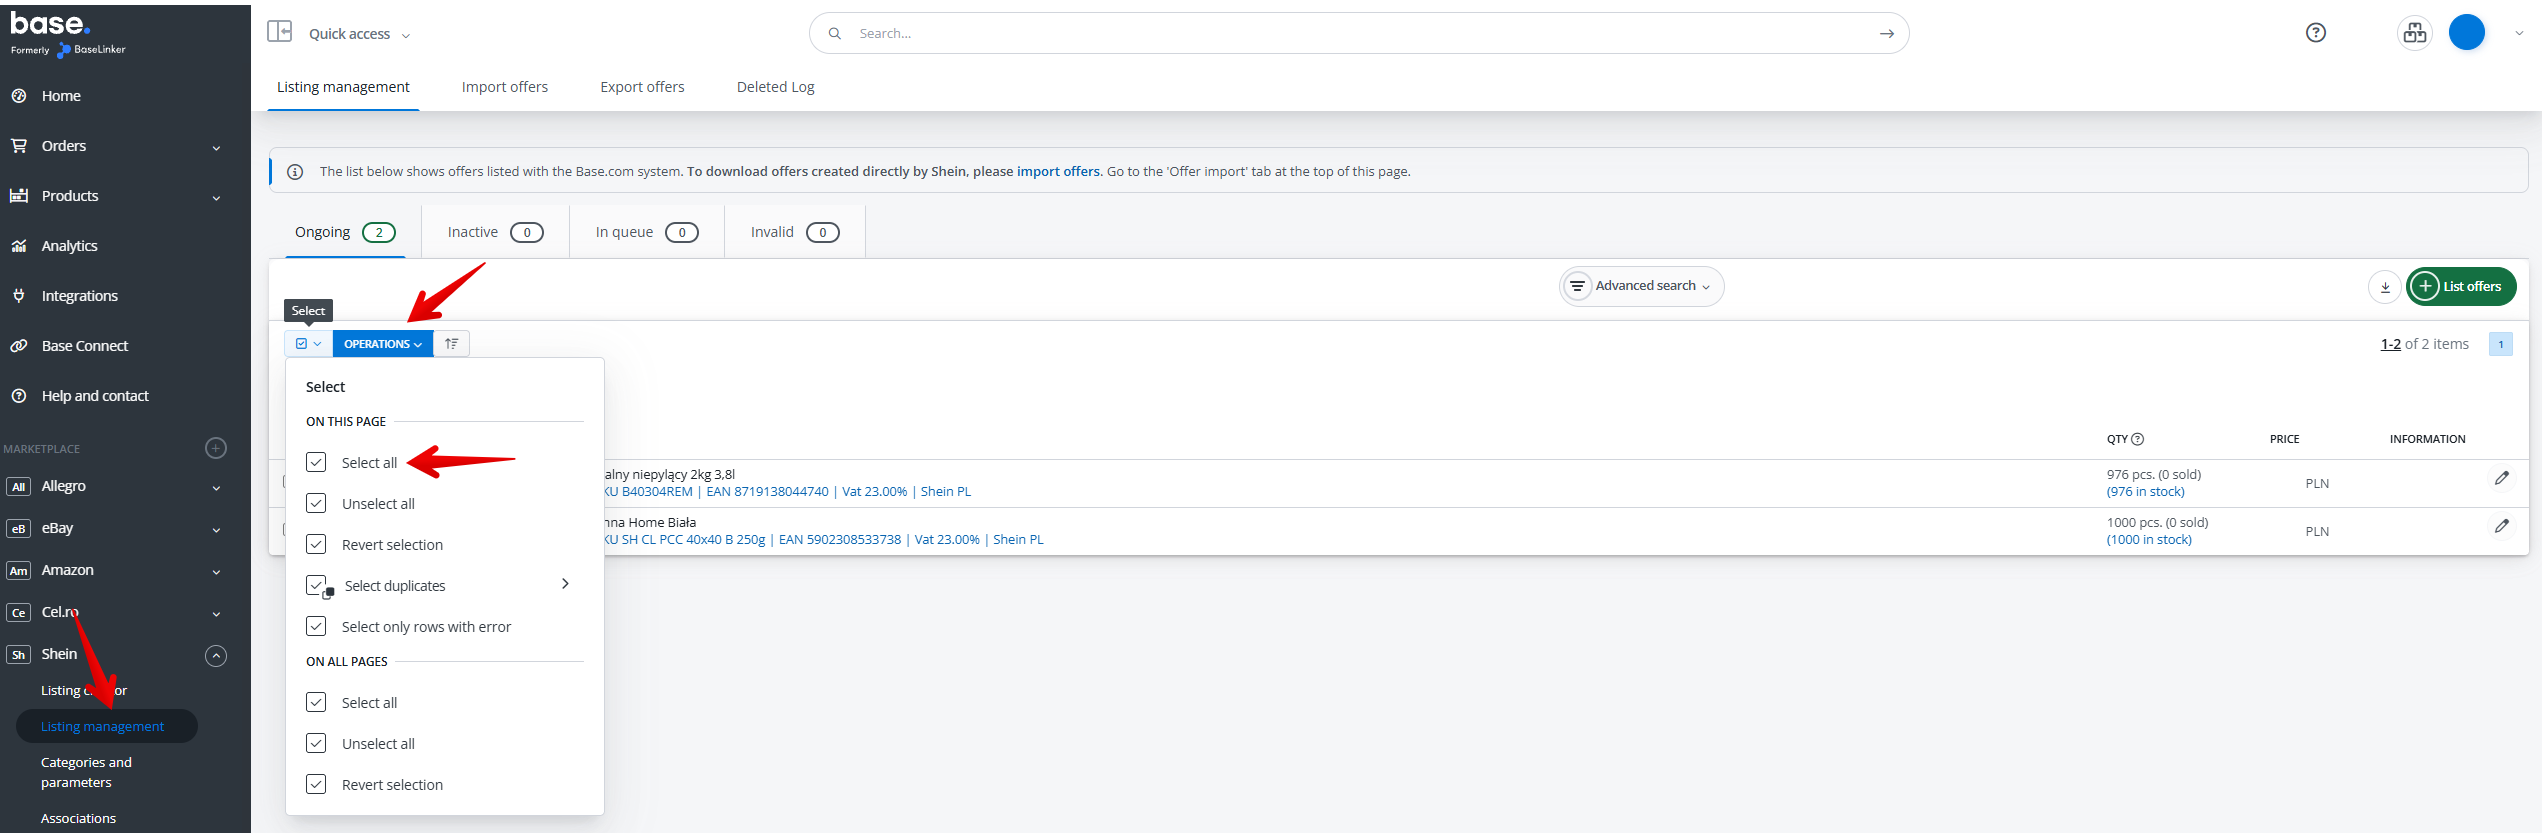
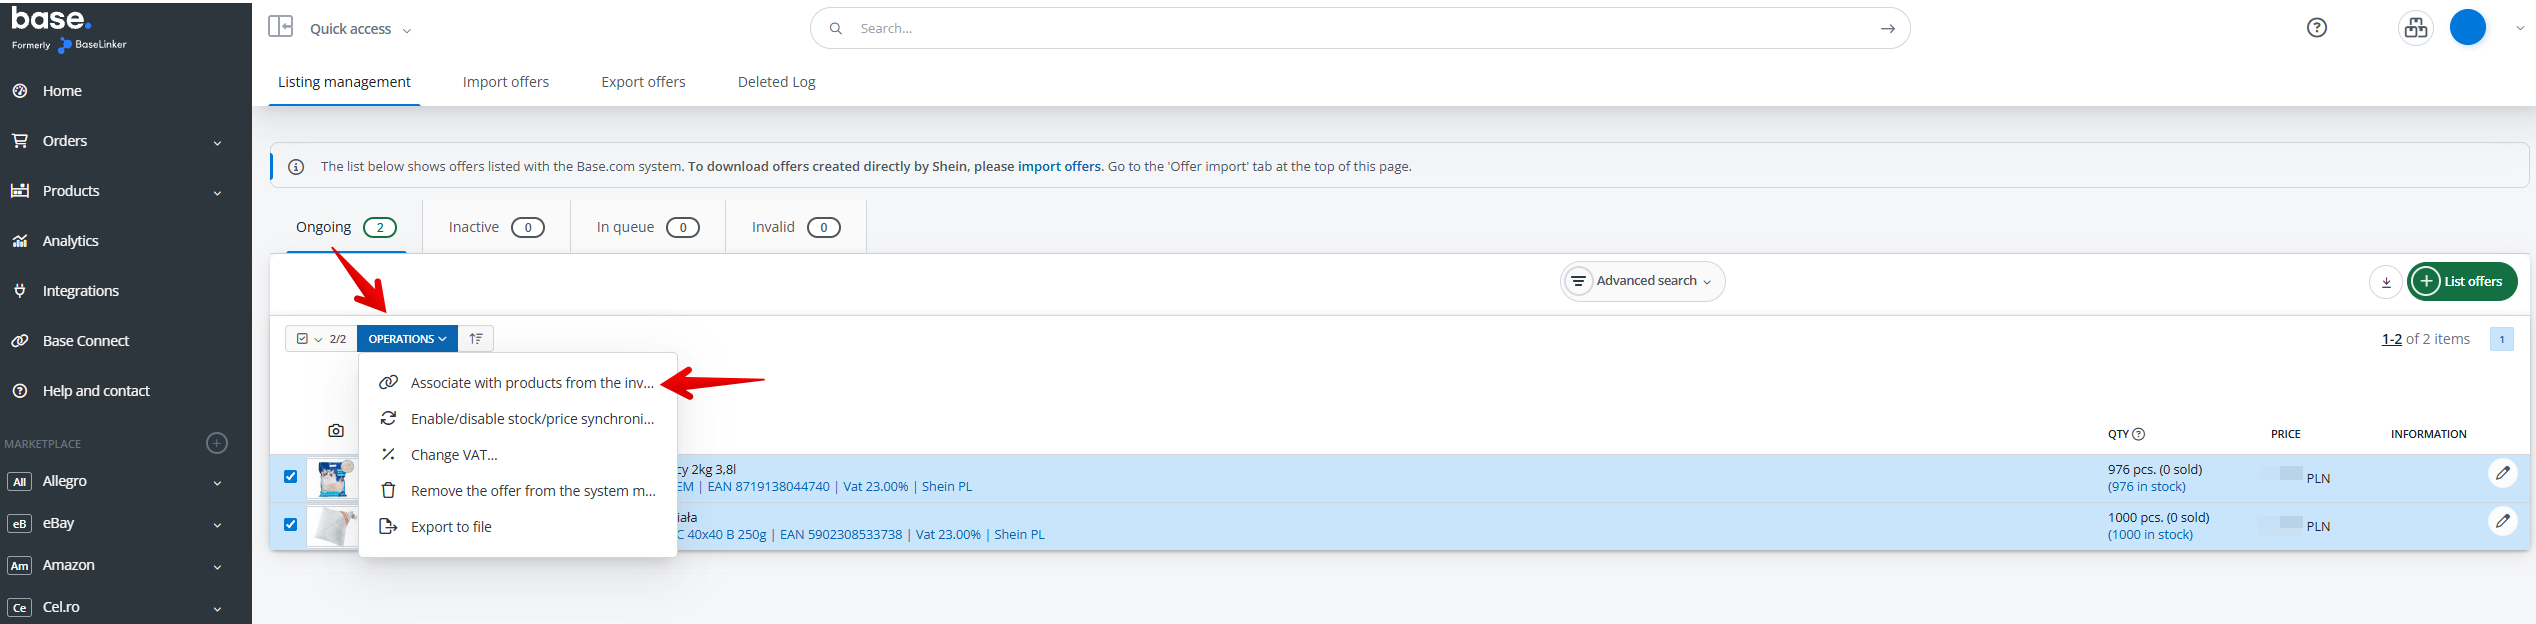
- Click “Operations” and then “Associate with products from the storage”
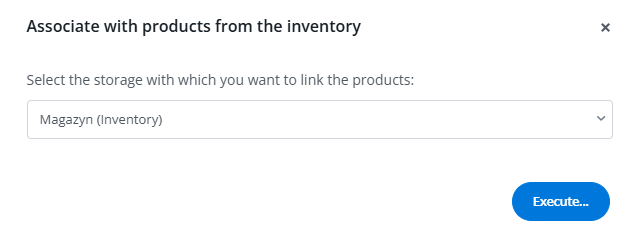
- Select your inventory and then click “execute” button.
- Click “Match automatically”
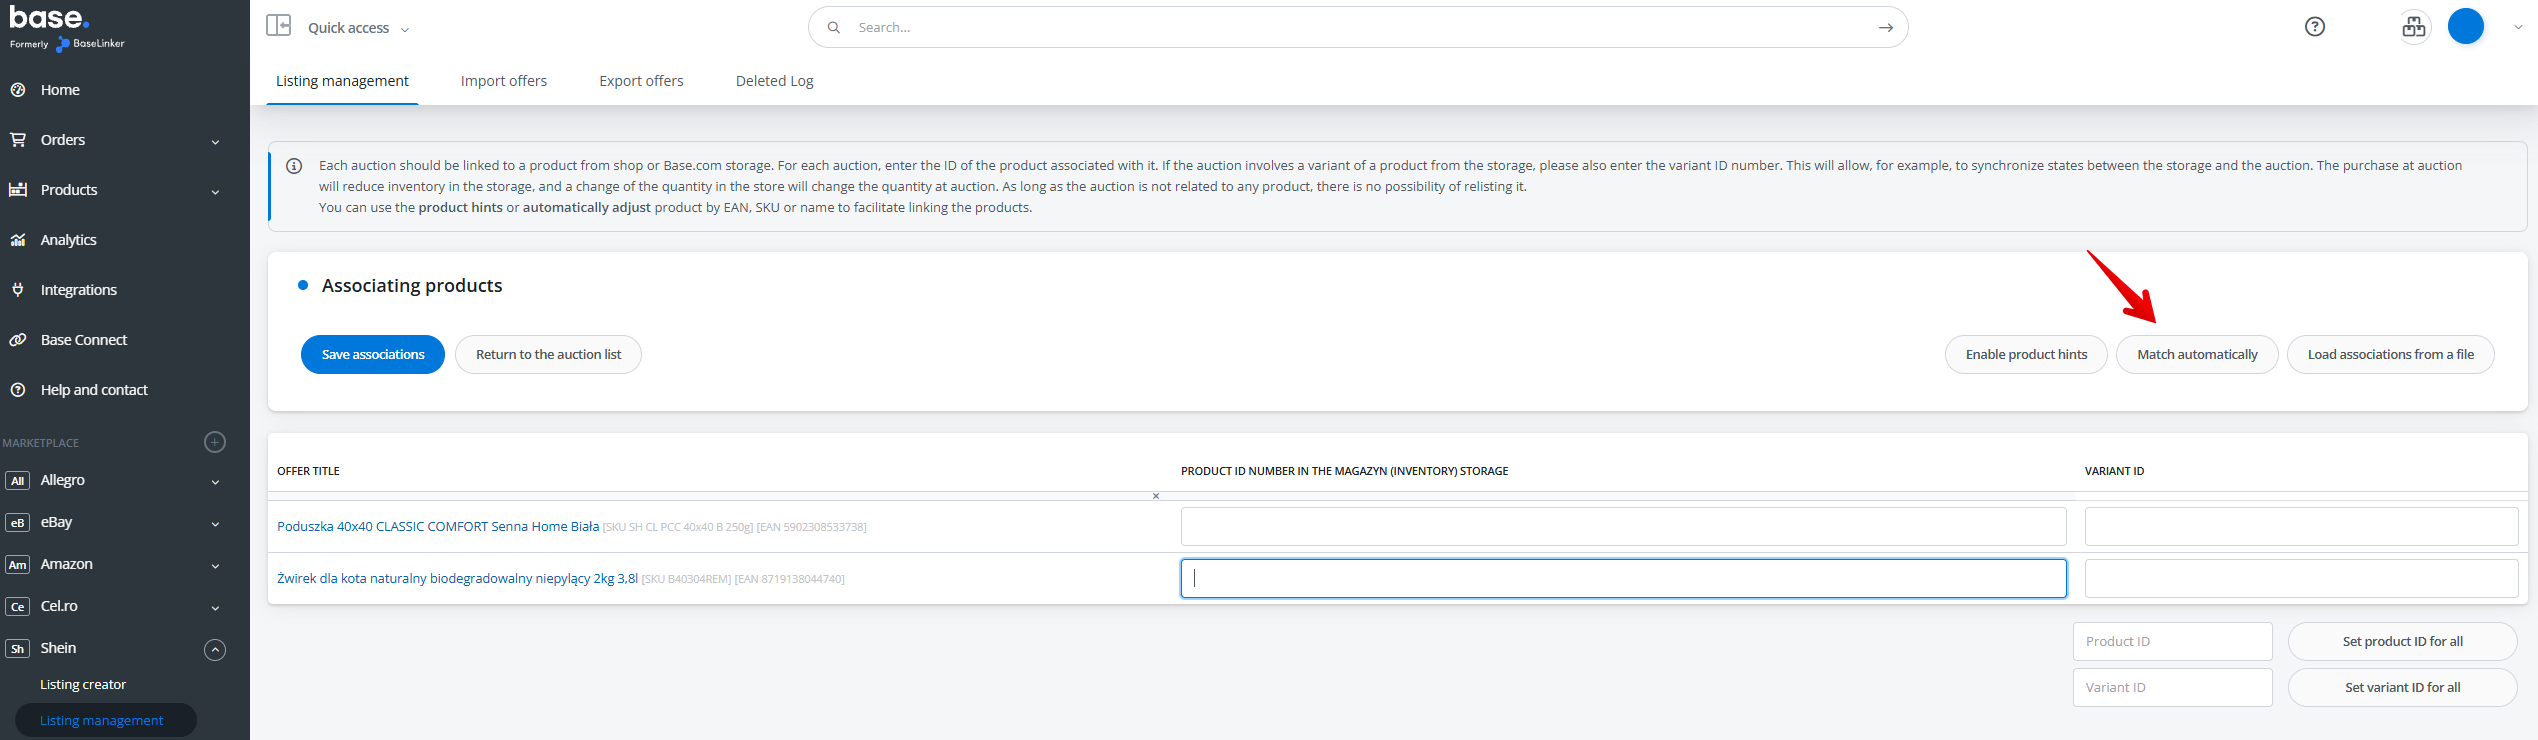
- Unclick “Match by name” and then click “match automatically”
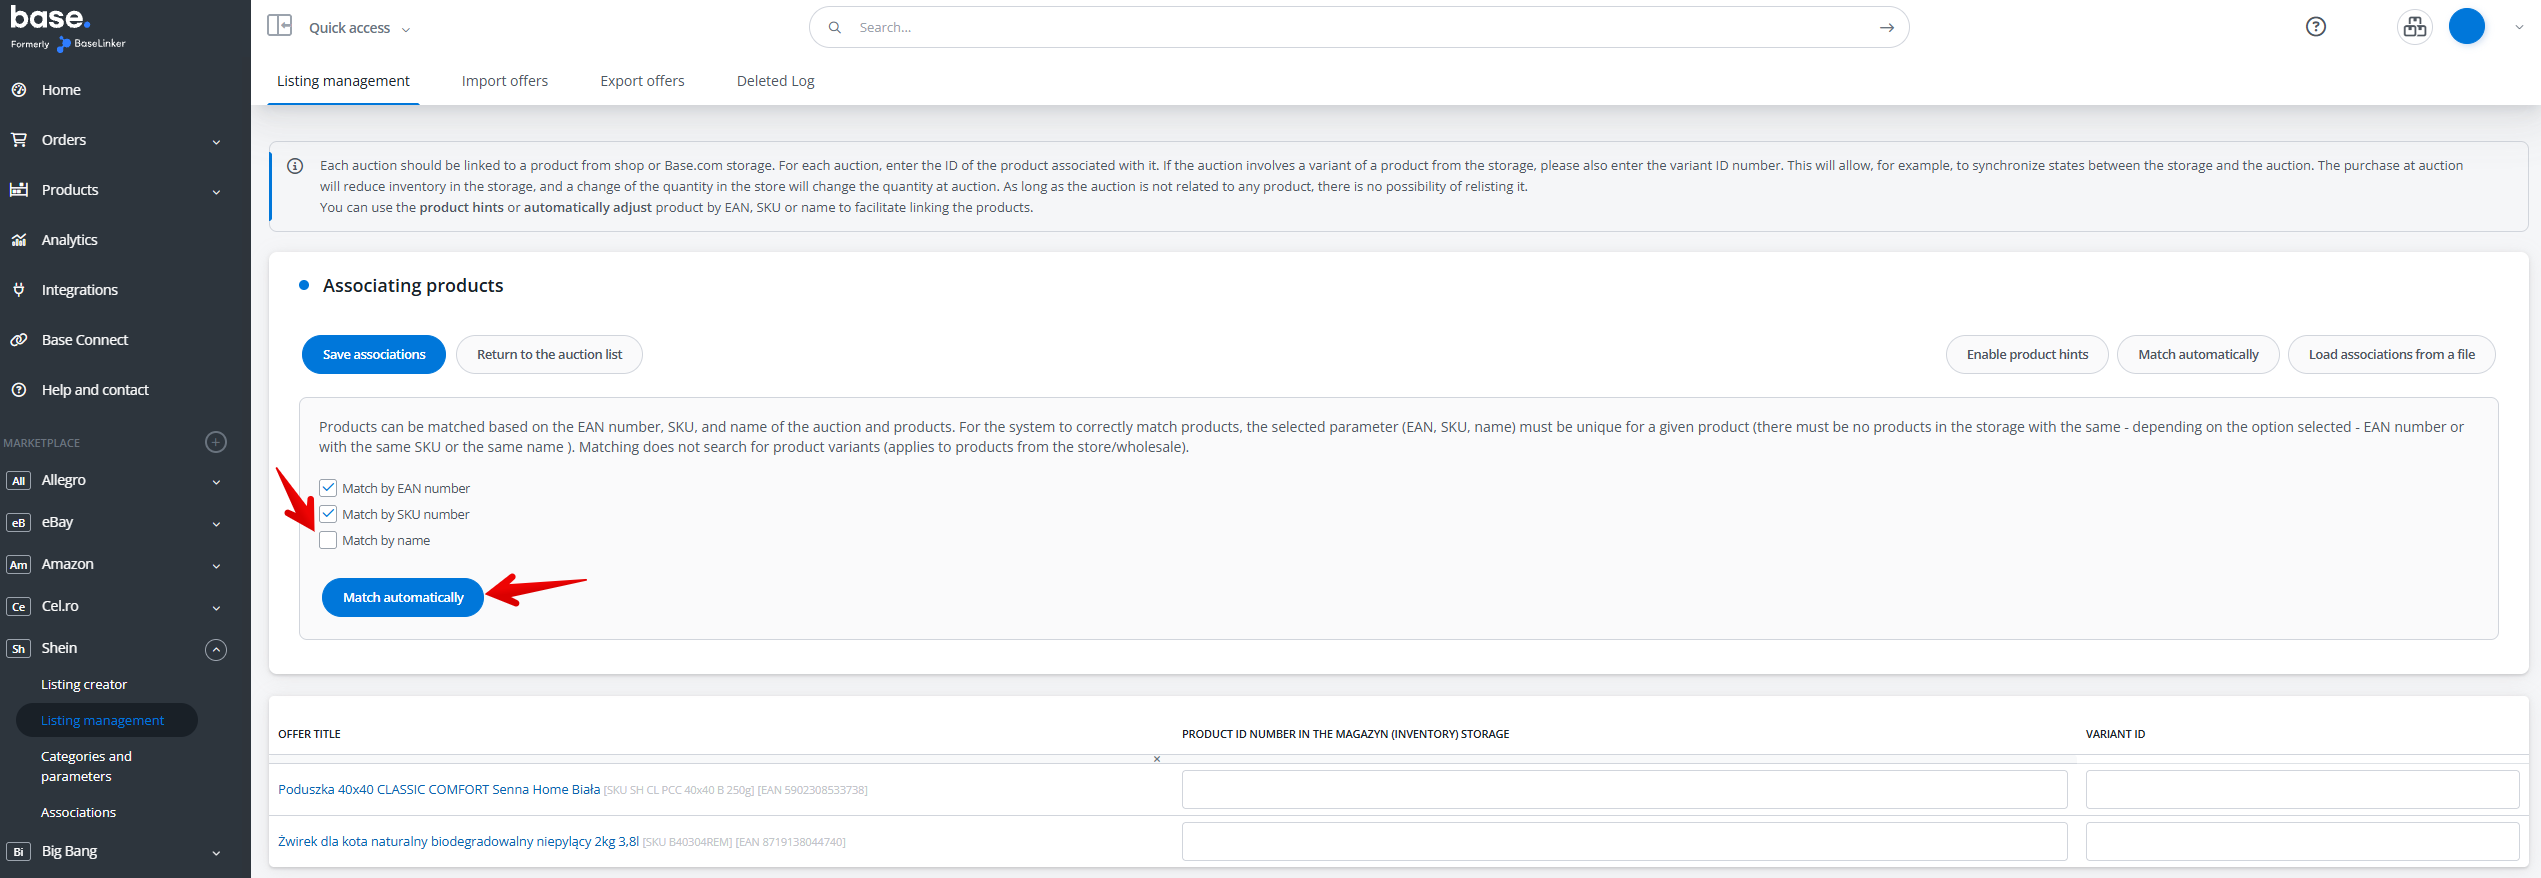
- Click “Save associations”
- Return to “Product list“. You should now see a blue Shein tag next to the linked products under the Integration column.

Setting Up Shopify Order Tracking
This guide explains how to automatically send Shopify tracking information for Shein orders that are fulfilled by Shopify.
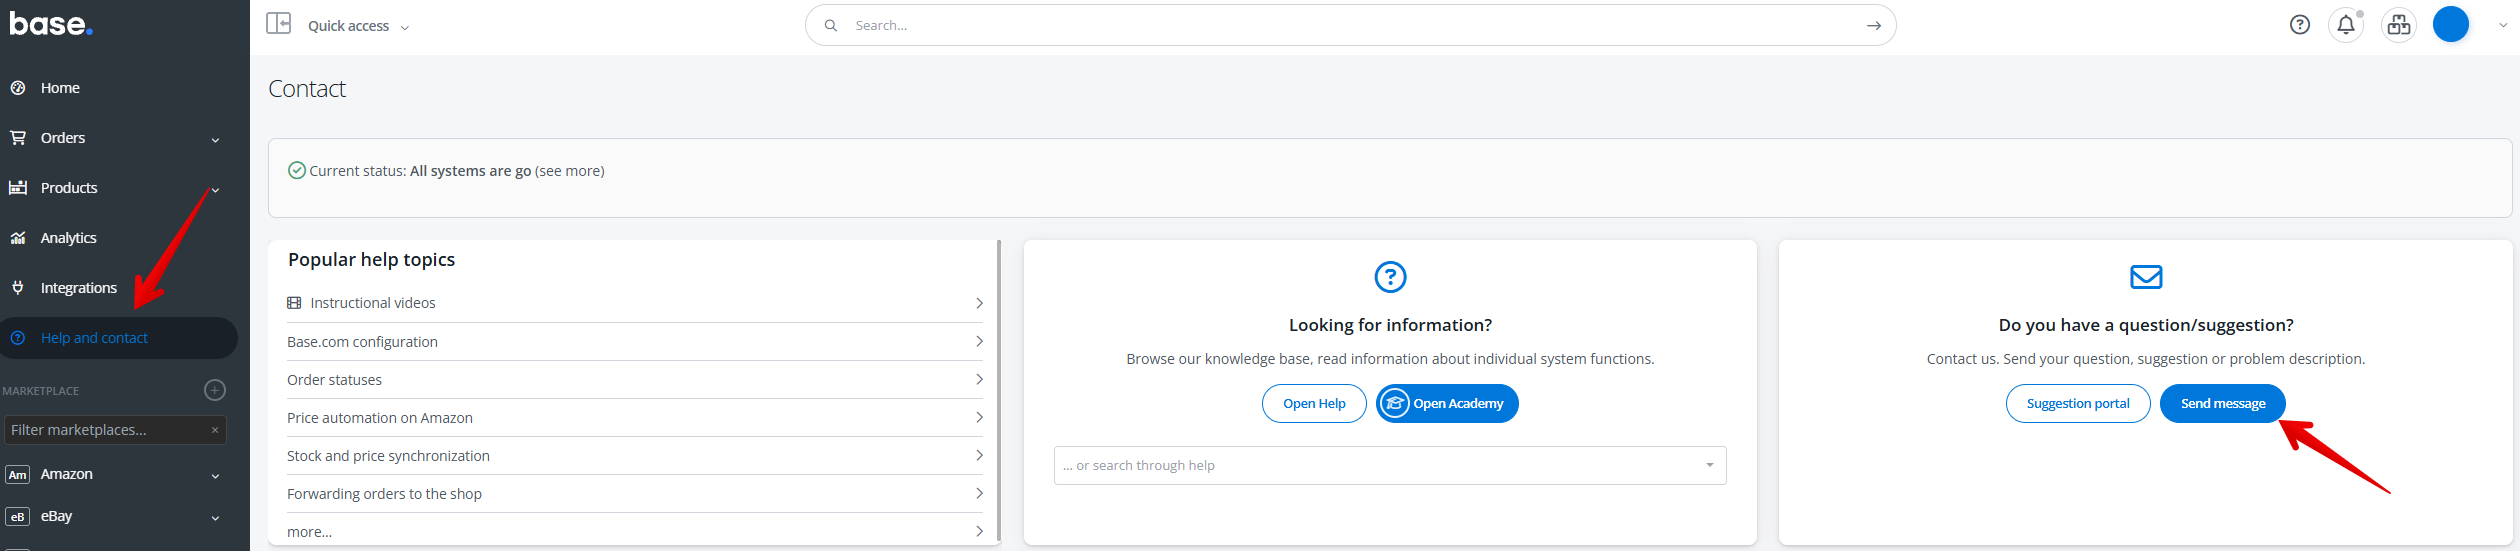
You will first need to open a support ticket and request to be added to tracking information forward via Shopify pool.
- Click “Help and contact” and then “Send message”
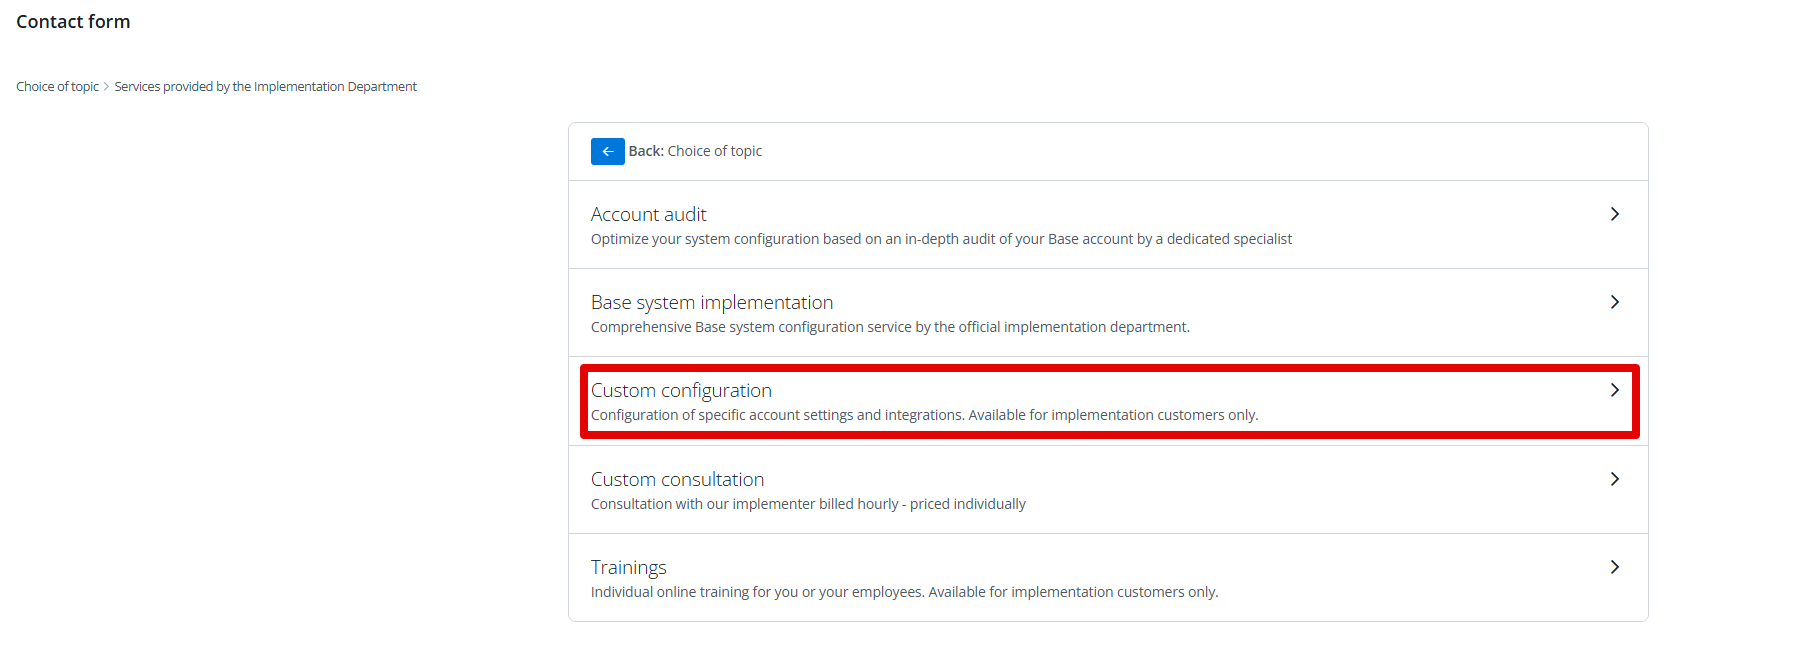
- Click “Comprehensive system implementations, custom configurations, individual consultations, account audits, dedicated training courses”
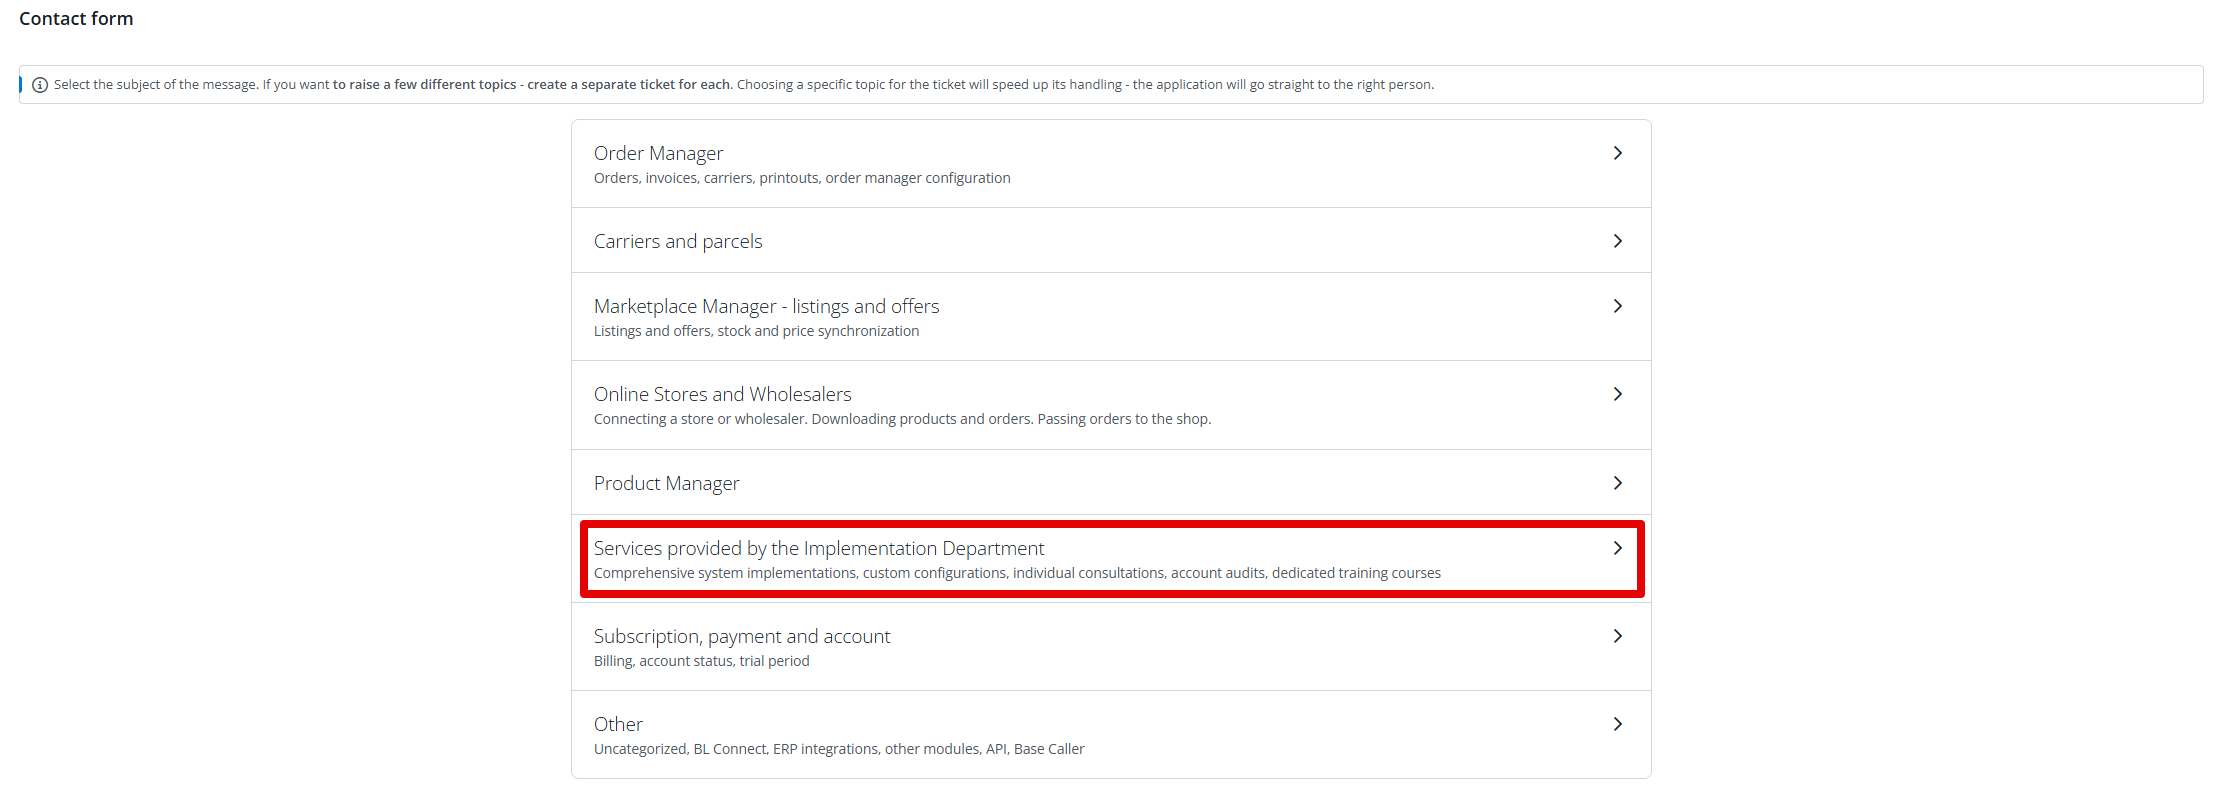
- Click “Configuration of specific account settings and integrations. Available for implementation customers only.”
- Click the “Ticket description” field and type the following message:
“Please add my account to the Shopify Tracking pool.”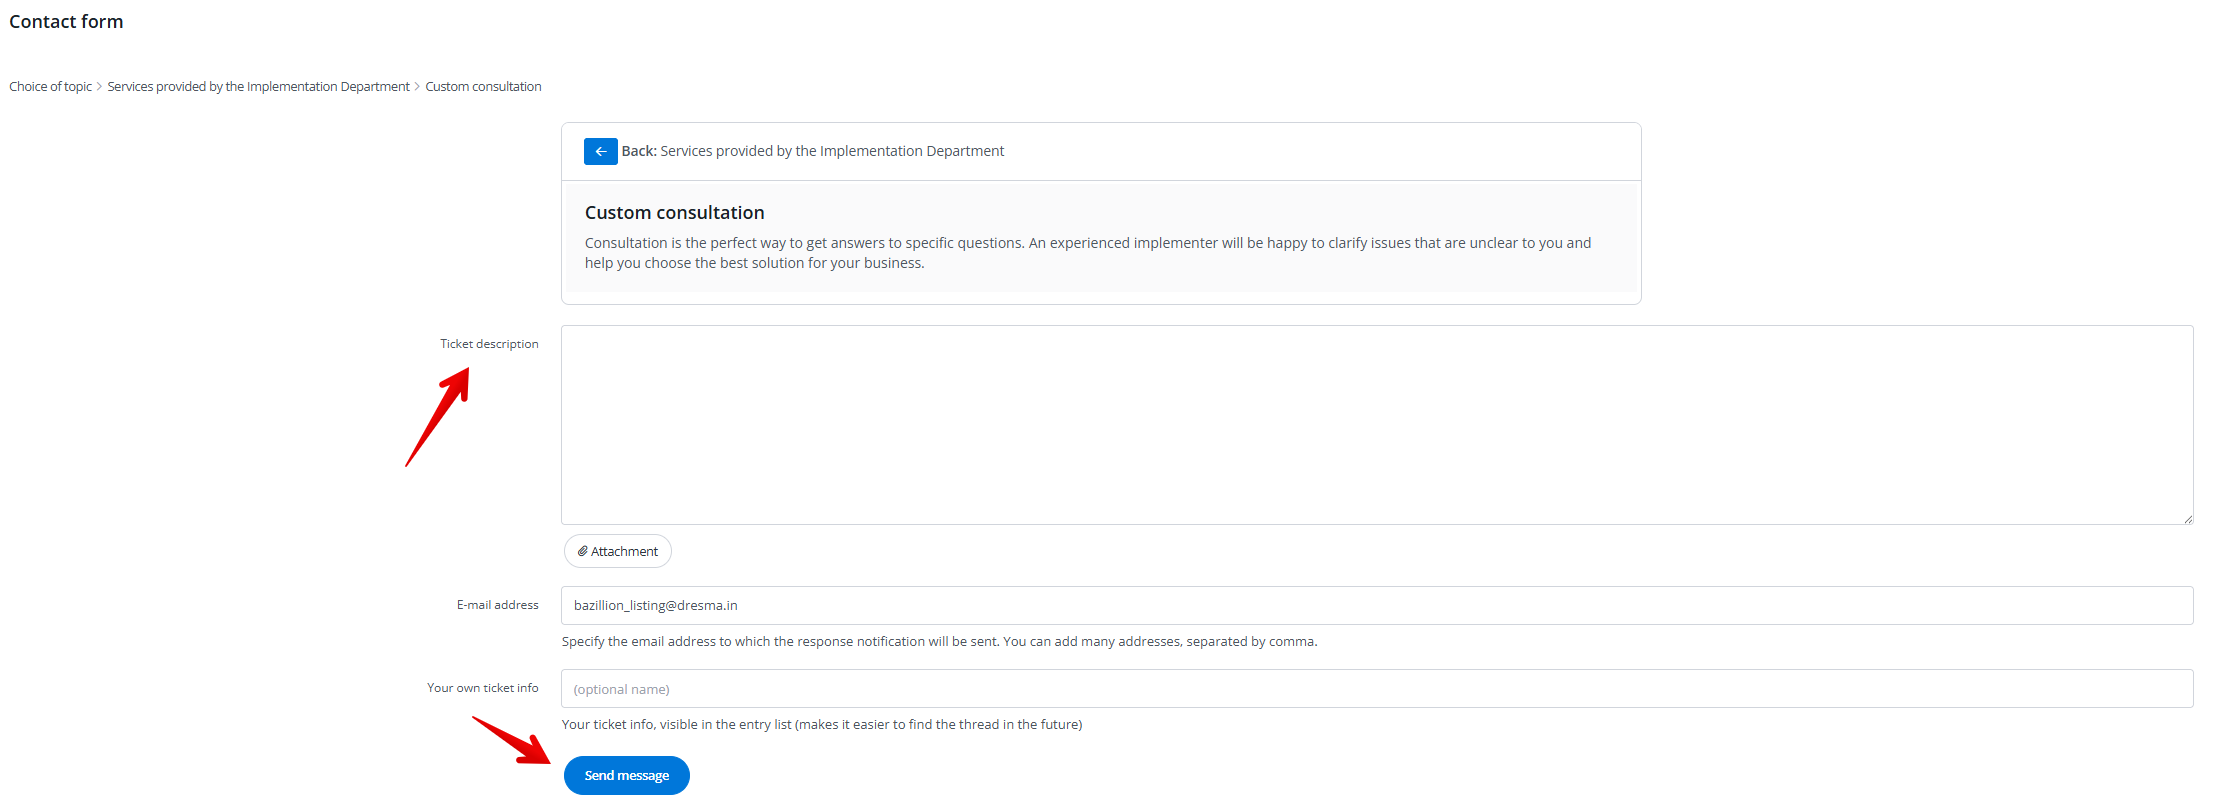
Click “Send message” and our Support team should respond within 24 hours letting you know the status of the request.
- Go to “integrations” and “Shopify”

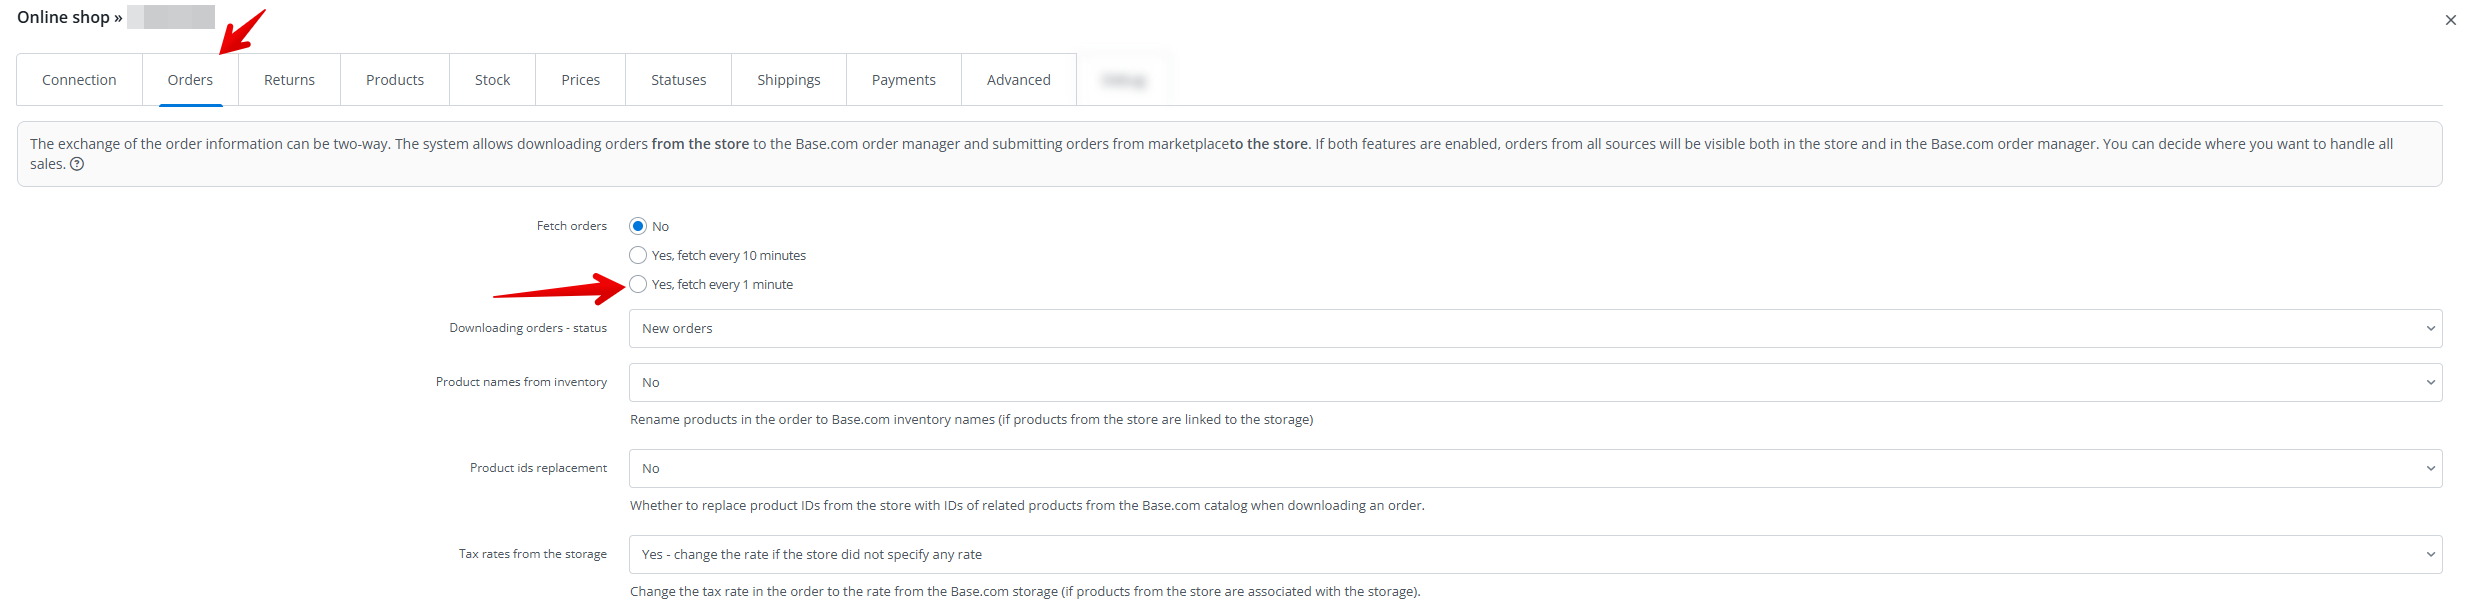
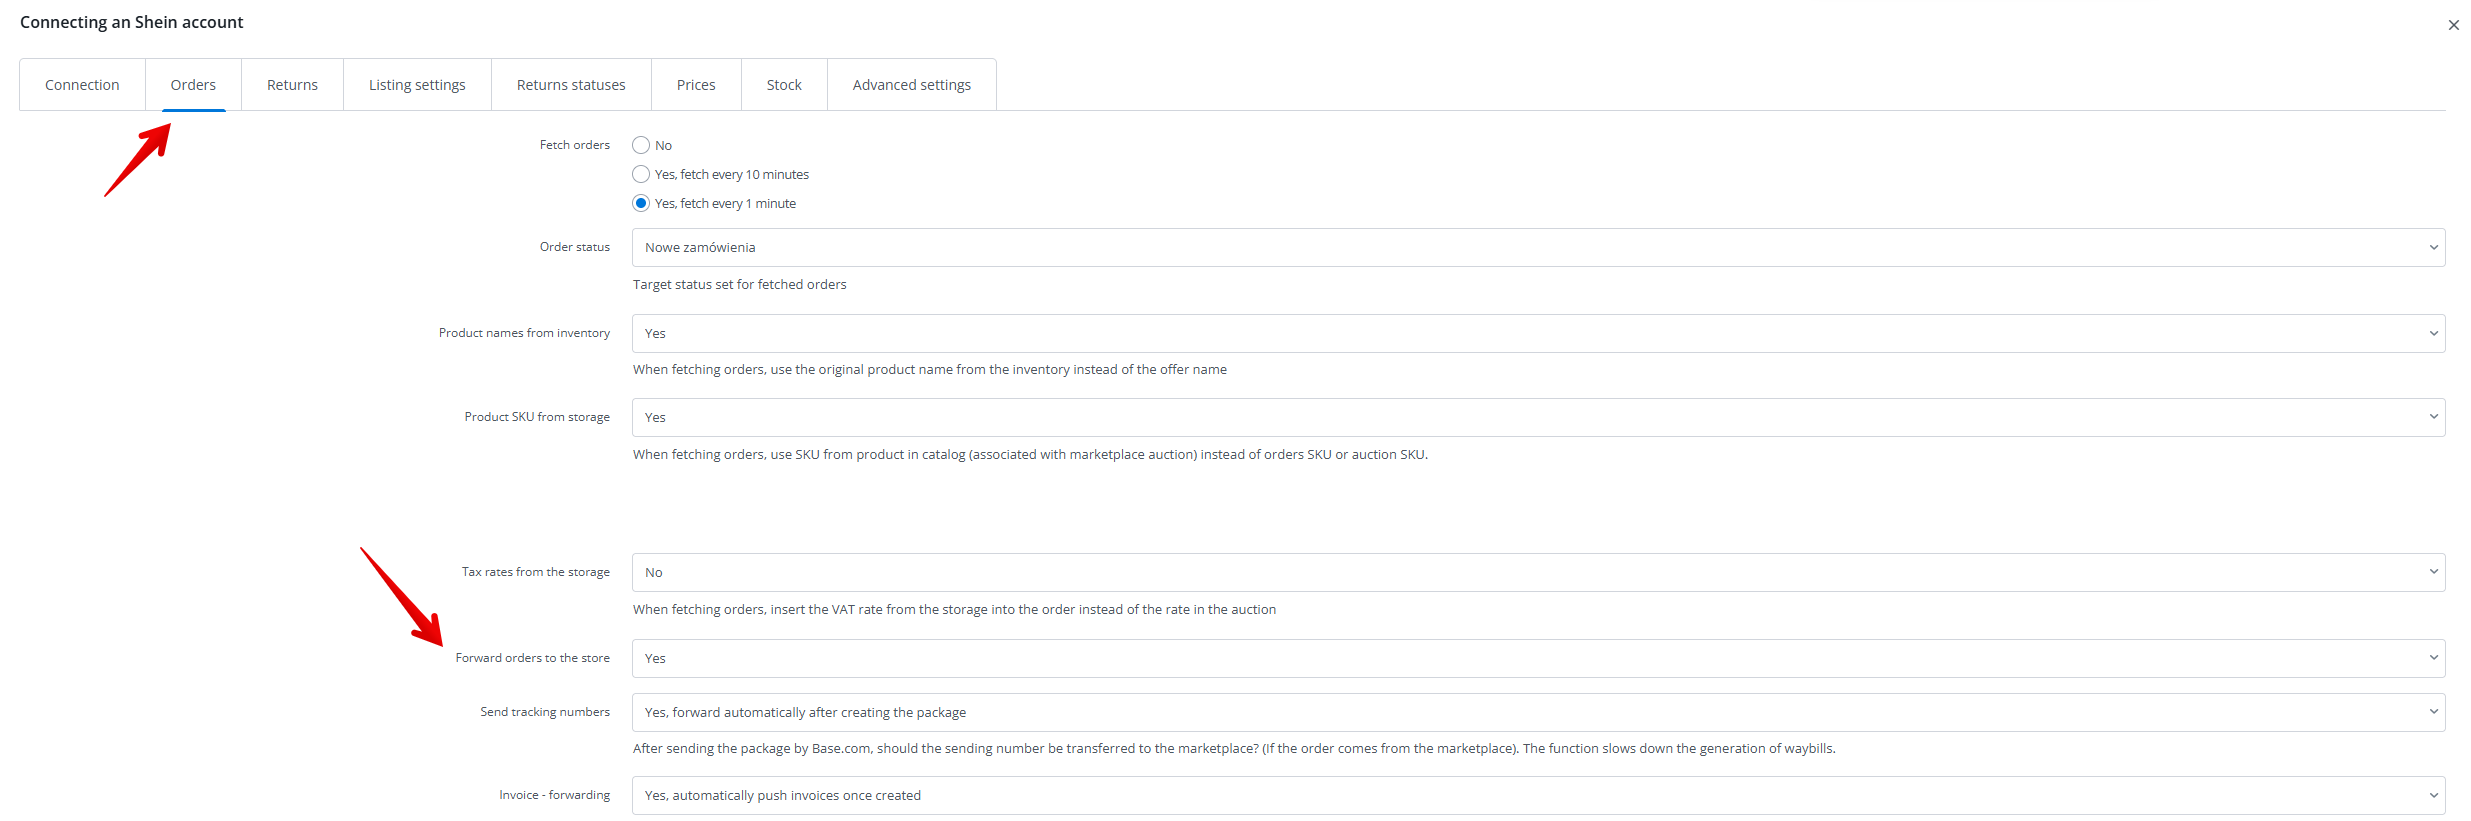
- Navigate to the Orders tab. Under “Fetch orders“, change to “Yes, download every 1 minute“.
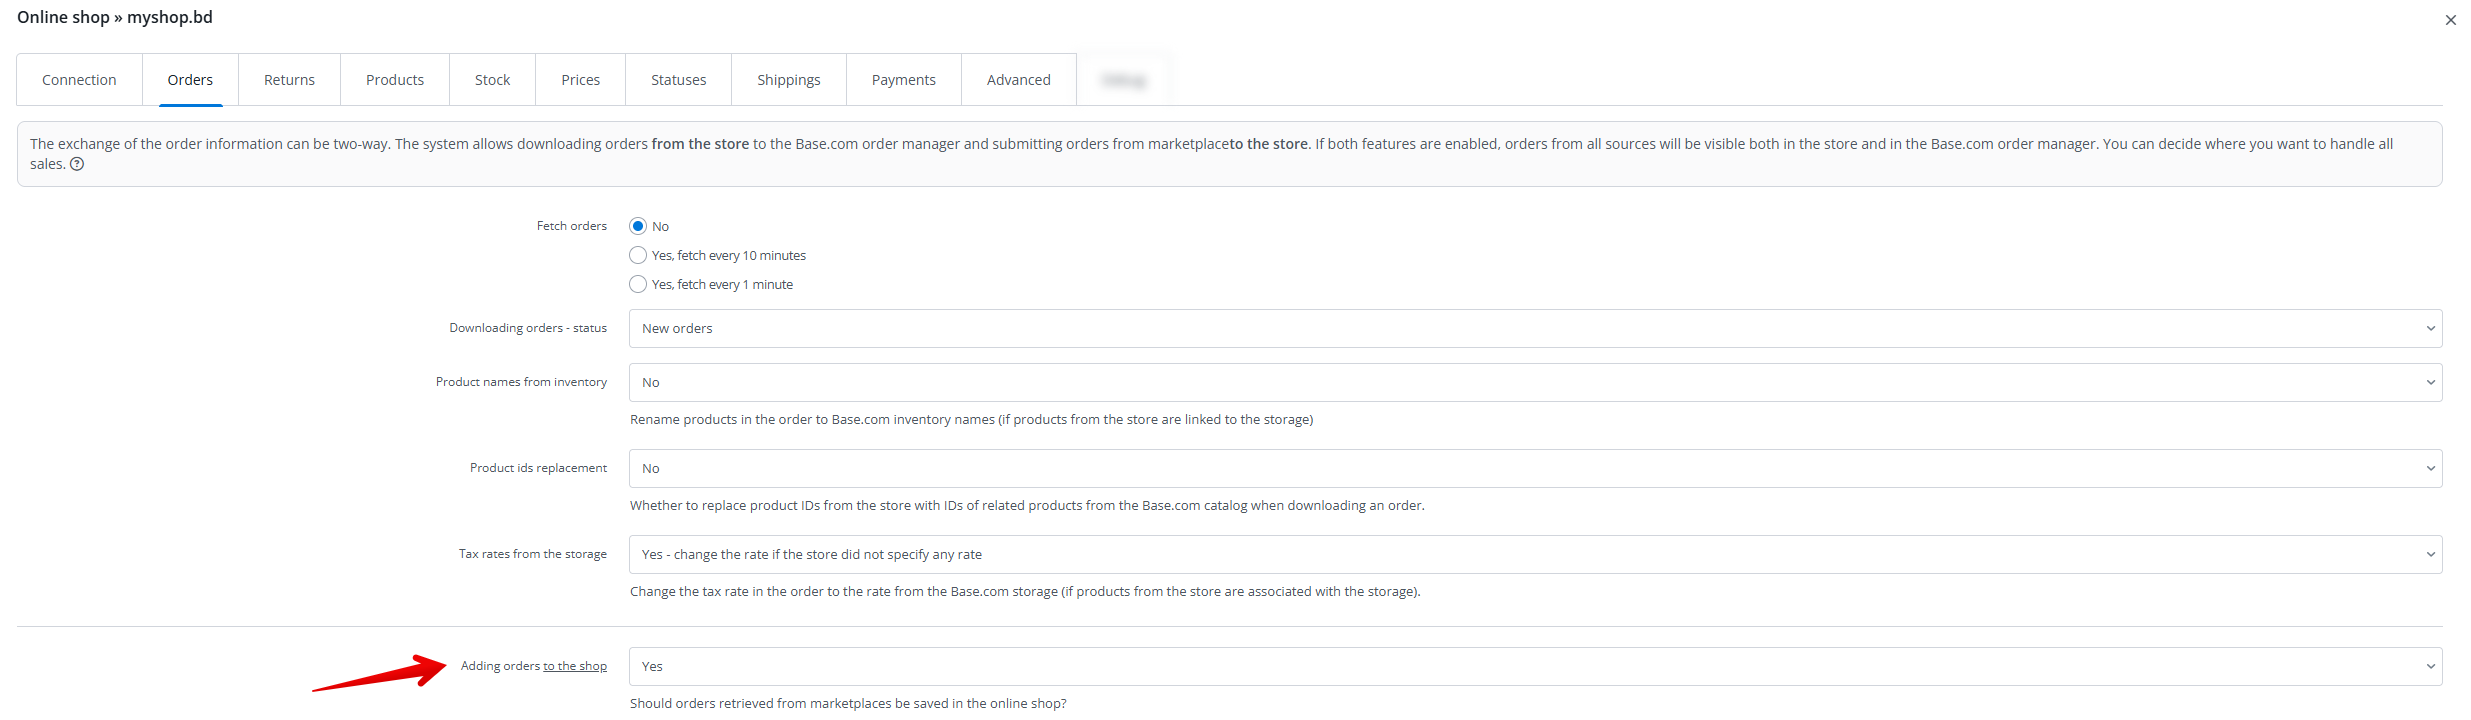
- Find “Adding orders to the shop” and change to “Yes“.
- Navigate to the Shipping tab. Click “Send tracking numbers“. Select the “Yes, forward automatically after creating the package” option and “Yes, fetch tracking numbers” option. Then click “save”

- Click “Advanced“. Find the “oa_remap” field and type in “tags=extra_field_1,“.

- Scroll and find the field “og_get_orders_only_with_specific_tags“. Type “BL_SHEIN”

- After finishing configuration, click “save” button.

- Next, we will need to set up an Automatic Action in Orders. This will tag any order from Shein with “BL_SHEIN” when it is sent to Shopify for fulfillment. Click “Orders” and then “Automatic Actions”

- Create automatic action mentioned in the picture below

- After that go back to the Shein integration. In the “orders” tab select the “Yes” option for Forwarding orders to the store.
- Now Shopify will forward tracking information for any new orders coming from Shein.
Creating offers on Shein
This guide provides a step-by-step process for listing products without variations on the Shein Marketplace.
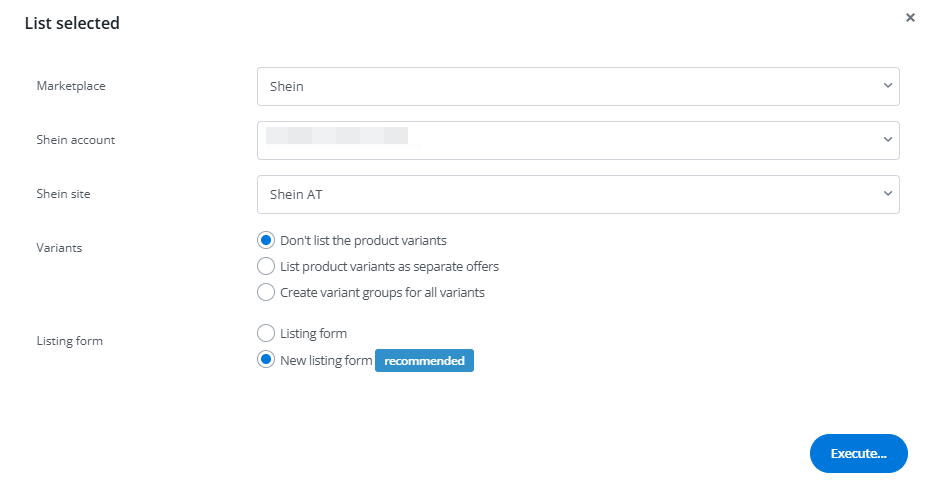
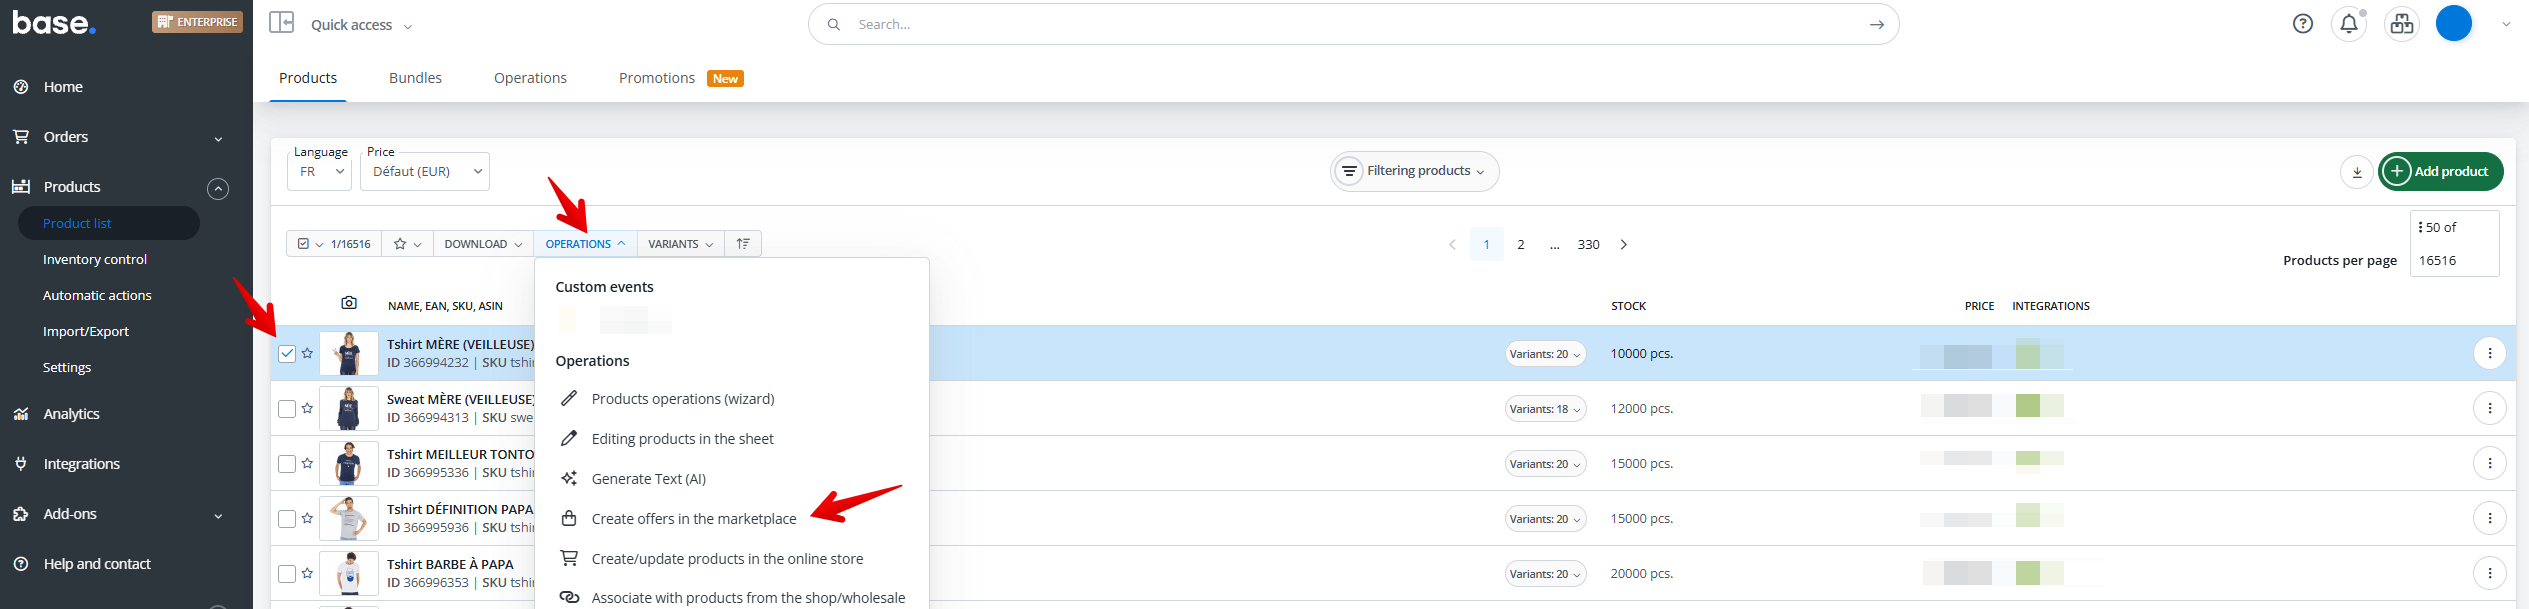
- Navigate to the “Products” section. Click “product list“. After that choose products you want to list on Shein Marketplace.

- Click “Operations” or click on the blue “Show table options” to see “Operations“. Click “Create offers in the marketplace”

- Make sure all settings are set correctly
- Click here for the category dropdown. Find the relevant category to list in. You can also type in the search bar to help find the category. Be sure to have the correct category selected before continuing. Each category has slightly different requirements in order to be listed on Shein.
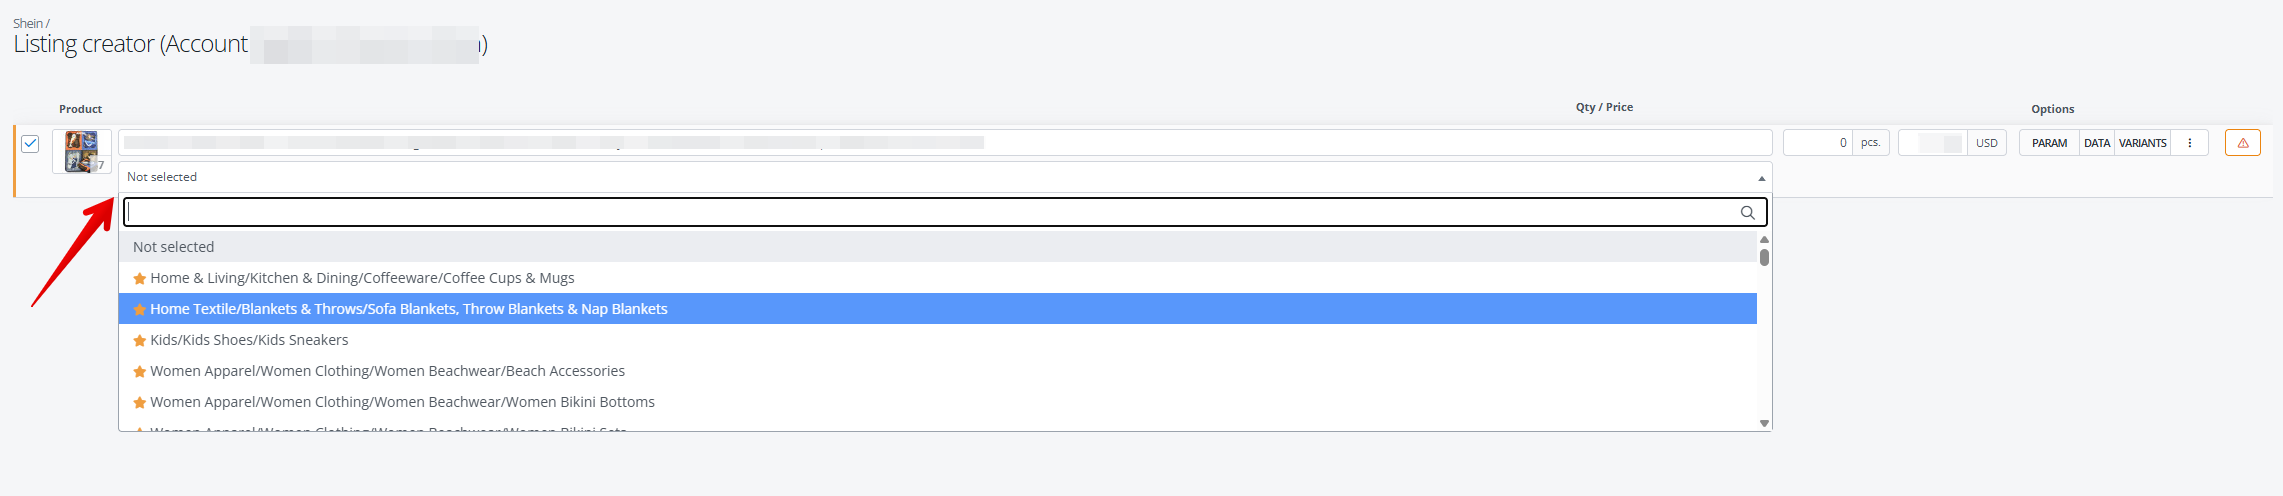 You can create associations for categories so they will be filled automatically. More information about associations can be found in this article.
 - Click on “Param“. The fields highlighted in red are mandatory by Shein. These fields, along with any others you wish to include, must be completed before submitting to Shein.
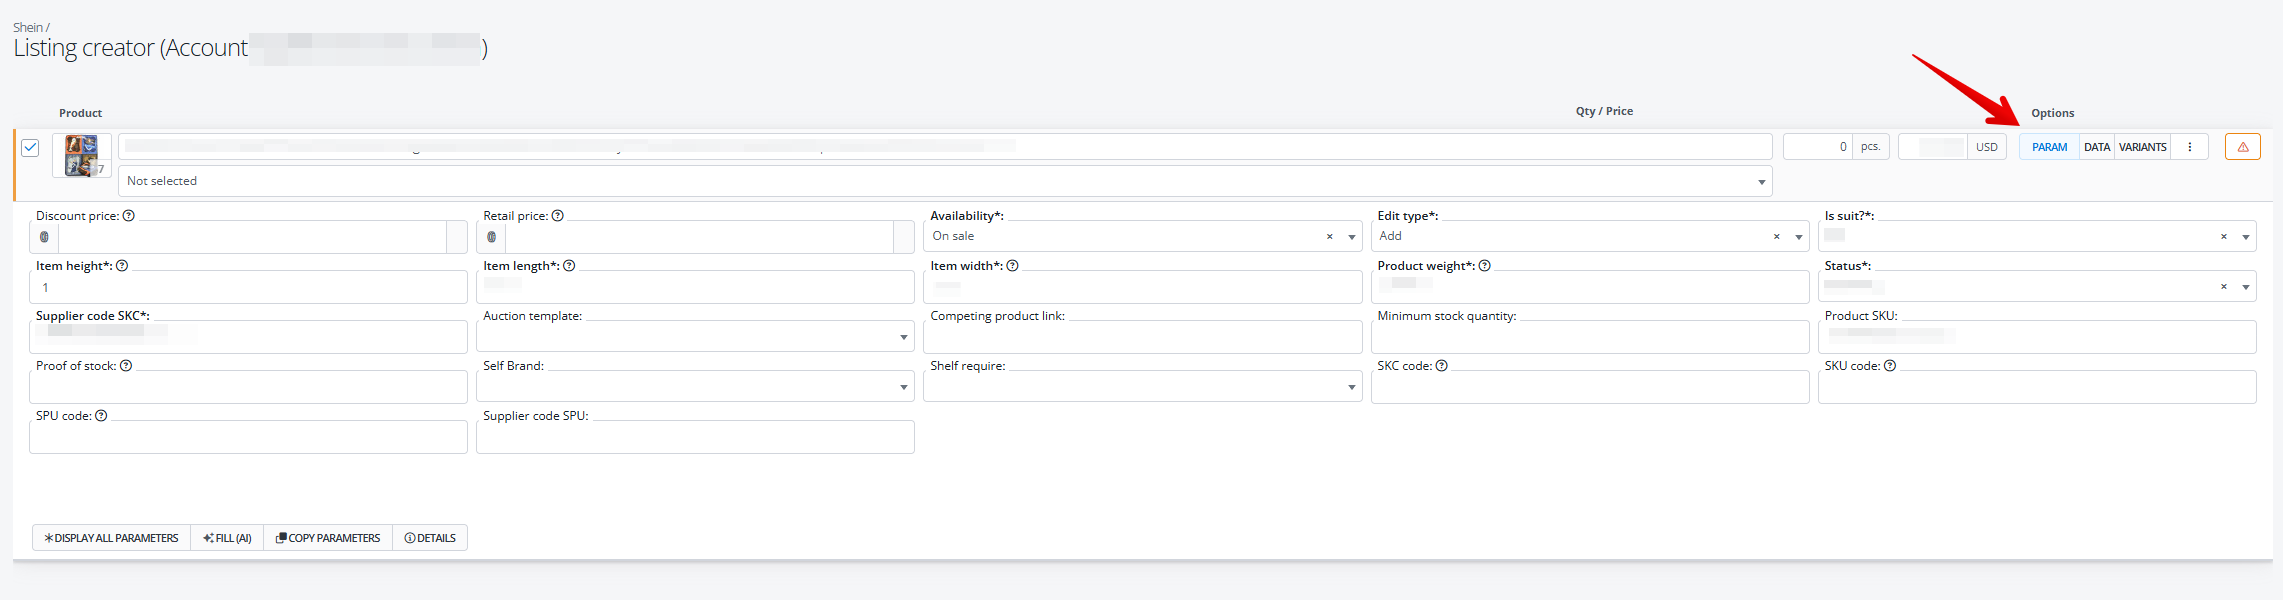 You need to manualy complete all parameters or you can create parameters mapping rules. More information about parameters rule you will find in this article.
 - Click “List offers” at the bottom of the screen after filling out the listing form. Now Base will do a preliminary review of the listings before sending it to Shein. You can see the status of the submitted listing in the Queue tab in Listing Management.

- Offers will be moved to different tabs based on their status. If there will be some errors, offer will be moved to “invalid” tab. When offer will be sent to marketplace and will be under verification it will be into “in queue” tab. Once marketplace will accept your offer it will be moved to “ongoing” tab
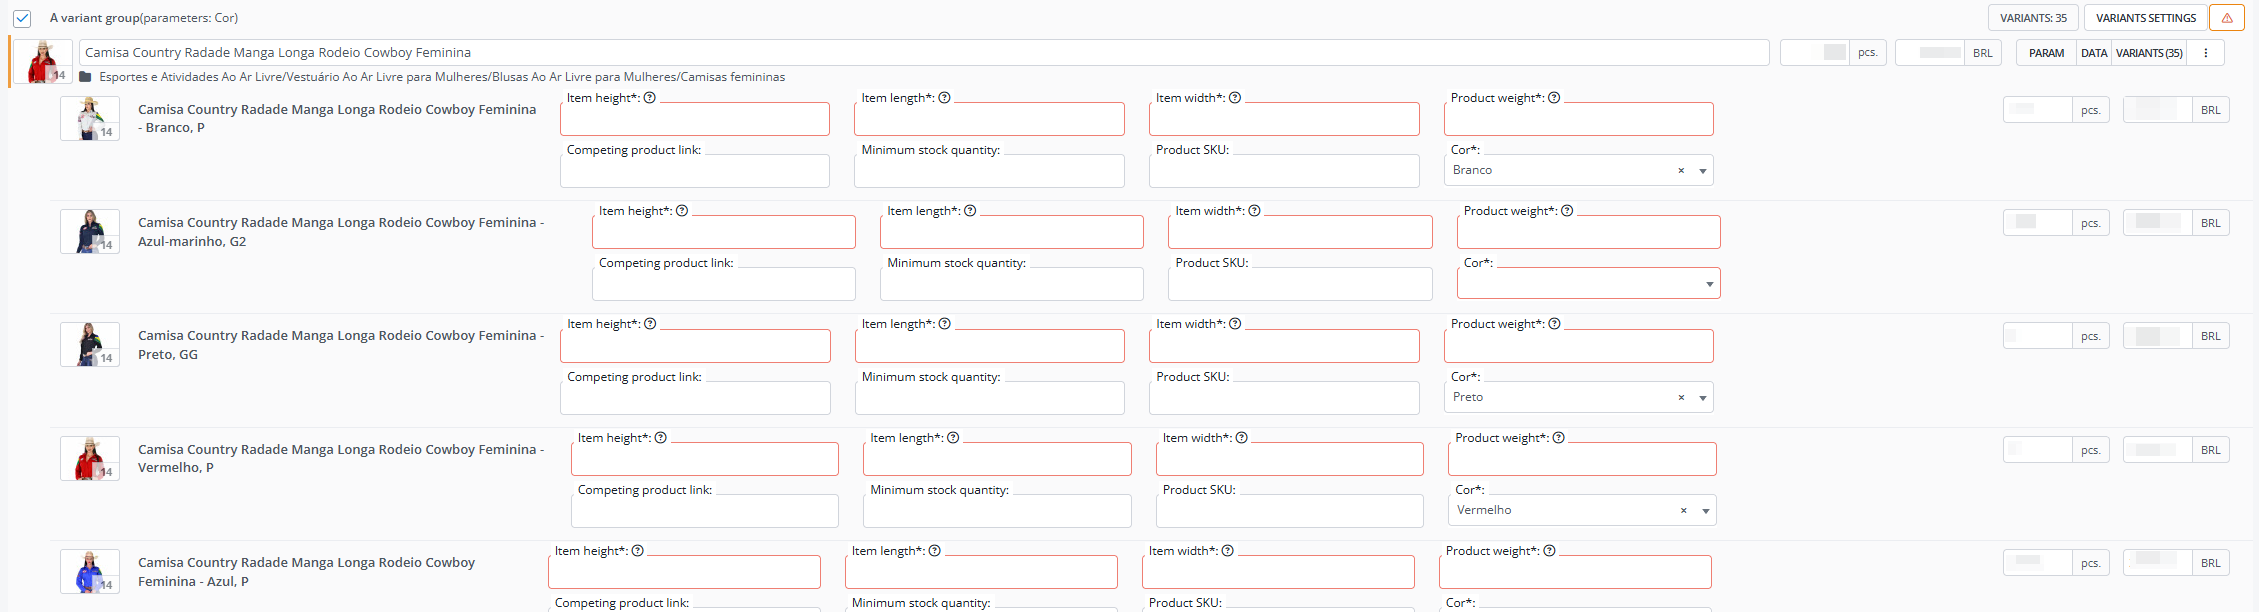
Creating Shein Listing with Variations
This guide provides a step-by-step process for creating Shein listings with product variations. The below example is for a t-shirt that has different sizes and color as variations.
- Click “Products” and then go to “product list“. Click on the product with variations to be listed. You can click “Variants” to see all the child products.
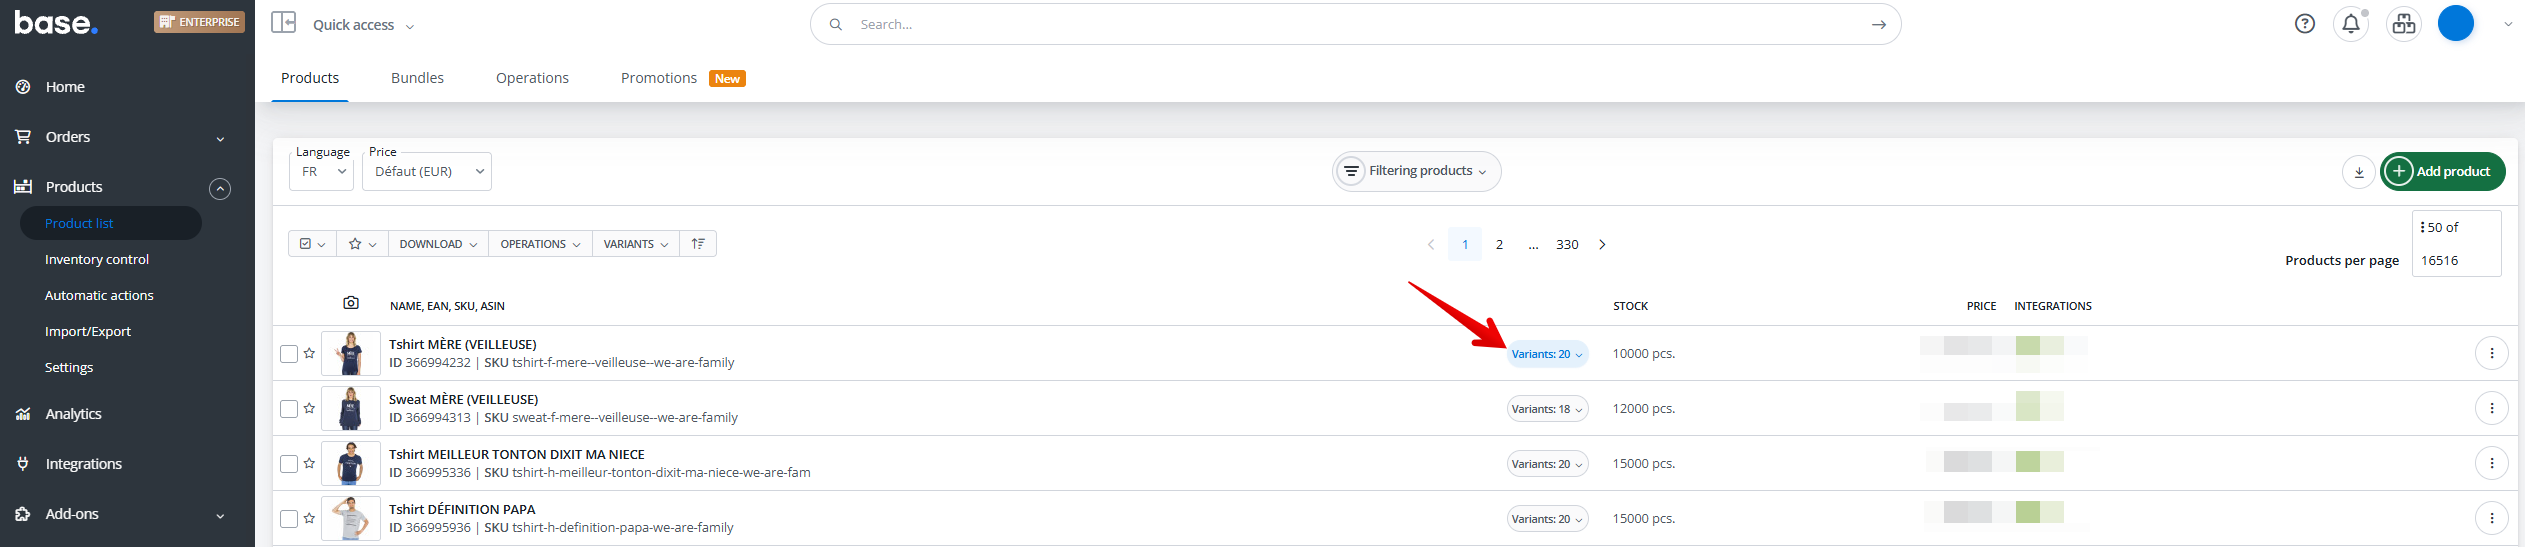
- Click on the parent product box. Make sure only parent product is selected
- After selecting the category to list in, click on “Variants“. You need to choose the category before proceeding. Otherwise, you will not be able to list with variances.

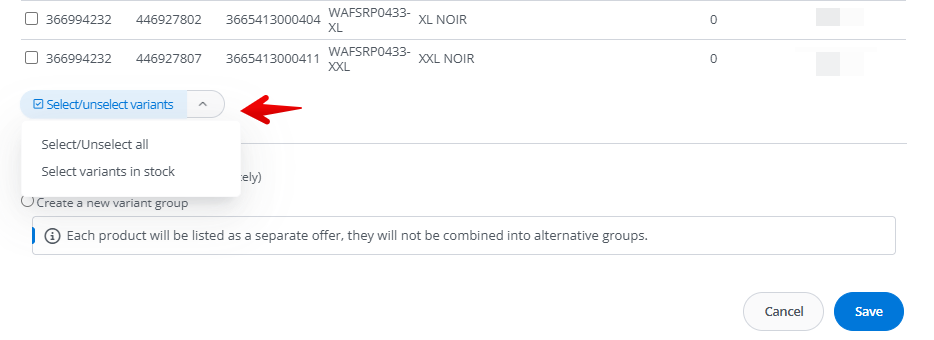
- Scroll down to “Select/unselect variants“. You can either select manually which variants to list or click “Select variants in stock” at the bottom.
- Click “Create a new variant group“. Then select parameter based on which you want to create your variation group.
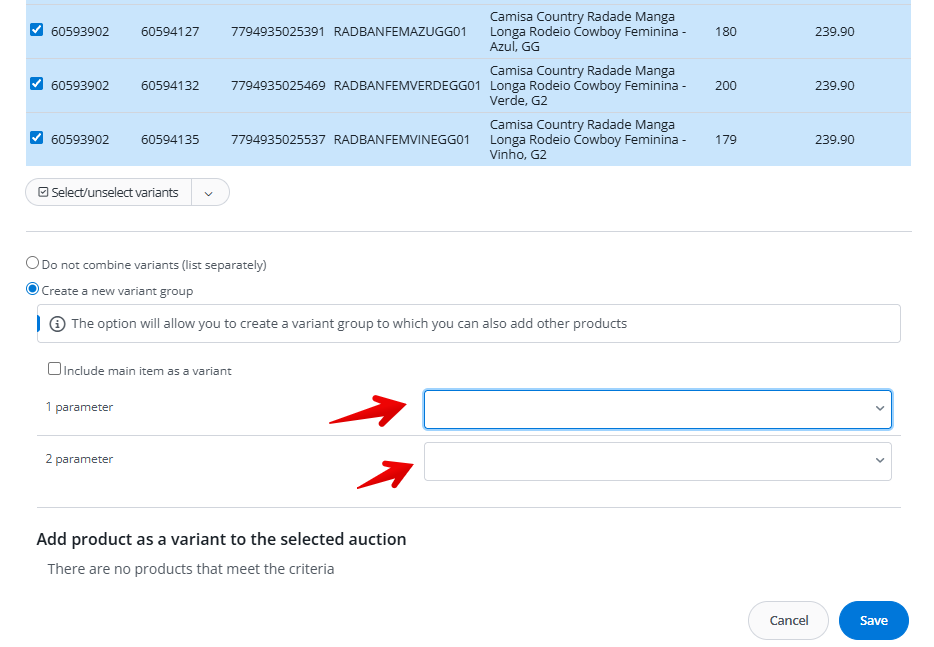
- Double check that all required parameters fields are filled for each variation.
- Click the blue “List offers” at the bottom of the screen to submit and it will either go into the “Invalid” tab due to errors or into the “In queue” tab for review in the Listing Management . If the listing has errors, you can edit and correct them from the “Invalid” tab.