In the times of dynamic e-commerce market growth, entrepreneurs increasingly need to pay attention not only to the price of the offered product, but also to the speed and quality of order handling. Implementing a barcode system and using a scanner significantly reduces order fulfillment time and also limits the risk of error when performing routine tasks. BaseLinker supports the introduction of such a solution to the company.
Barcode scanner
A barcode scanner is a device designed to read information stored in the form of a barcode. Modern barcode scanners often work as a keyboard emulation – the read barcode appears on the computer screen at the cursor position. Scanning a code can also trigger a specific action in the system – equivalent to selecting a specific button using the keyboard and mouse.
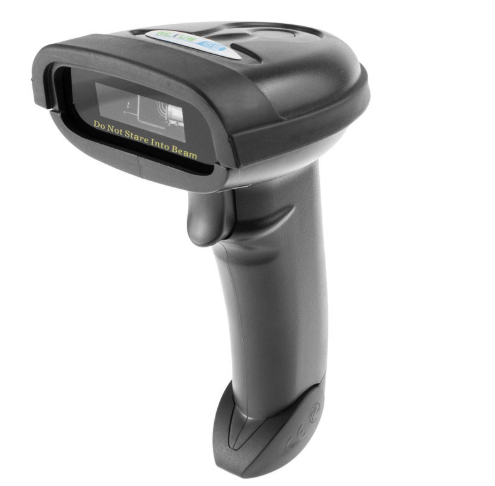
There are many types of scanners available on the market for different purposes. The BaseLinker system works with any barcode scanner connected to a computer, tablet, or phone. It is worth spending some time and choosing a scanner appropriate for the specifics of a given company’s operations.
You just need to connect the scanner to the computer according to the instructions for the given model (e.g., via a communication cable or USB cable) and possibly upload the driver provided with the scanner. You can also choose a wireless scanner and connect it to a phone or tablet via Bluetooth.
In both cases, you don’t need to buy any additional software! You also don’t need to configure the BaseLinker system further. It is enough for the scanned code to be entered into the browser where BaseLinker is open. This means that you only need to open the system panel in any web browser on the device to which the scanner is connected (on a computer, tablet, or phone).
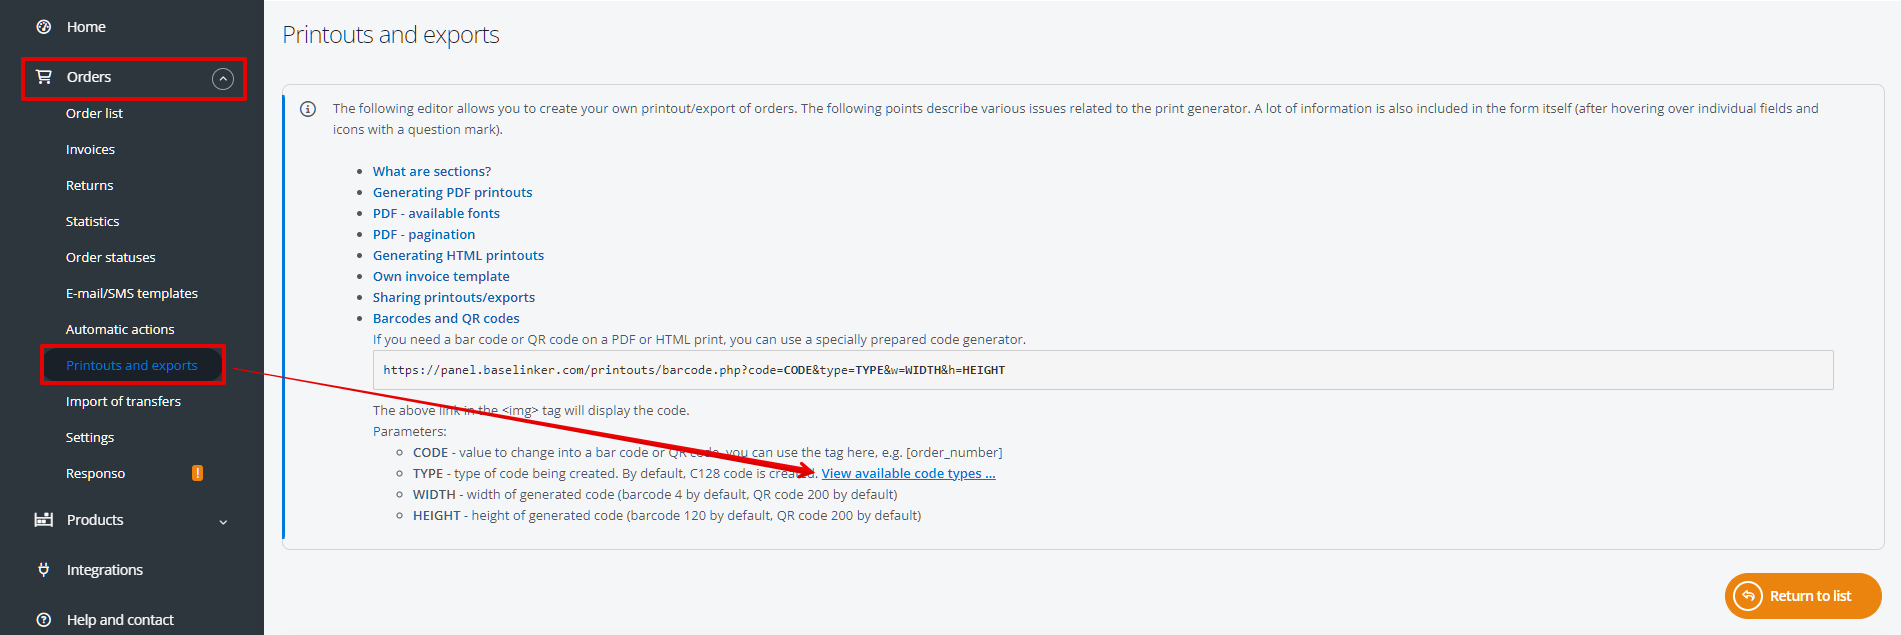
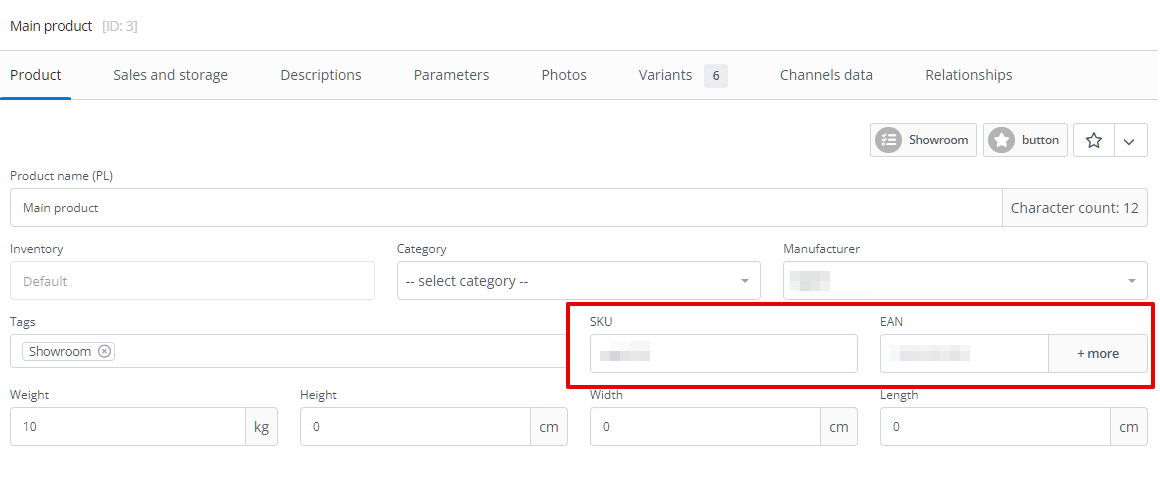
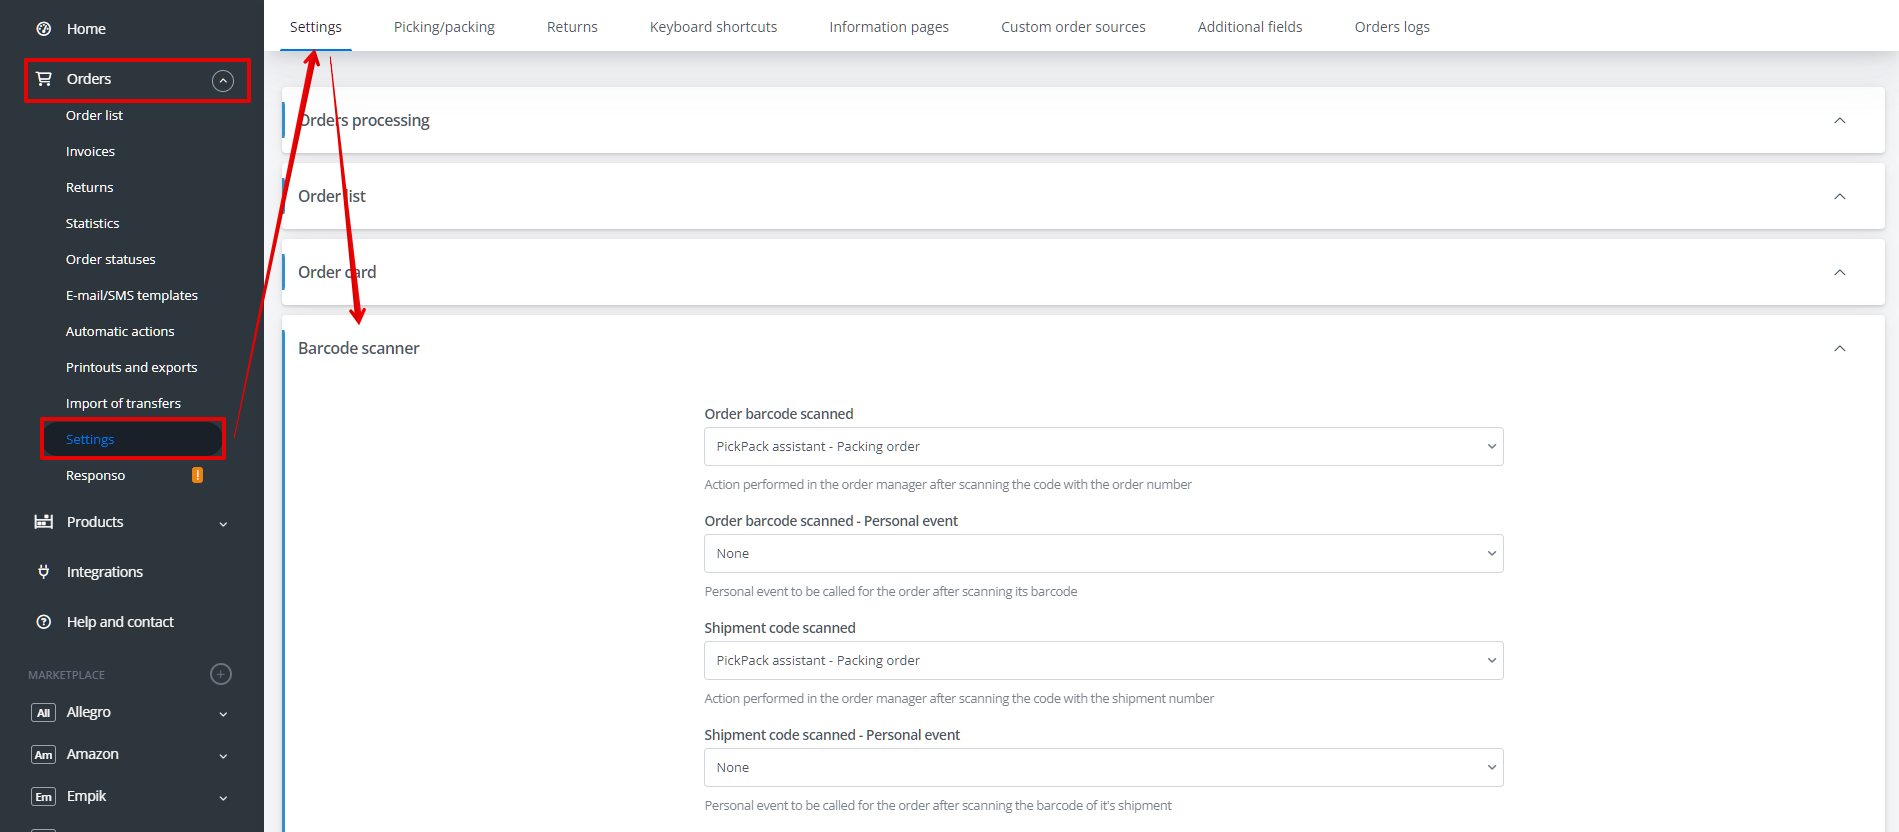
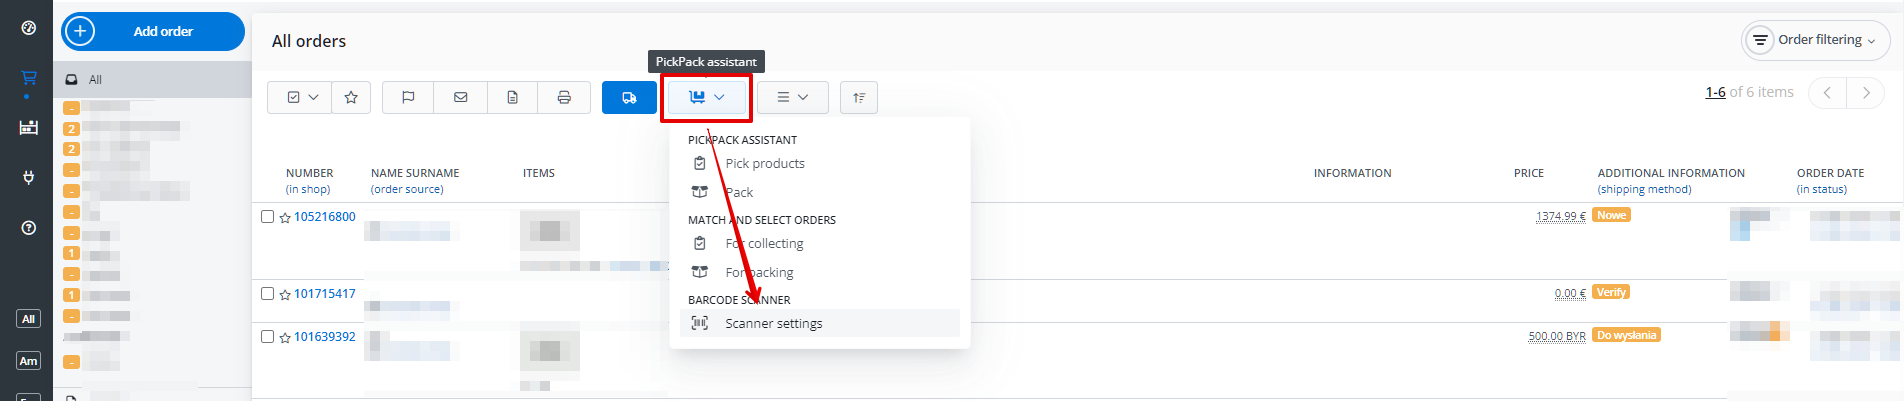
To ensure everything works properly, remember a few important principles. A barcode is a graphical representation of characters understandable to barcode readers. It is a type of identifier that allows you to quickly and easily obtain the necessary information. Barcode fields contain black and white patterns that can be scanned and read as data, and in this form, added to the database. On a large scale, barcodes were implemented in the 1970s as a solution to the problems of product identification and flow control. The BaseLinker system allows the creation of different types of barcodes, e.g.: By default, a C128 type code is created. The full list can be found in the Orders → Printouts and exports → Edit (selected printout)/New printout/export section. The BaseLinker system allows reading the following types of barcodes: In the BaseLinker system, there are two types of codes related to orders: The order code is used to identify a specific order and can be assigned both in the BaseLinker system and in the online store system. The BaseLinker system allows creating various types of order printouts and exports in the Orders → Printouts and exports section. These documents can be generated with a barcode. For this purpose, a specially prepared barcode generator can be used. Order barcodes can be found among others on the following documents: The barcode visible on the courier label contains the shipping number and is used to identify a specific shipment. It is created by the courier system and retrieved into the BaseLinker system directly via the API. The BaseLinker system allows for proper product identification by scanning the EAN or SKU code. This streamlines the order collection and packing process. The EAN code is a barcode that is found on all standard product boxes (this is the code that is scanned at the supermarket checkout). If such a code is retrieved along with the order (and in some cases also assigned to a given product in the warehouse system), it will allow the identification of that product during packing. When working in the PickPack Assistant module, after scanning such a code with a barcode reader, the system will mark one unit of the given product in the open order as packed. The seller can also assign an SKU code to each product in the warehouse. This is a code that also allows for product identification, but is mainly used for managing the given goods in the warehouse. This code, unlike the EAN code, is created only for the needs of a specific warehouse. In this case, not only must the SKU code be assigned to each product in the system, but also additional physical product labeling must be provided. This means that you need to prepare the barcode containing the SKU numbers yourself and stick them on the products. Therefore, we recommend using the EAN code instead of the SKU code. When creating an SKU code, it is also worth remembering that the BaseLinker system detects the scanning of barcodes whose length is not less than 6 characters. The EAN or SKU code is displayed in orders coming from platforms like Amazon or eBay. However, in the case of other platforms (e.g. Allegro), for the EAN code to be visible in the order, the auction on which the product was listed must be in the BaseLinker system. Additionally, this auction must be associated with a product from the warehouse that has an assigned EAN or SKU code (Products → Product list → Edit → Product → EAN or SKU). BaseLinker allows assigning barcodes to: Shortcuts related to built-in system functions are: The barcode summary printout can also contain shortcuts for user-defined automatic actions. To do this, it is necessary, in the Orders → Automatic actions → Personal events section, when creating a custom event, to check the Enable barcode field. In the Orders → Settings → Barcode scanner section, you should assign the selected action performed in the order manager after scanning the order number code or the shipping code. Depending on the settings, the system may do the following after scanning the order number or label: Additionally, in the Orders → Order list → PickPack assistant → Scanner settings section, there is an option to configure the scanner separately on a given workstation. The settings saved in this place will overwrite the default scanner settings until the user logs out. After logging back in, the default settings, which can be specified in the Orders → Settings → Barcode scanner section, will be restored. The system can be used by several people at the same time. If we have several warehouse employees, each employee should have:
Barcode
Barcode types in the BaseLinker system
Codes related to orders
Order Number Codes
Courier label codes
Barcodes related to product
Built-in system functions
User’s own automatic actions
Barcode scanner configuration
Scanning orders by multiple employees