Shipyaari is a leading last-mile and shipping solutions provider for eCommerce sellers, boasting serviceability over 29K+ pincodes.
Pre-requisites:
Keep your email ID and password on hand,which are are compulsory for authentication purposes.
Steps to connect your Shipyaari account
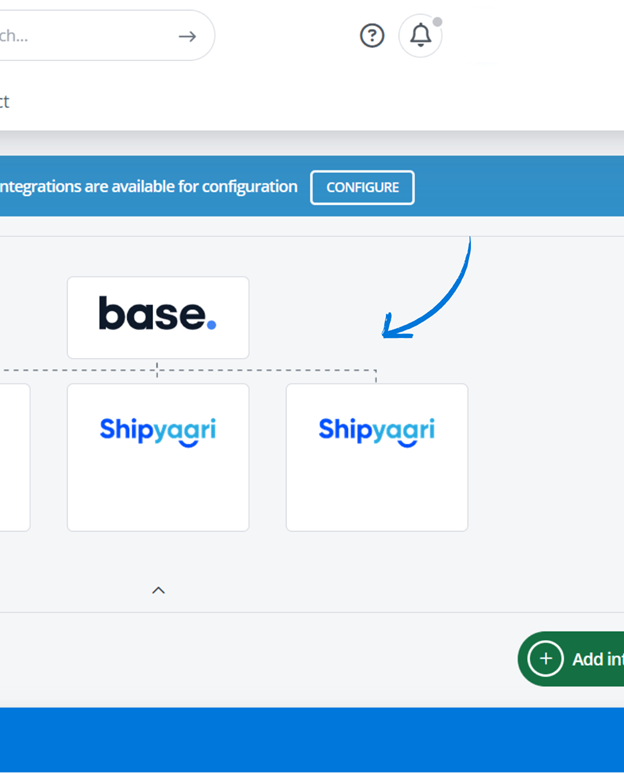
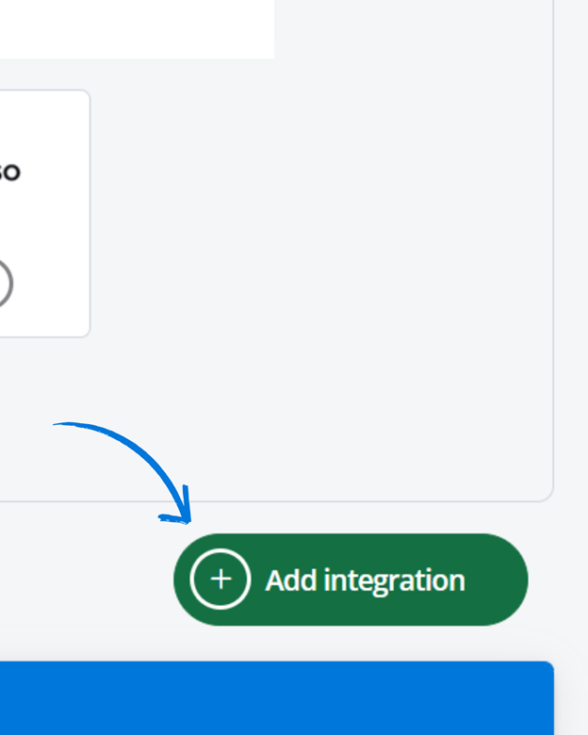
- In Base, go to the Integrations tab and click on the Add Integration button.
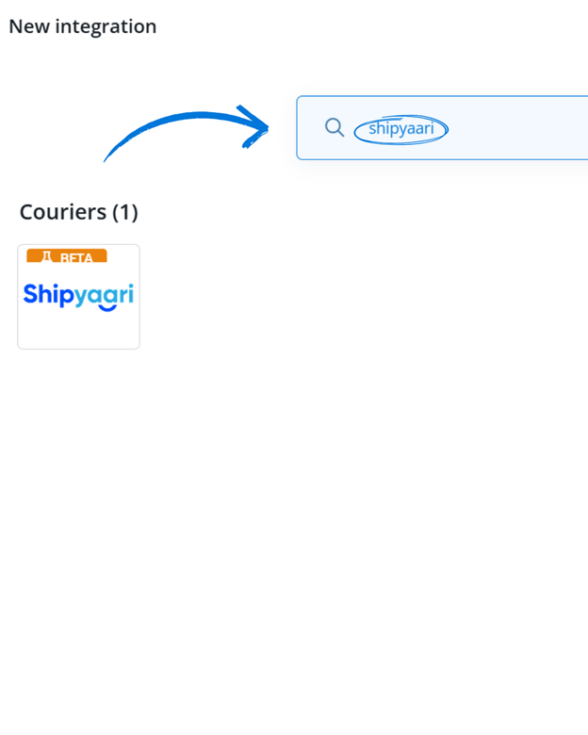
2. Search for “Shipyaari” using the search function box above or navigate to the courier tab to pick it out manually
3. Enter your Email ID and API Password associated with your Shipyaari account. These fields are compulsory and should not be skipped during set up.
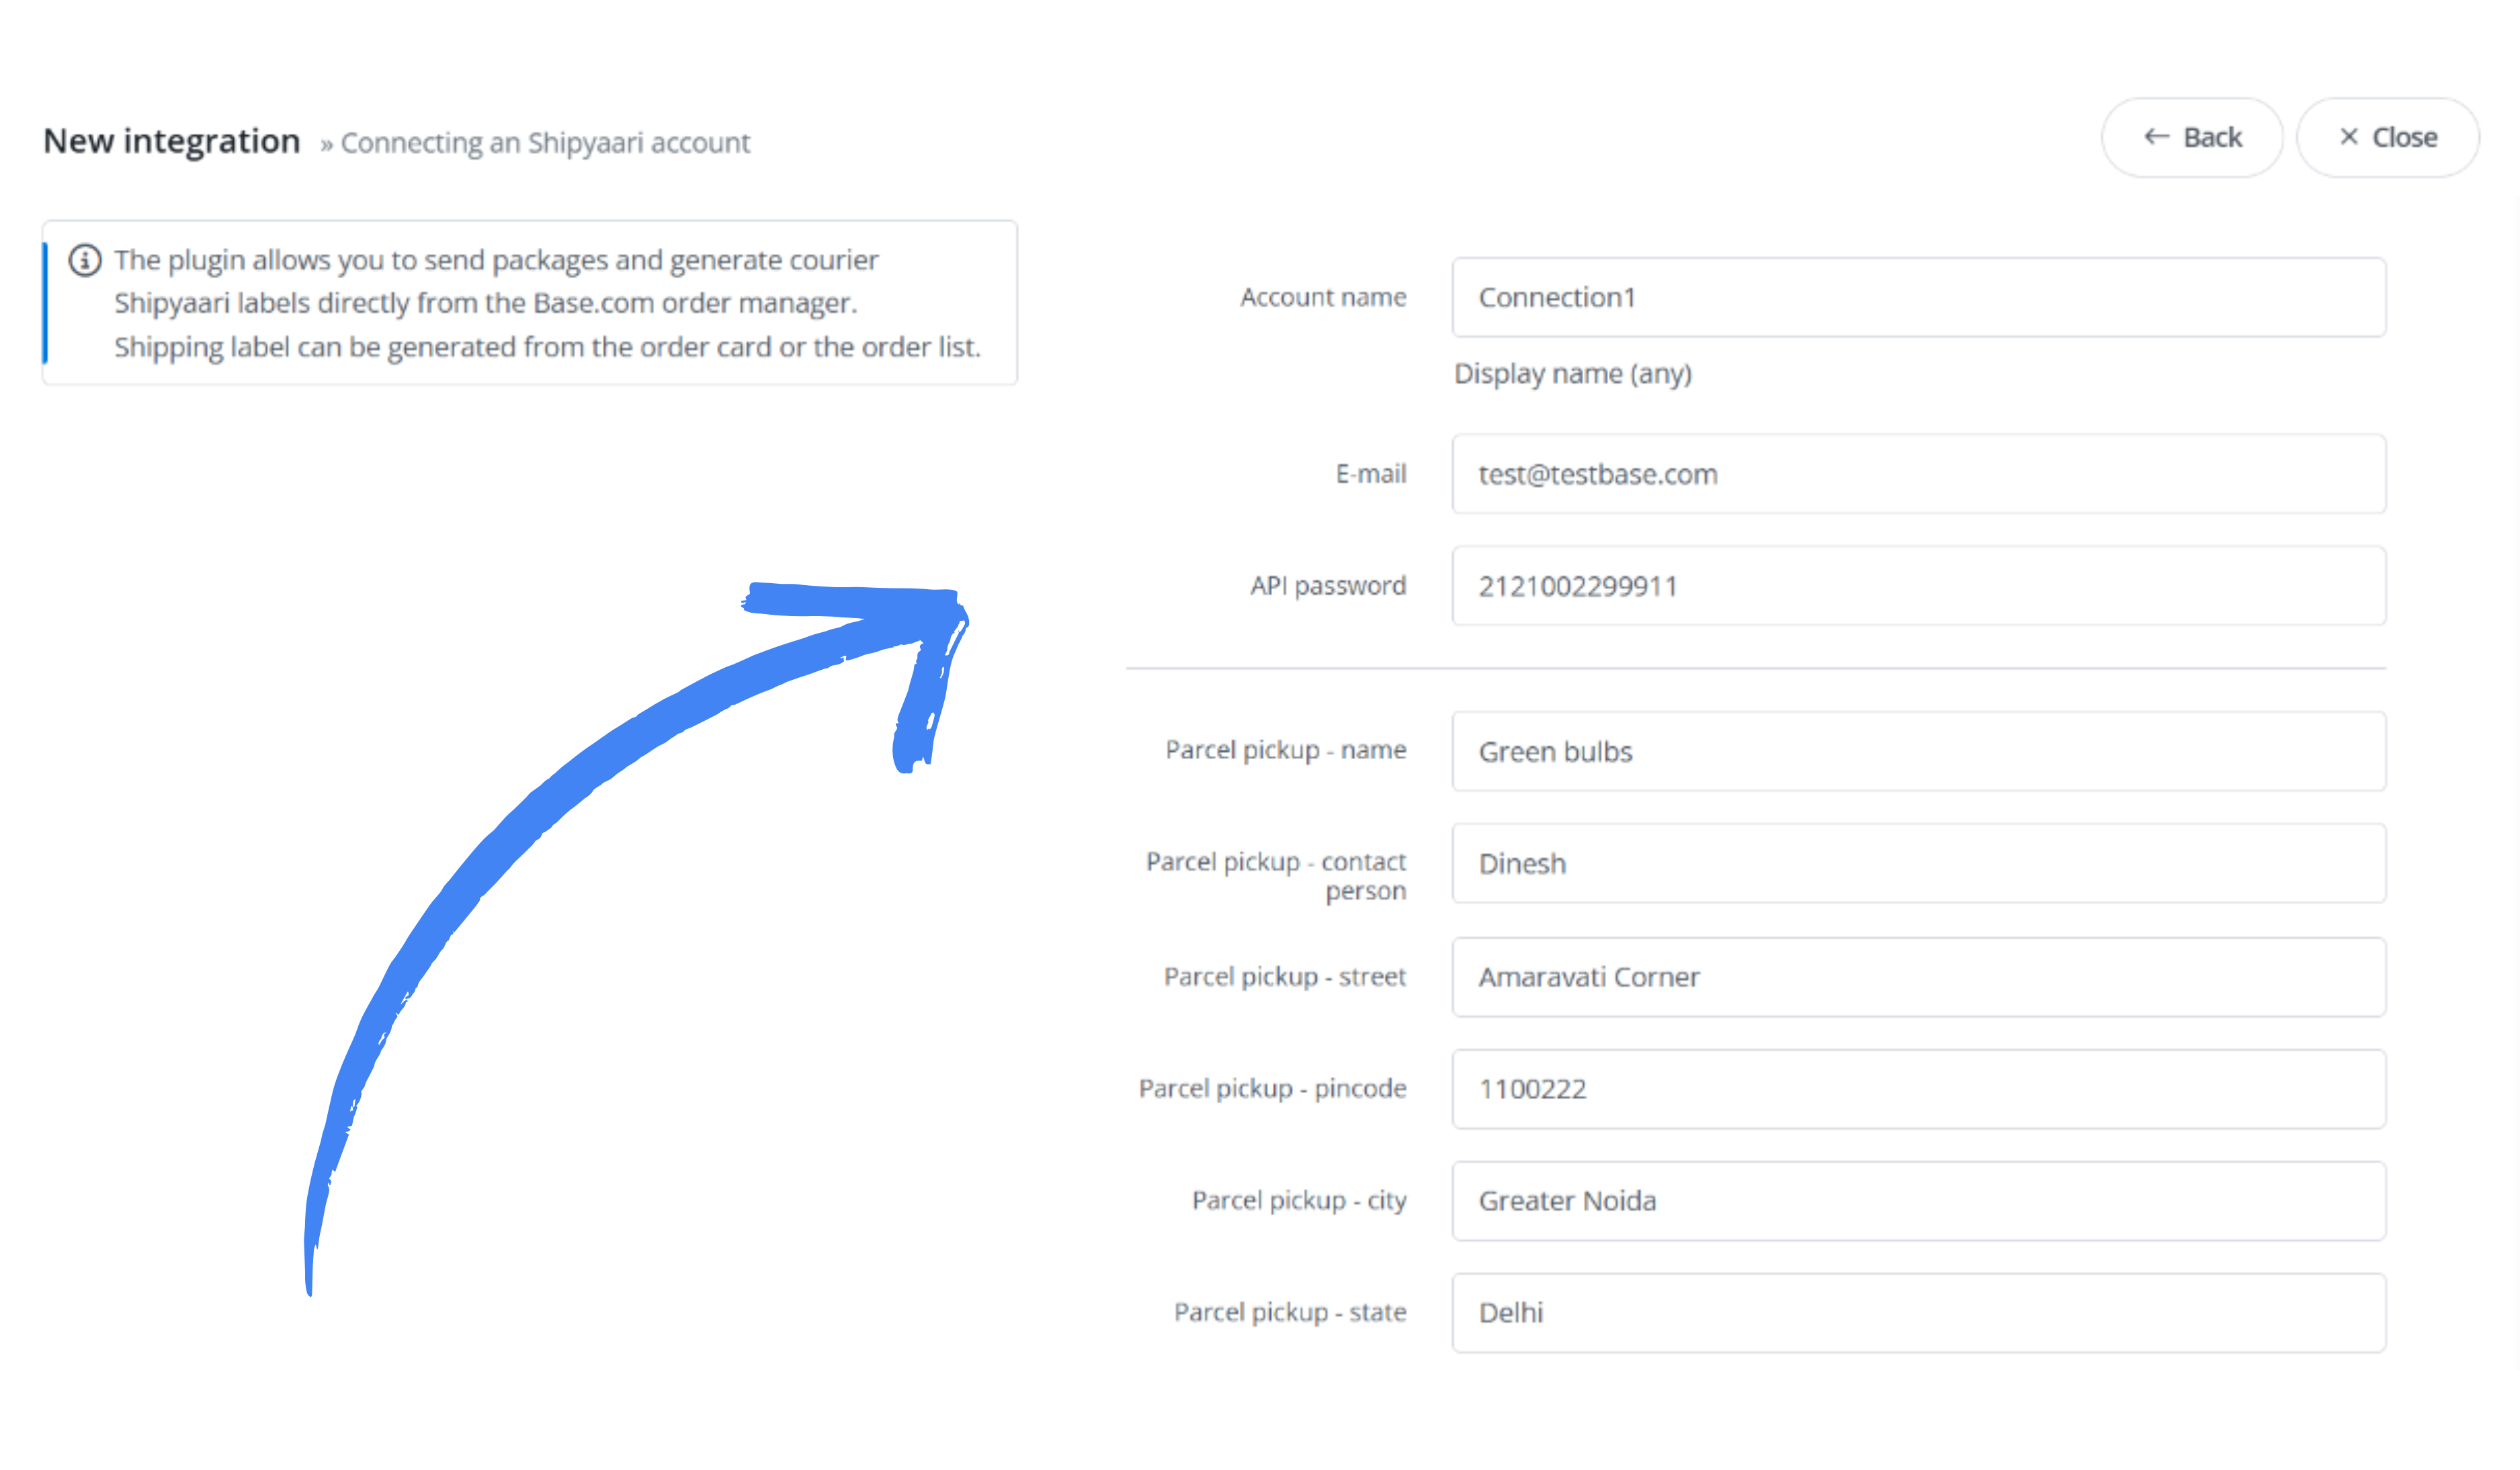
4. Proceed to fill in the remaining details for the courier partner’s reference, which
- Parcel Pick up Name [optional]
- Contact person [optional]
- Street [mandatory]
- Warehouse Pincode [mandatory]
- Warehouse City [mandatory]
- Warehouse State [mandatory]
- Phone number [optional]
5. The seller GSTIN, while optional for B2C accounts, is a compulsory field to fill in for B2B.
6. Enter the maximum weight or upper limit of the parcel in the field marked “Block max. Weight of the packages”. This acts as a safety cache to prevent parcels exceeding the specified weight limit from being pushed out that can attract extra courier charges. This feature lets sellers compare and select cost-effective delivery modes based on weight conditions [for example, delivery by road freight versus air].
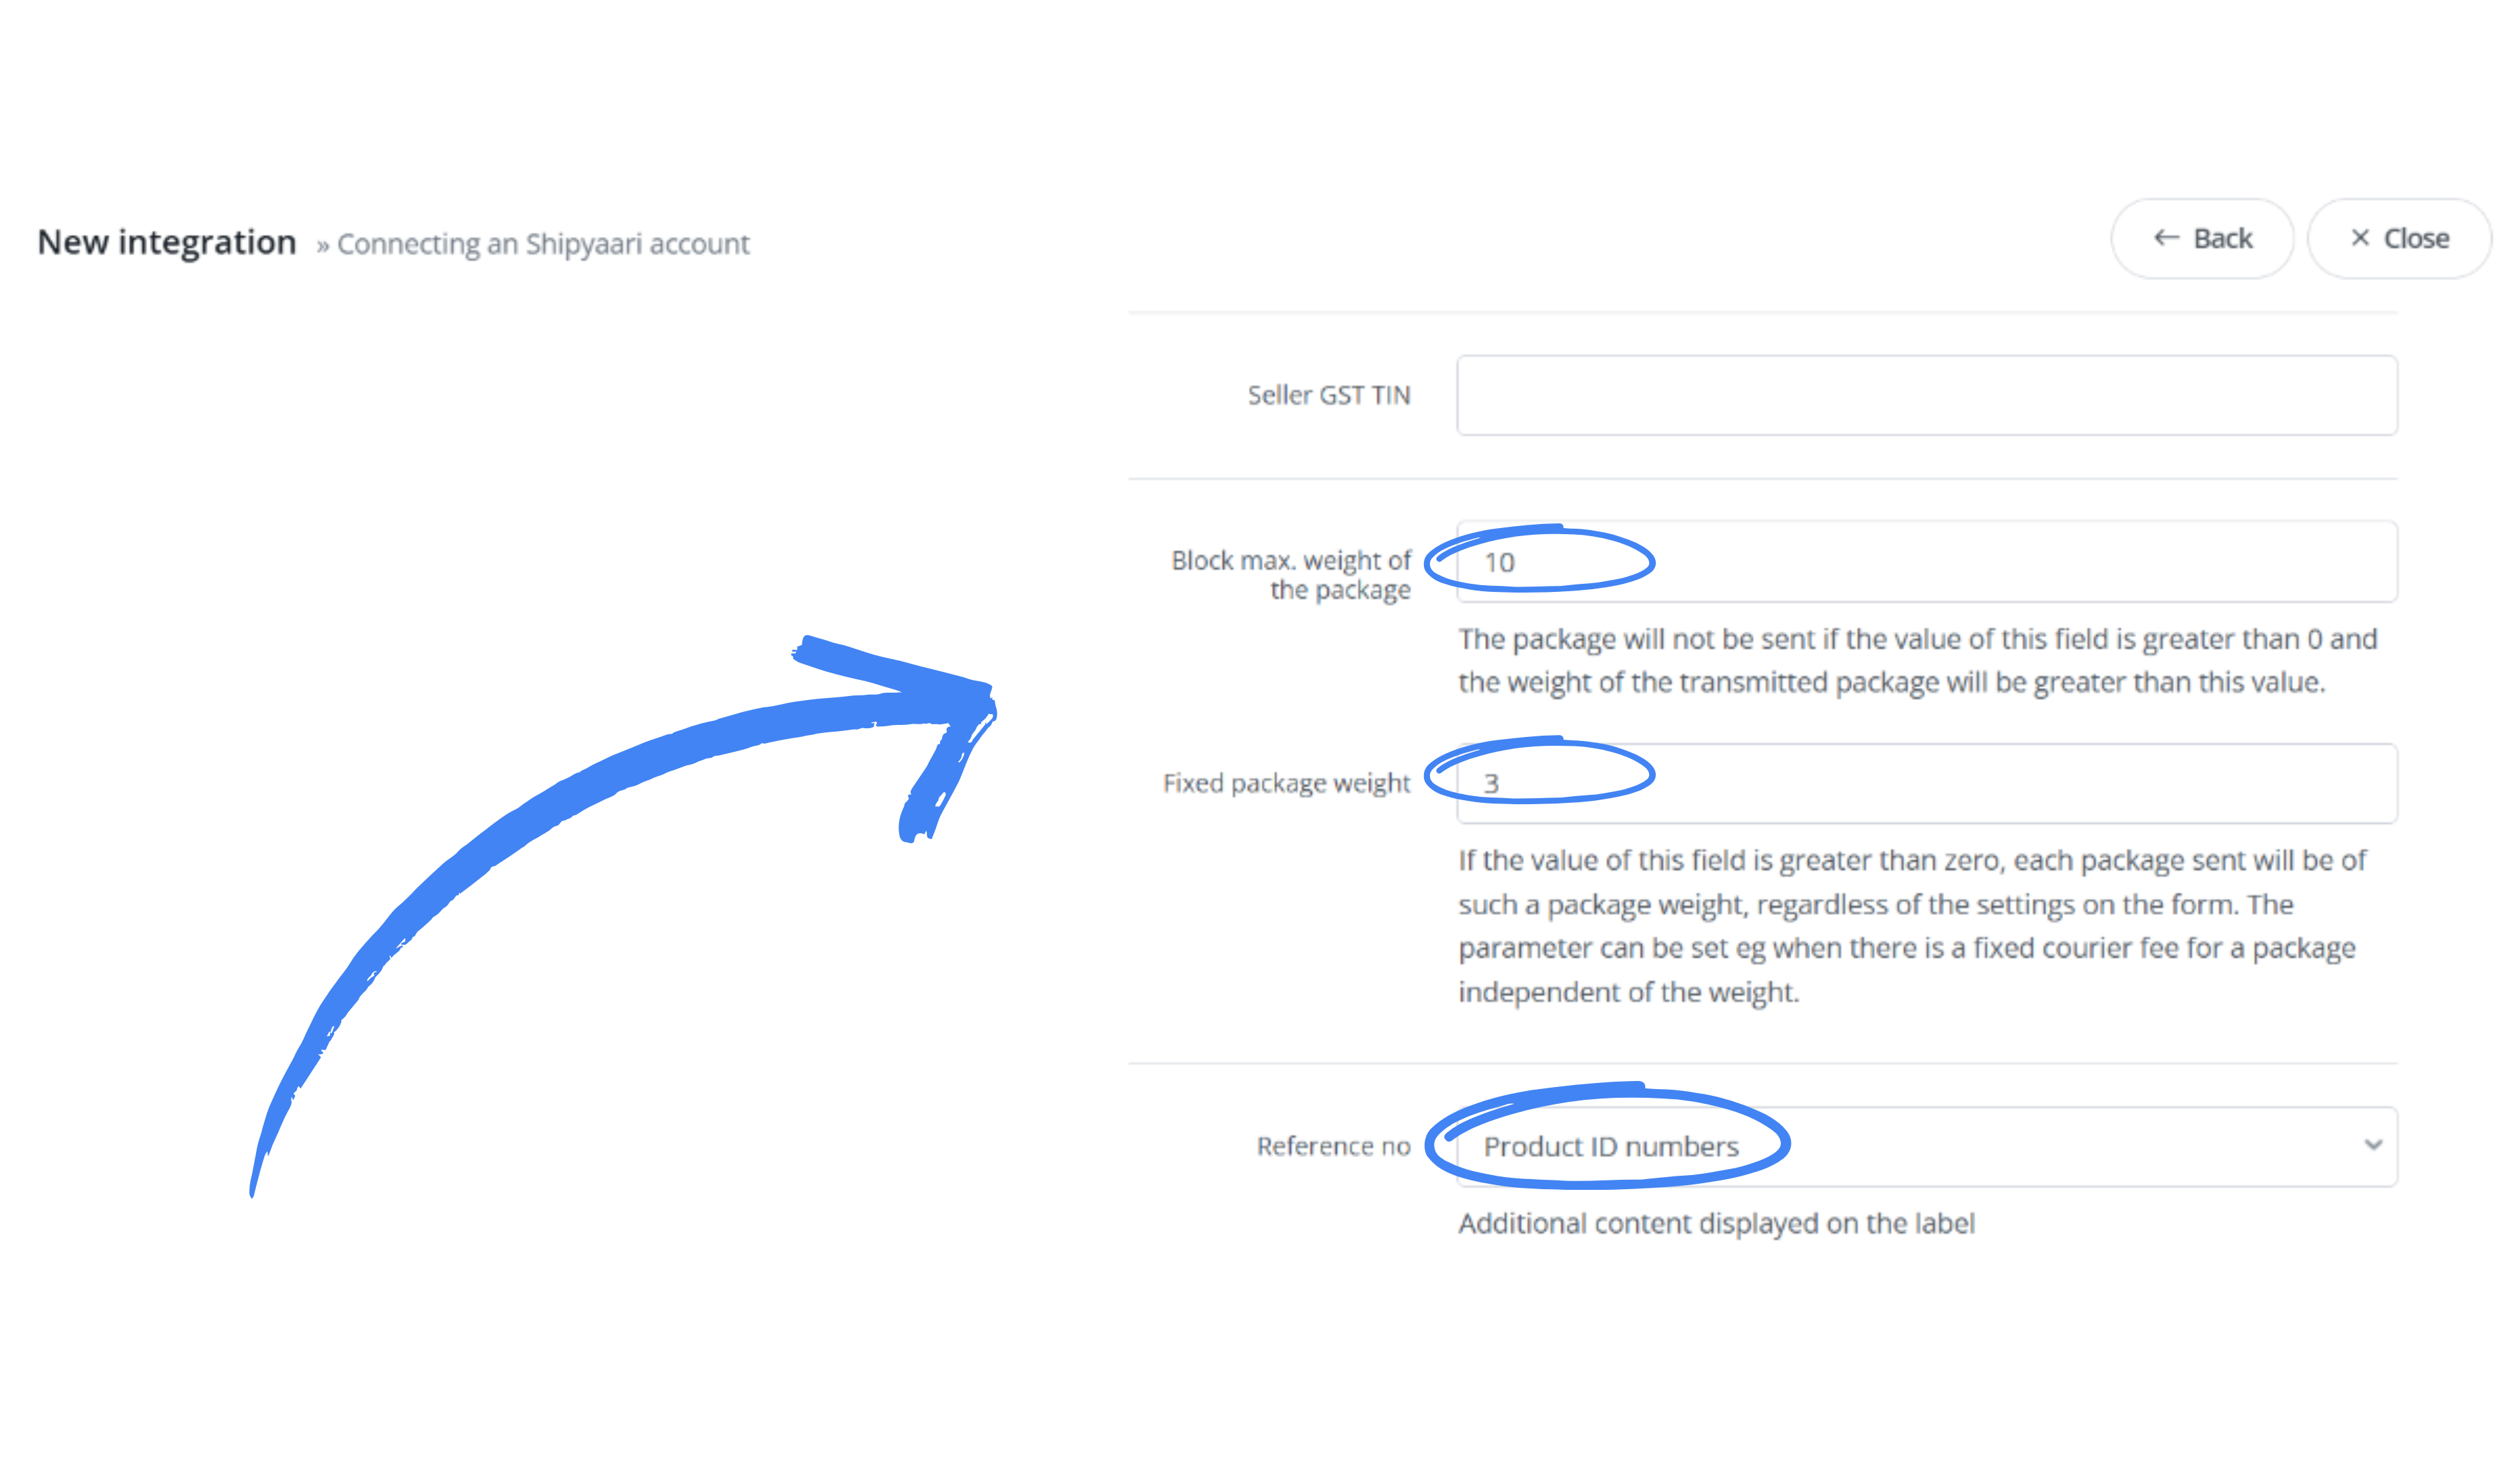
7. The Fixed package weight which is the field following Step 6, lets you create a fixed weight to assign to all packages, which is useful when automating shipment creation.
8. Reference number is an optional field for sellers to capture additional static information that should appear on the label.
9. Use the Company logo field to feature your brand logo on the label. Ensure to enter public URLS and not image uploads from the system.
10. Another optional field to enter additional parcel information is the percentage or fixed value. The seller should fill this field if they want to add a default package (cardboard) weight to their shipments.
11. Now save the details by pressing the Save Button. The integration will appear on the Base panel, indicating successful set up completion.