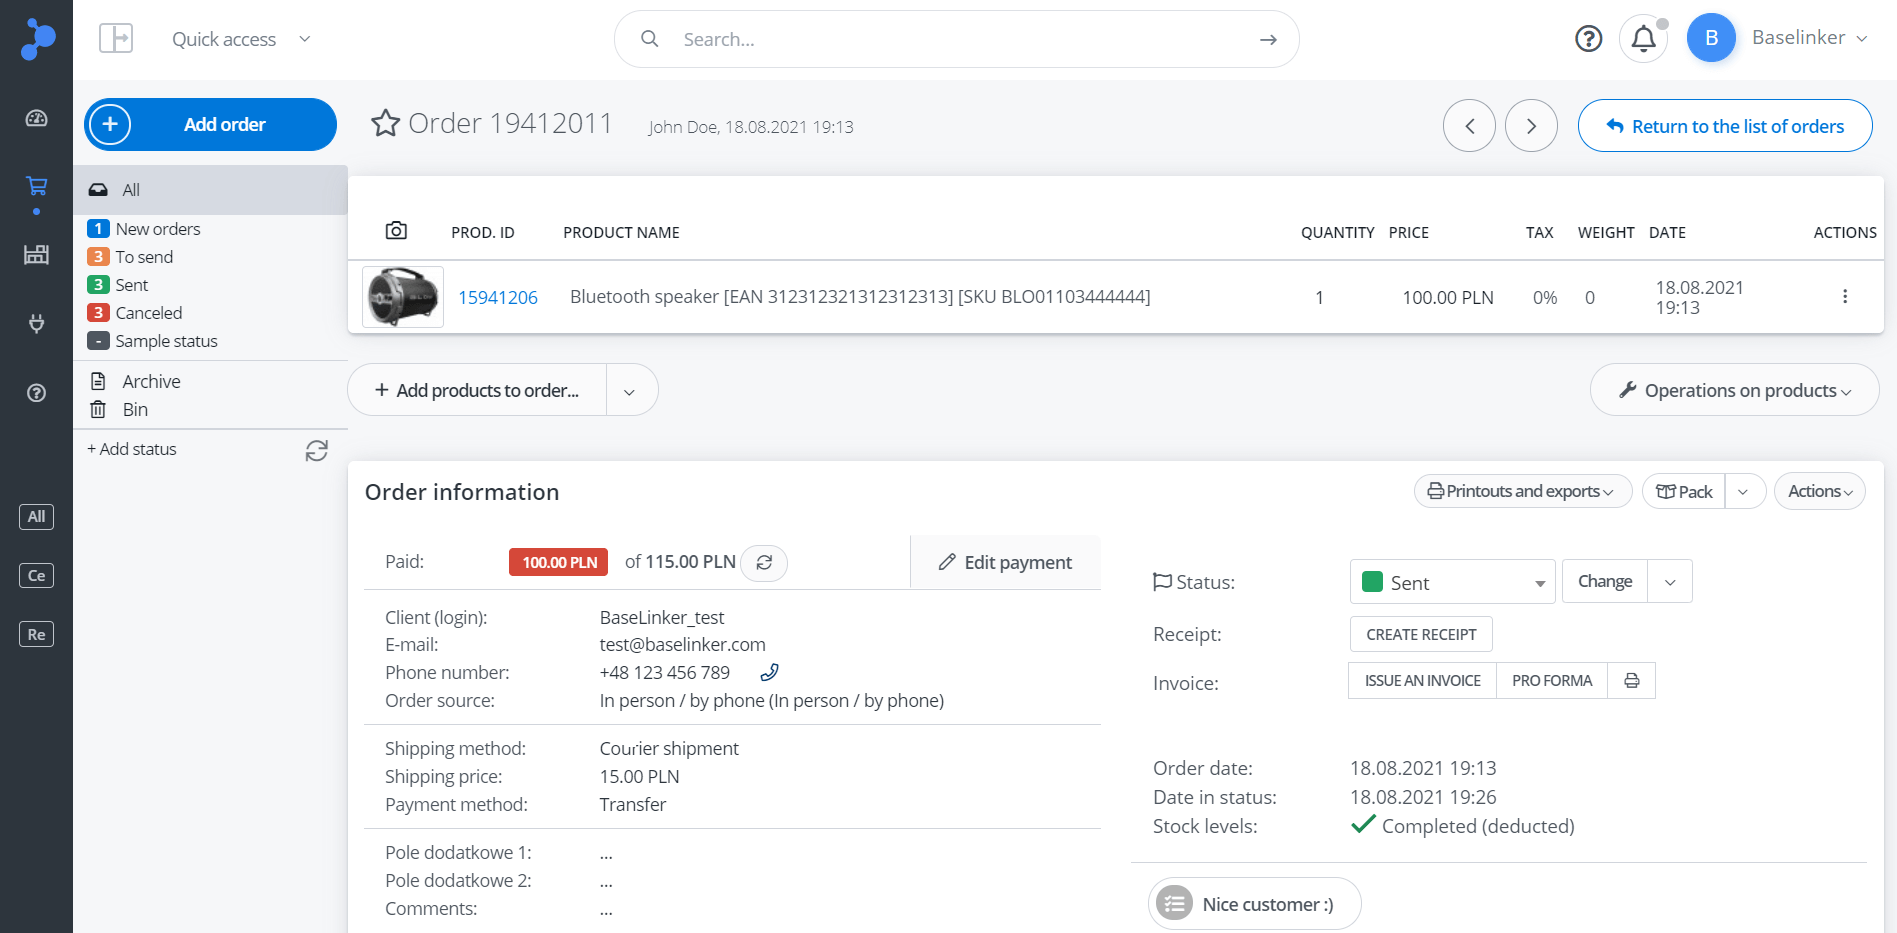
All order information are visible on the order card under Orders → Order list.
The order card is divided into the following sections:
- product table – includes product information in the order;
- Order information – here you can see information about the buyer, payment, shipment, etc.;
- Delivery address and Invoice data;
- Shipments;
- Exchange of messages;
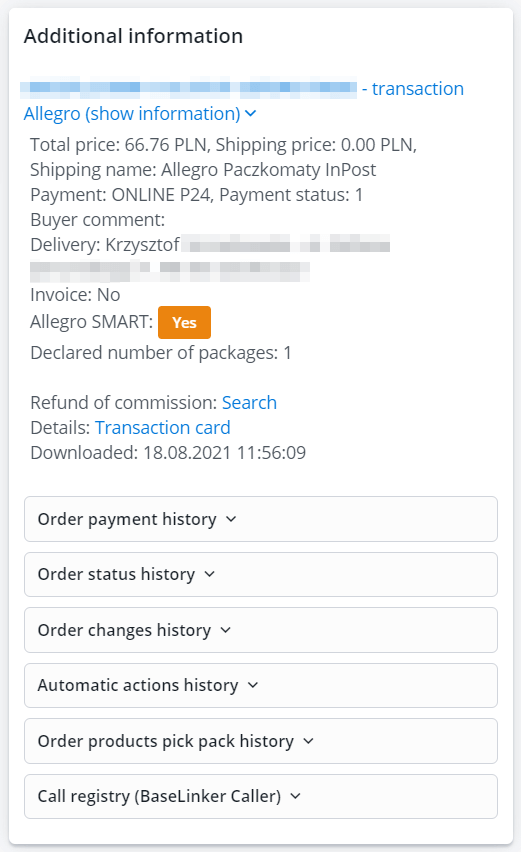
- Additional information.
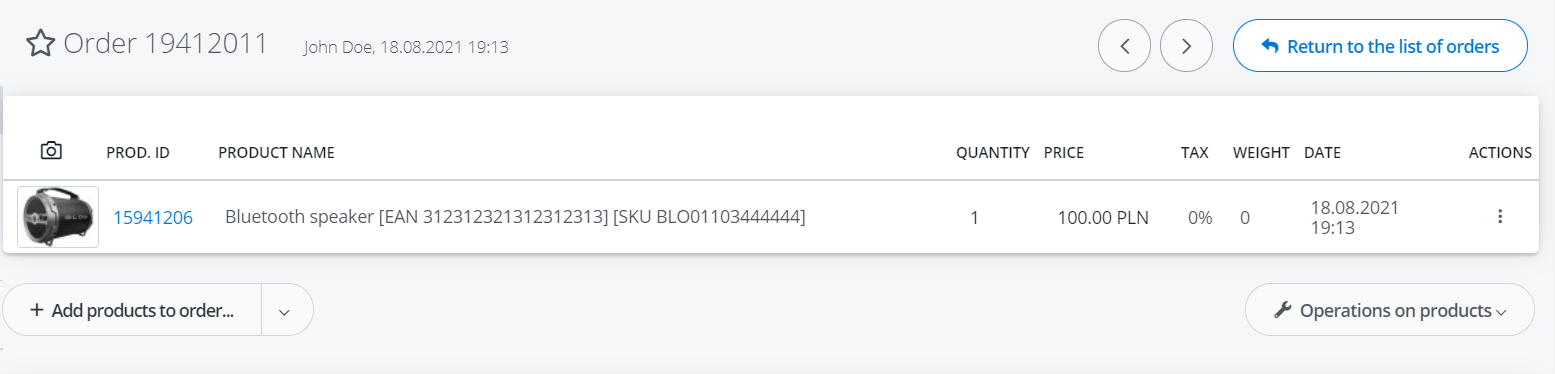
Product table
In the product table, you will see all products from a given order. The following information is available for each product:
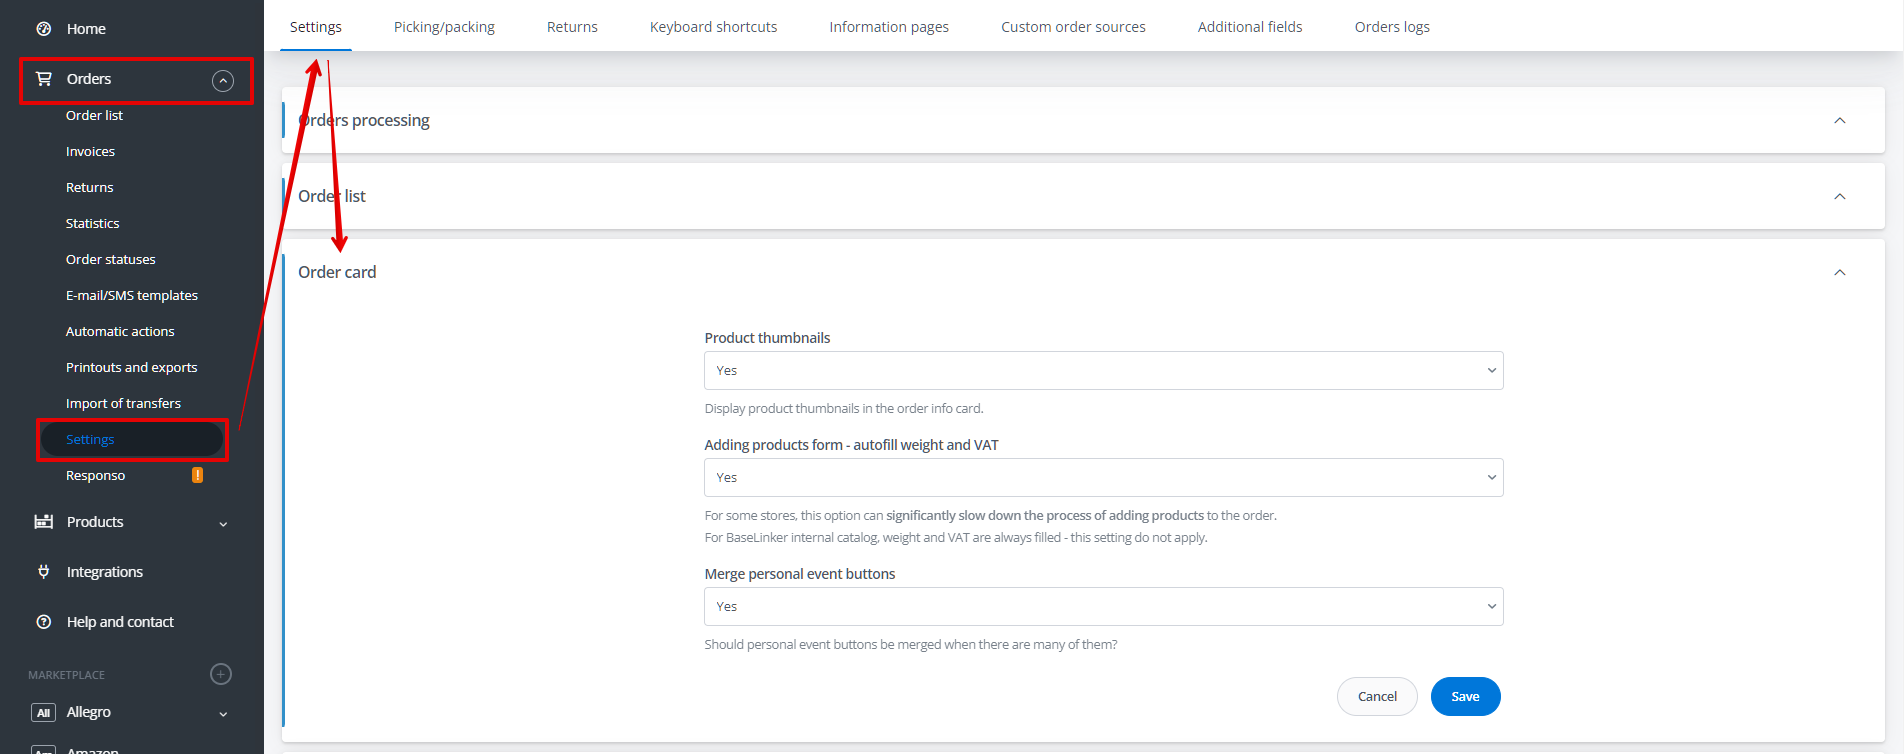
- product thumbnail (you can enable/disable its display in order settings);
- product ID;
- product name (from warehouse or offer, depending on the order source integration settings);
- EAN;
- SKU;
- locations;
- quantity;
- price;
- VAT;
- weight;
- date (of adding the product to the order).
Here you can make the following changes:
- add new products (+Add products to order);
- remove a selected product;
- edit information about individual products;
- bulk change the weight, VAT, or prices of all products in the order by selecting the Operations on products option;
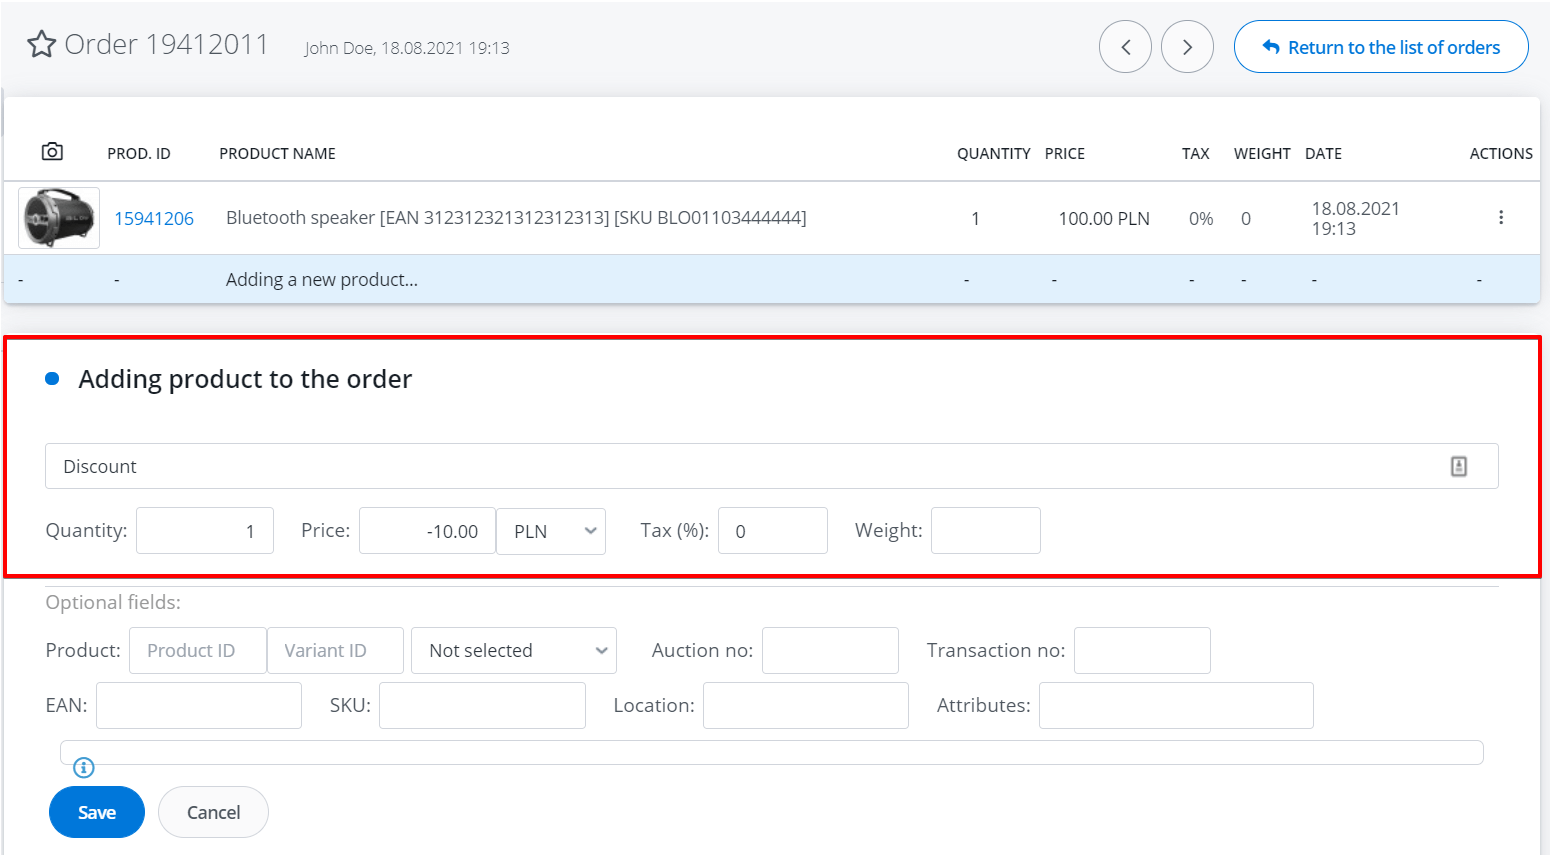
- add a discount to the order by:
- changing prices for all products,
- by selecting +Add products to your order → Add products manually and adding a product with a negative price (for instance you can name it discount).
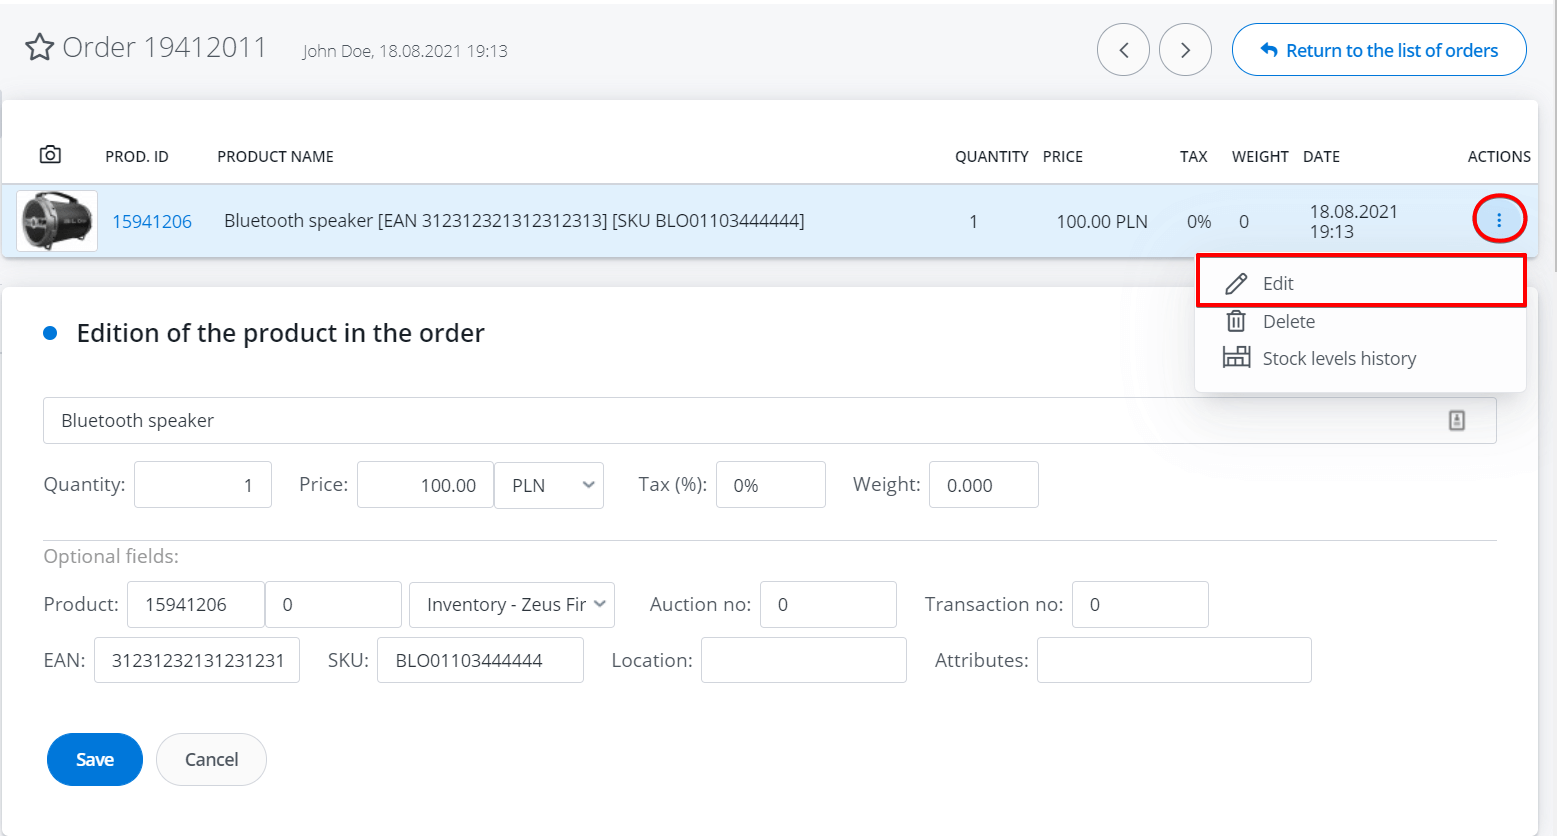
Actions on products in the order
After clicking the three vertical dots icon in the Actions column next to a product, the following actions are available:
- Edit,
- Delete,
- Stock history.
By selecting the Edit option, you can change:
- product name, number of purchased units (only whole numbers, no fractions), price, and currency;
- VAT, weight, EAN, SKU;
- product ID, variant ID, inventory, and warehouse from which the product originates;
- auction number;
- transaction number;
- product locations in the warehouse;
- attributes – no product parameters (e.g. color, material) are taken to order. Here you can see information like packing for a gift.
Product ID, EAN, SKU, VAT, Weight
The product ID number in the order, as well as the EAN number, SKU, VAT rate, and weight, are taken directly from the offer in the system where the order was placed.
If you change the EAN/SKU/VAT or weight for a product in the warehouse, this data will not be automatically updated for new orders. To do this, you need to re-save the offer’s link to the product or go to edit the offer and select the Refresh data from warehouse option in the Connection tab.
Order information
In the upper right corner of the section, the following buttons are available:
- Prints and exports – here you can quickly generate a print/export for the order. You can create templates in the Orders → Prints and exports section;
- Pack:
- Collect products,
- Take a photo;
- Actions:
- Delete order,
- Create a new order for this customer,
- Create a copy of the order,
- Divide order,
- Create return.
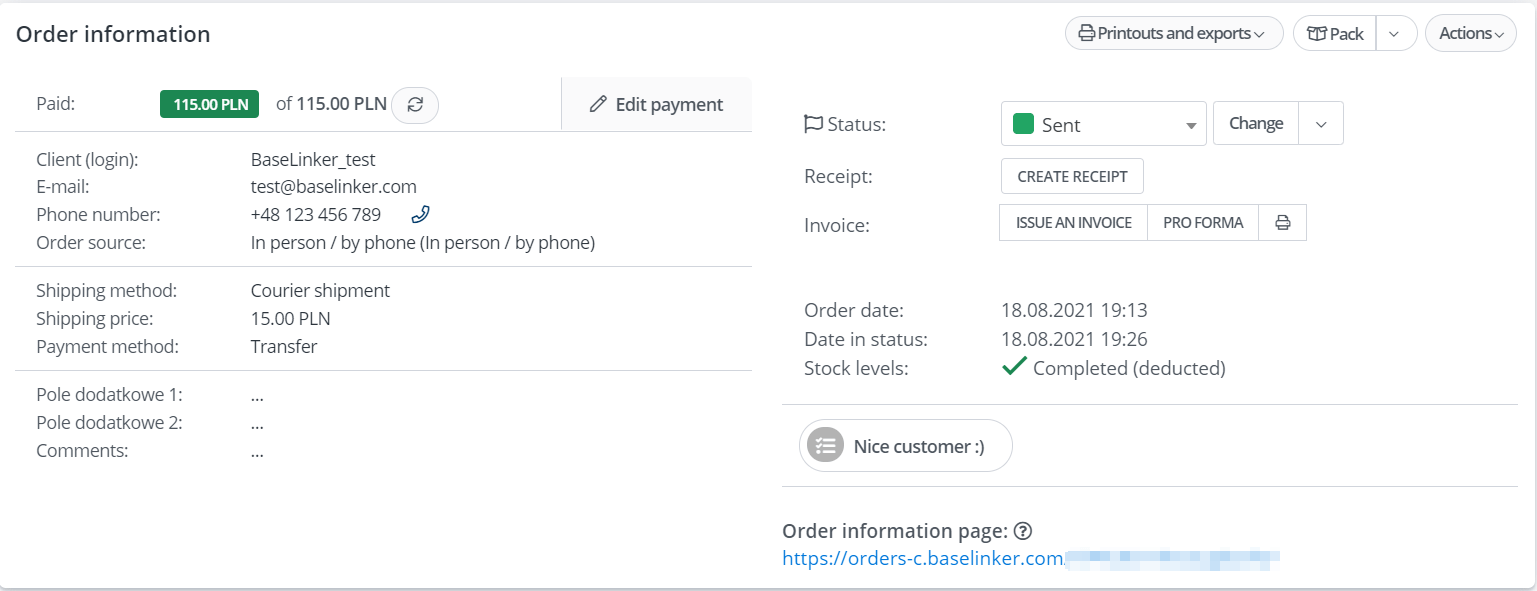
In the Order information section, there are detailed information about the order such as payment status (which you can change), buyer data, shipping method, payment method, or order source.
Additional order fields are also available here.
On the right side of the section, the following are also available:
- order status – and the ability to move the order to another status;
- information about sales documents – you can issue an invoice for the order here, for example;
- order placement date;
- date in status – the date when the order entered the current status;
- custom event buttons;
- link to the page with order information.
Delivery address and Invoice data
Further down, three tables are visible:
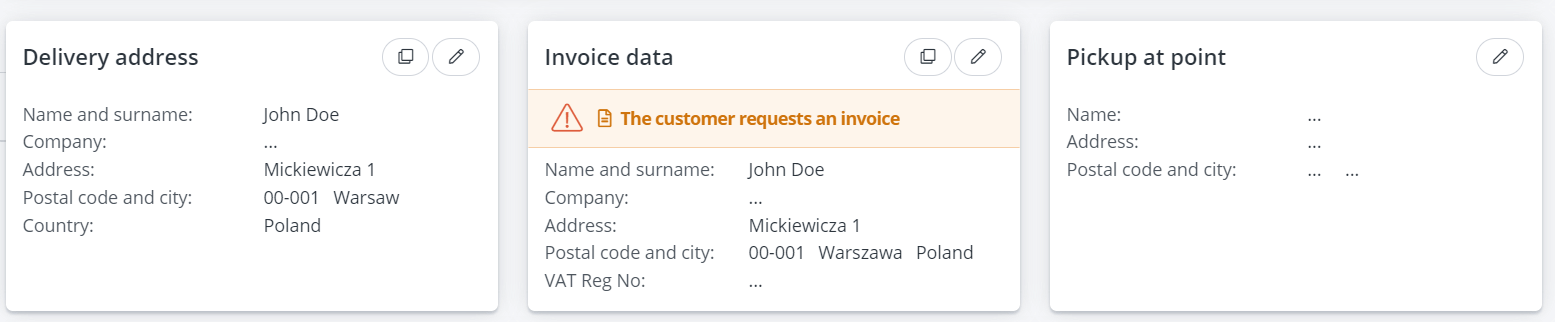
- Delivery address;
- Invoice data – delivery data will be inserted here unless the customer provides separate billing details. If the customer requests an invoice when placing the order, an additional message The customer requests an invoice will appear here;
- Pickup at point – if the customer chose delivery to a pick-up point, the delivery point data will be retrieved here.
Shipments
In the shipments table, you can create a package and print a label, as well as cancel it (if the carrier’s API allows it).
Simply select the carrier, fill in the shipment options, and create a package. After sending the package, the tracking number will appear in the table along with a link to the courier’s website and the package status at the courier.
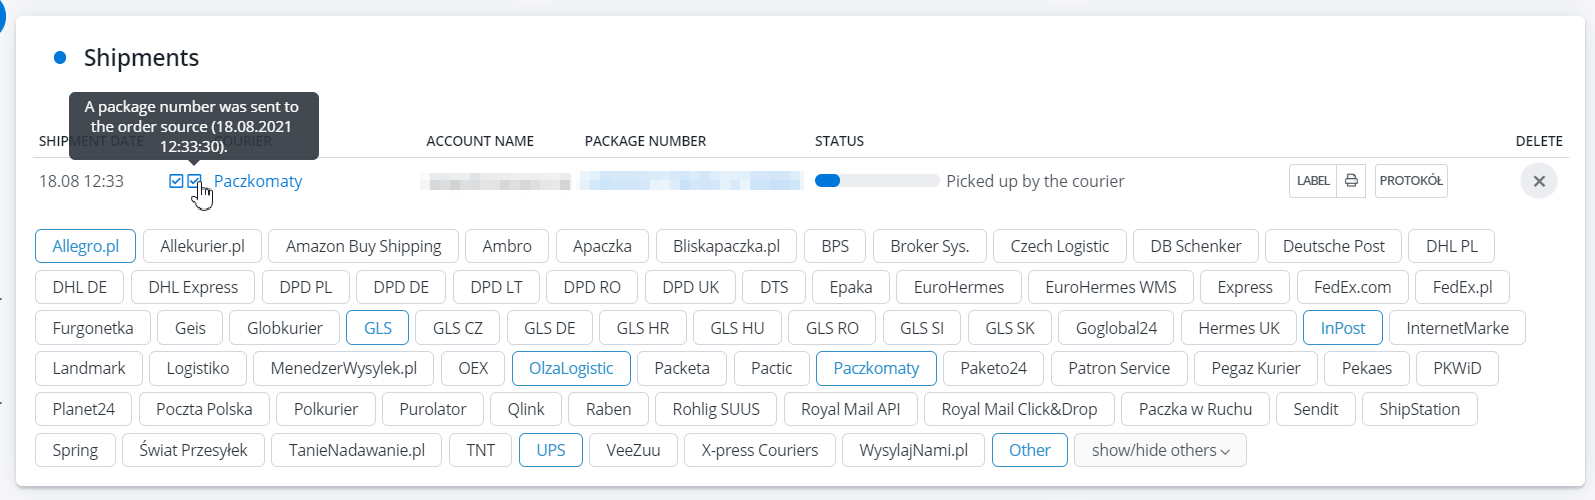
In this table, you can also add a package sent outside BaseLinker (e.g., directly in the courier’s system). Just select the Other option, choose the courier, and enter the tracking number.
Exchange of messages
The Exchange of messages table contains messages left by the customer on the order page, messages sent to the customer (both email and SMS), and internal messages (for the seller only).
Here you can:
- send an email message to the customer – you can use prepared templates or create your own message;
- send SMS messages to the customer – if you have a connected SMS integration;
- send a message to the page with order information;
- add information visible only to the seller. This method is often used by users who have many employees – it can serve as a window for exchanging information about the order between employees. More information on this topic can be found in the articles:
- Communication with the customer,
- Sending SMS messages.
Here you can track the order’s history in detail – changes in the order, payment information, and statuses. The table contains the following sections: In the Orders → Settings section, in the Settings → Order Card tab, you can enable/disable the following options on the order card: Additional information
Order card settings