Below you’ll find a few useful automatic actions that did not fit into the previously discussed categories.
Adding a product to an order
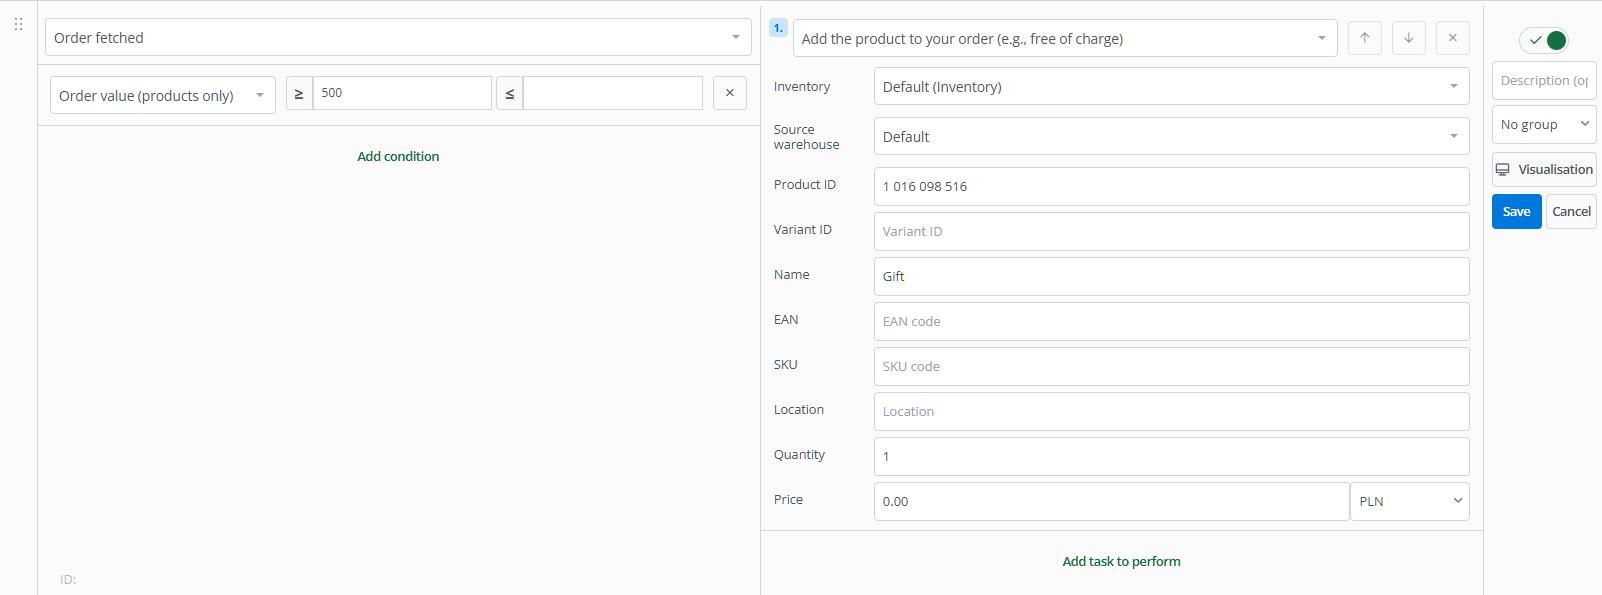
In this example, you’ll add a free item to an order above 500.
- Add an automatic action with an event defining the moment when you want to add a product to the order, e.g., Order fetched.
- As a condition, you can, but do not have to, indicate the order sources for which the automation should be executed.
- The most important condition in this example will be Order value (products only). You can also take into account the value together with delivery costs. Enter a value of at least 500.
- The action to be performed will be Add the product to your order (e.g., free of charge). Select the inventory containing the product you want to add, the warehouse from which the stock will be reduced, product ID, name that will be visible in the order, quantity, and price. You can also enter the product name, EAN, SKU, or location.
Modifying an order’s additional field
Currently, using automatic actions, you can set a specific value in an additional field, add a constant value to the current value in the selected field, or set a dynamic value.
Such automation can be useful, for example, for determining order picking priority (when picking is based on an additional field). You can choose any condition based on which a selected value will be inserted into the additional field. In this example, we’ll use a previously created additional numeric field named Picking priority.
- Select the event Order fetched.
- Add a condition based on which orders will be prioritized for picking. In this case, it could be Source of the order or Product with location. Enter an appropriate value for the selected condition.
- Choose the action Modify order.
- Indicate Field: Additional field. From the list, select the previously created numeric field.
- Set Value type: Fixed value (set).
- In the Value field, enter the digit that should appear in the selected additional field.
Displaying a message for an employee
Thanks to so-called interface actions, it is possible to automatically display a message on the screen for the system operator.
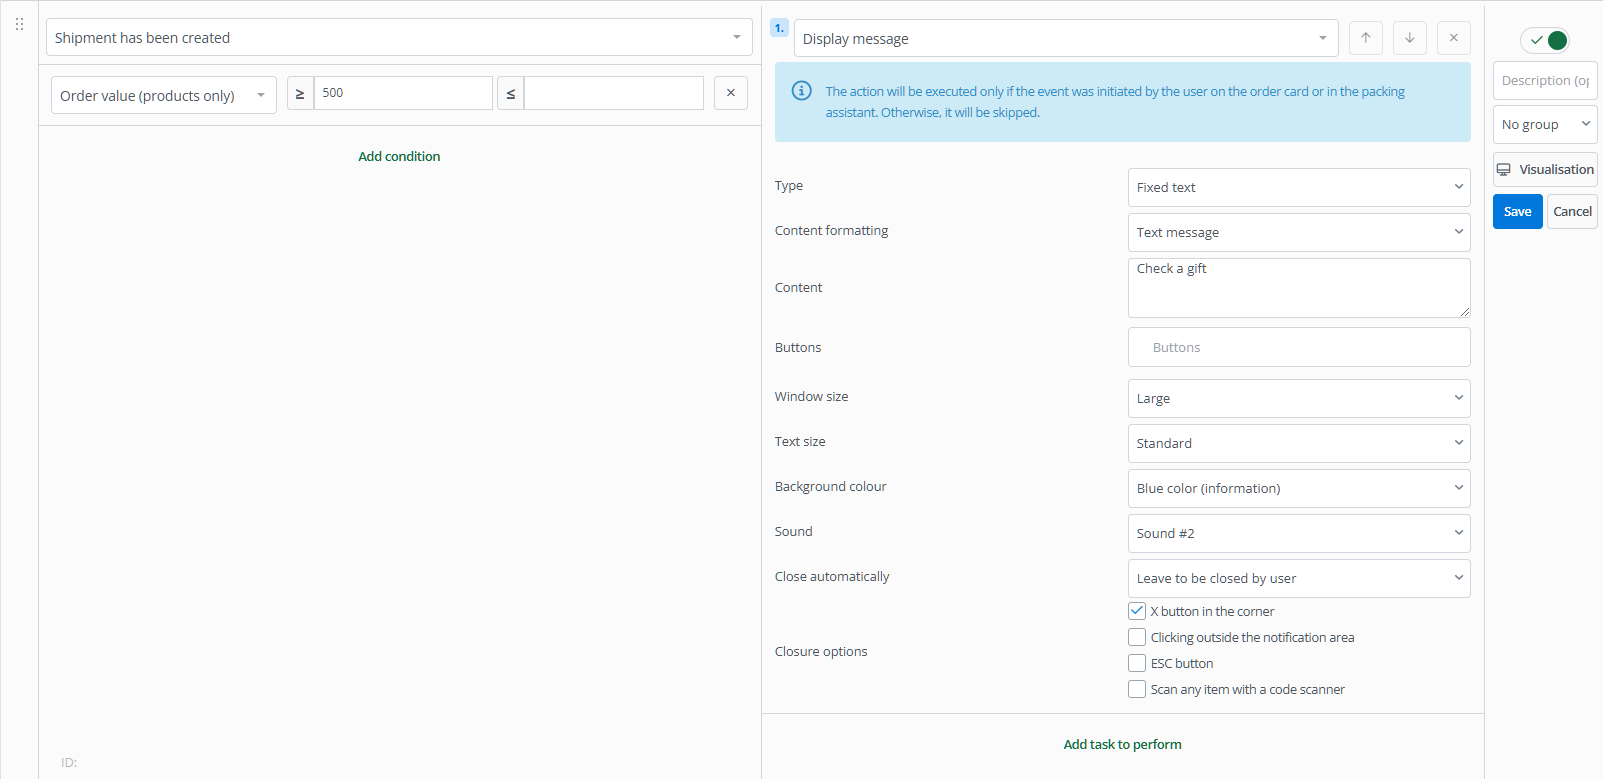
In this example, you’ll add a message reminding to check whether a free item was added to the order after creating a shipment. The automation will work if you create a shipment manually from the order card or using a personal event.
- Select the event Shipment has been created.
- You can add a condition, e.g., Order value (products only): not less than 500.
- Choose the action Display message. Enter the message text, size, background color, sound, and how it can be closed. You can also select personal event buttons that will be displayed under the displayed text.
Delaying automatic action execution
Thanks to the Wait for action, each automation can be executed with a delay specified in minutes, hours, or days.
In this example, a message will be sent 24 hours after the shipment is delivered to the client.
- Add an automatic action with the event The courier’s default parcel status has been changed and select the status Delivered.
- Use the Wait for action and enter 24 hours.
- Add a second action Send e-mail, choose an appropriate message template, sender, recipient, and message type.
Passing order information to wholesalers
If you use BaseLinker Connect integration, you can automatically pass order information to the wholesaler you work with.
The automation will also work for integrations with wholesalers available in the system that allow automatic order transmission. You can recognize such a wholesaler by the truck icon next to its logo in the new integration adding window.
The action described below will transmit an order in a specific status directly to the wholesaler.
- Select the event for a new automatic action Status has been set: Wholesaler.
- Add the action Forward order to the wholesaler. However, if you are connecting to a wholesaler using BaseLinker Connect, choose Forward order to BaseLinker Connect instead.


